Creating a form of voting or survey to attract visitors to your site
It is no secret that polls and voting on the sites are not only an additional way to communicate with readers, the opportunity to learn their opinions and wishes, but also another option to attract visitors.
People quite often take part in various polls. It does not matter at all whether they are paid or free. If the reader is interested in the topic of voting, he will definitely take part in it, as he will be interested in the final result, which in some cases is quite unexpected! As a rule, polls consist of one well formulated question and several answer options. And after the user's vote is counted, the average rating for each option is displayed. Thus, the voting leader will be immediately visible.
For marketing purposes, site and blog owners use the voting script to better understand the audience preference, for example, what readers want to see, and in what form it is better to submit. In some cases, no matter how diligently the author did not write articles, they seem uninteresting to the readers, and this significantly affects the attendance of the resource. Here, by the way, there will be polls and votes. After all, this way the site owner can easily find out what information is most interesting to visitors, and what to pay special attention to.
The greatest activity in various polls are women, so blogs and sites on the topic of cooking, fashion, beauty, psychology, needlework, that is, everything that is interesting to the beautiful half of humanity, just have to have such polls. This will significantly increase interest in the resource.
Nowadays there is no need to puzzle over how to create a voting form. It's enough to pass a simple procedure of registration on the site FormDesigner, after which just a few clicks will separate you from the convenient form of polling for your site.
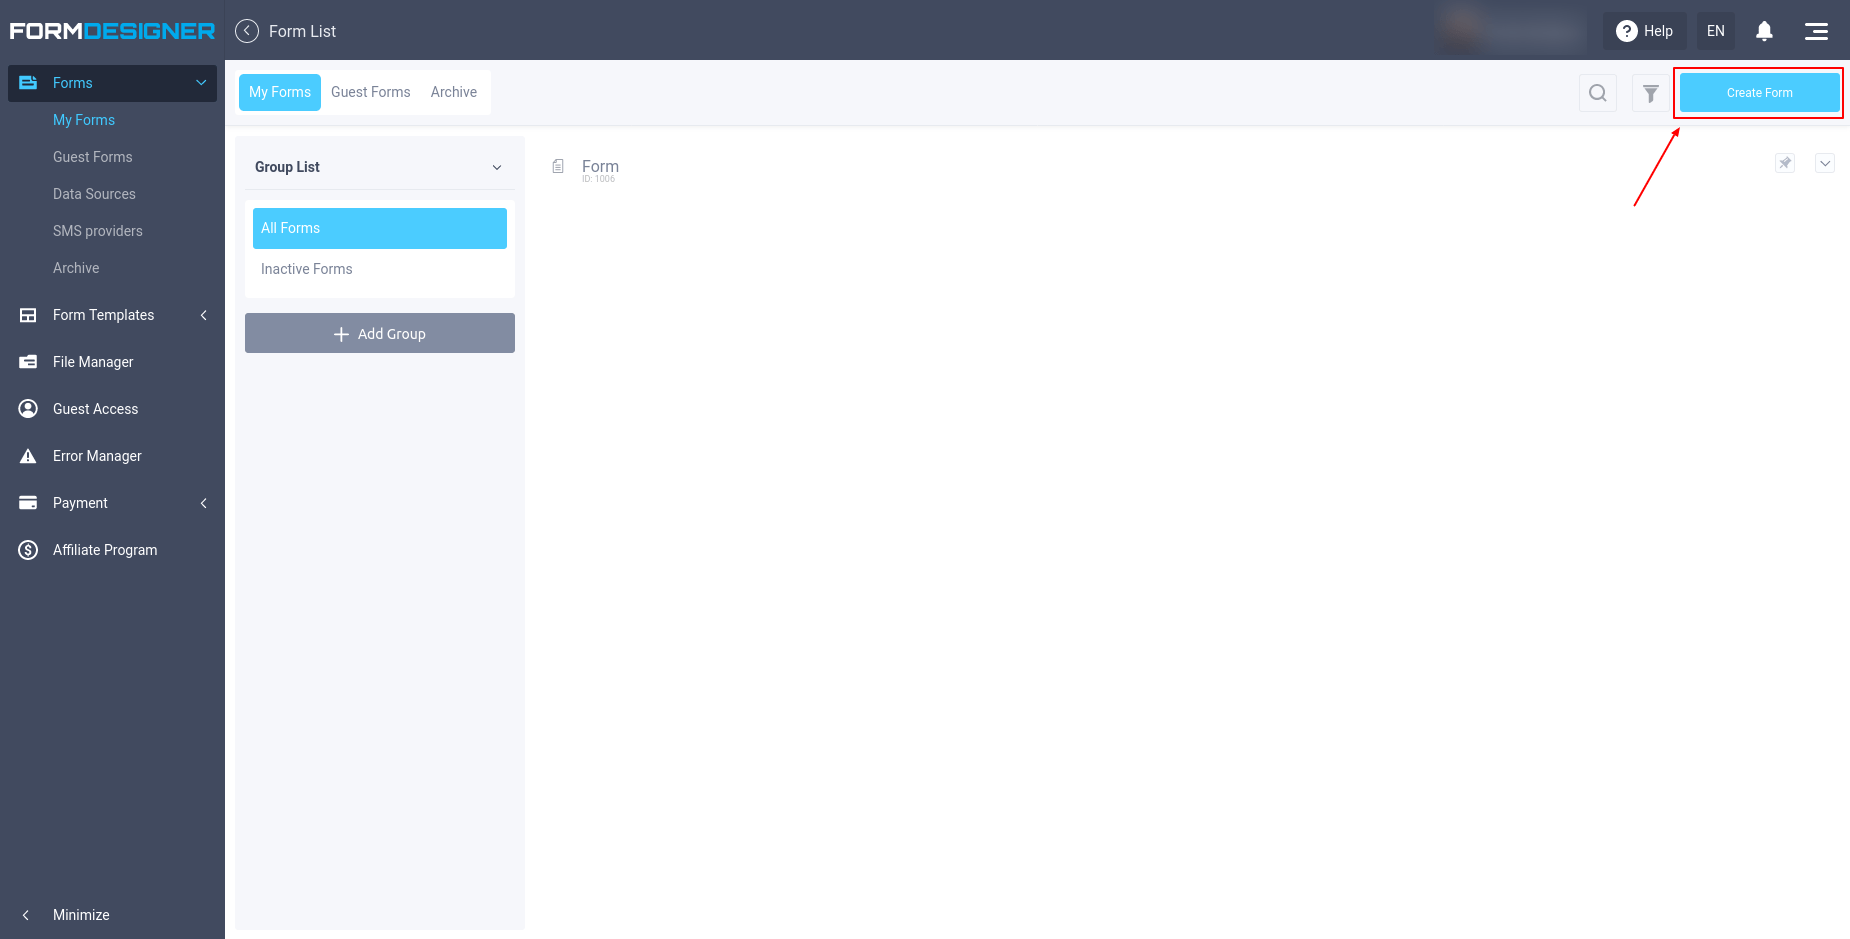
In order to create a vote, you need to click on the "Create Form" button in the list of forms:
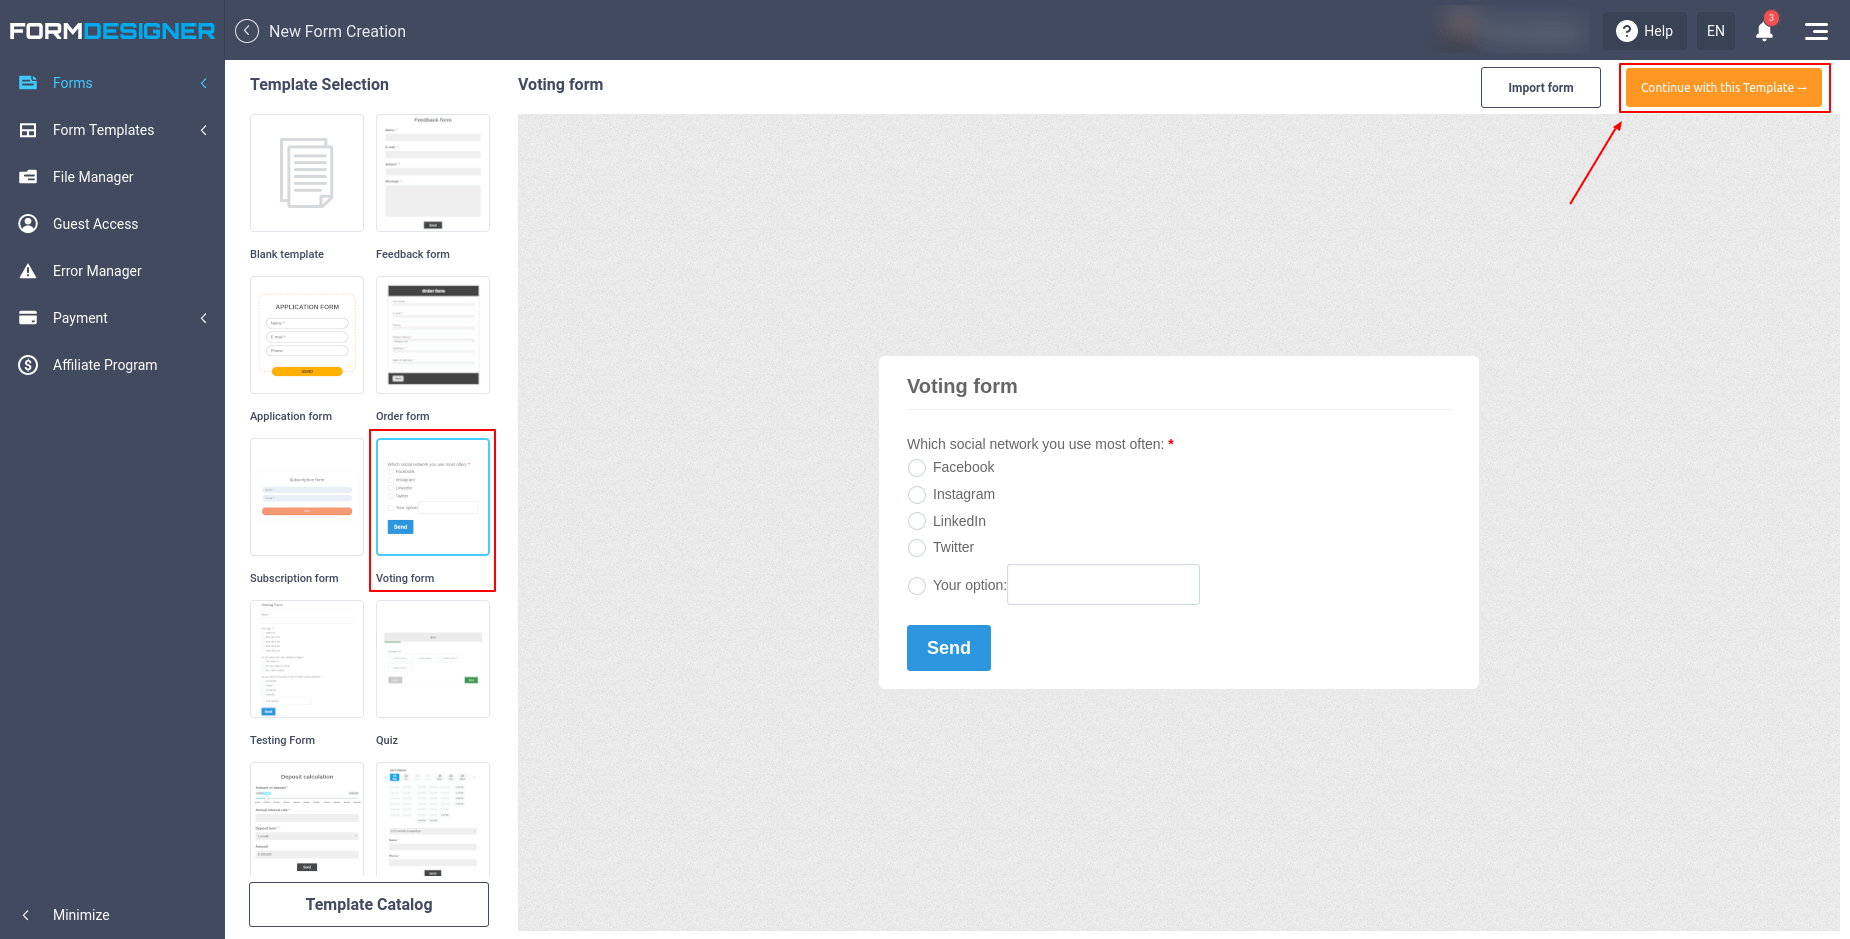
You will be taken to a page where you can select ready-made form templates. In our case we find the "Voting form" template:
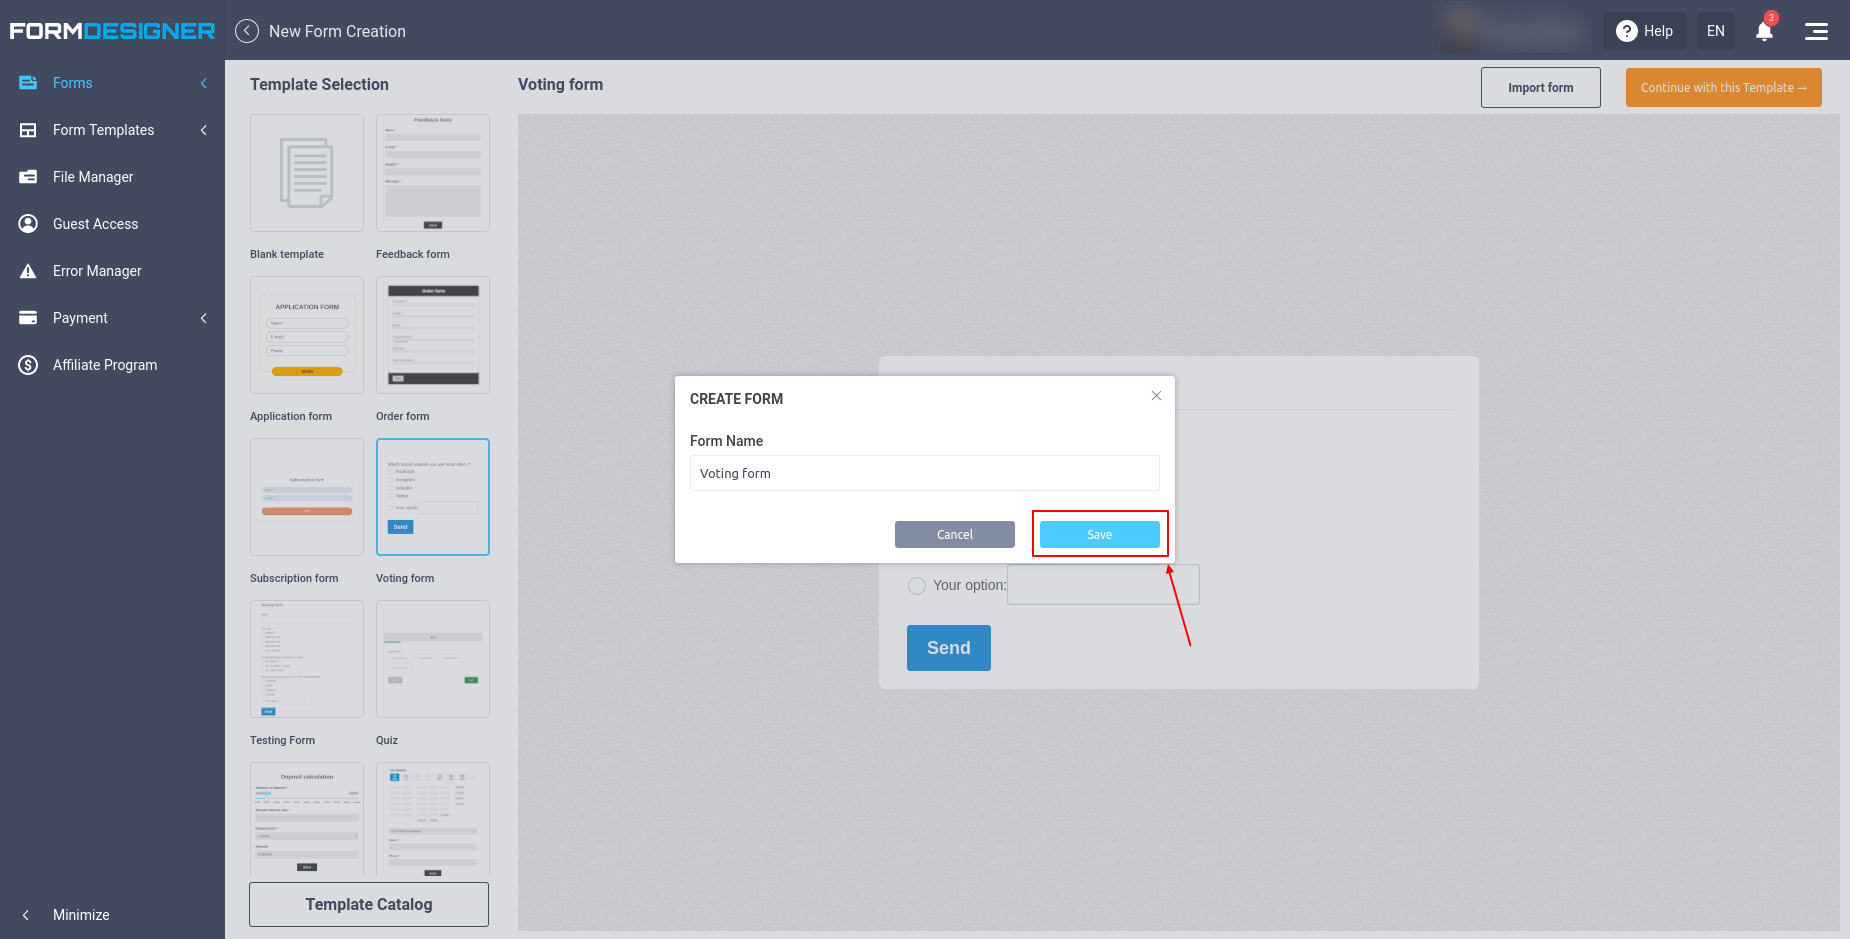
Select this template and then you need to click on the "Continue with this template" button. Next, enter the name of the form and click the "Save" button:
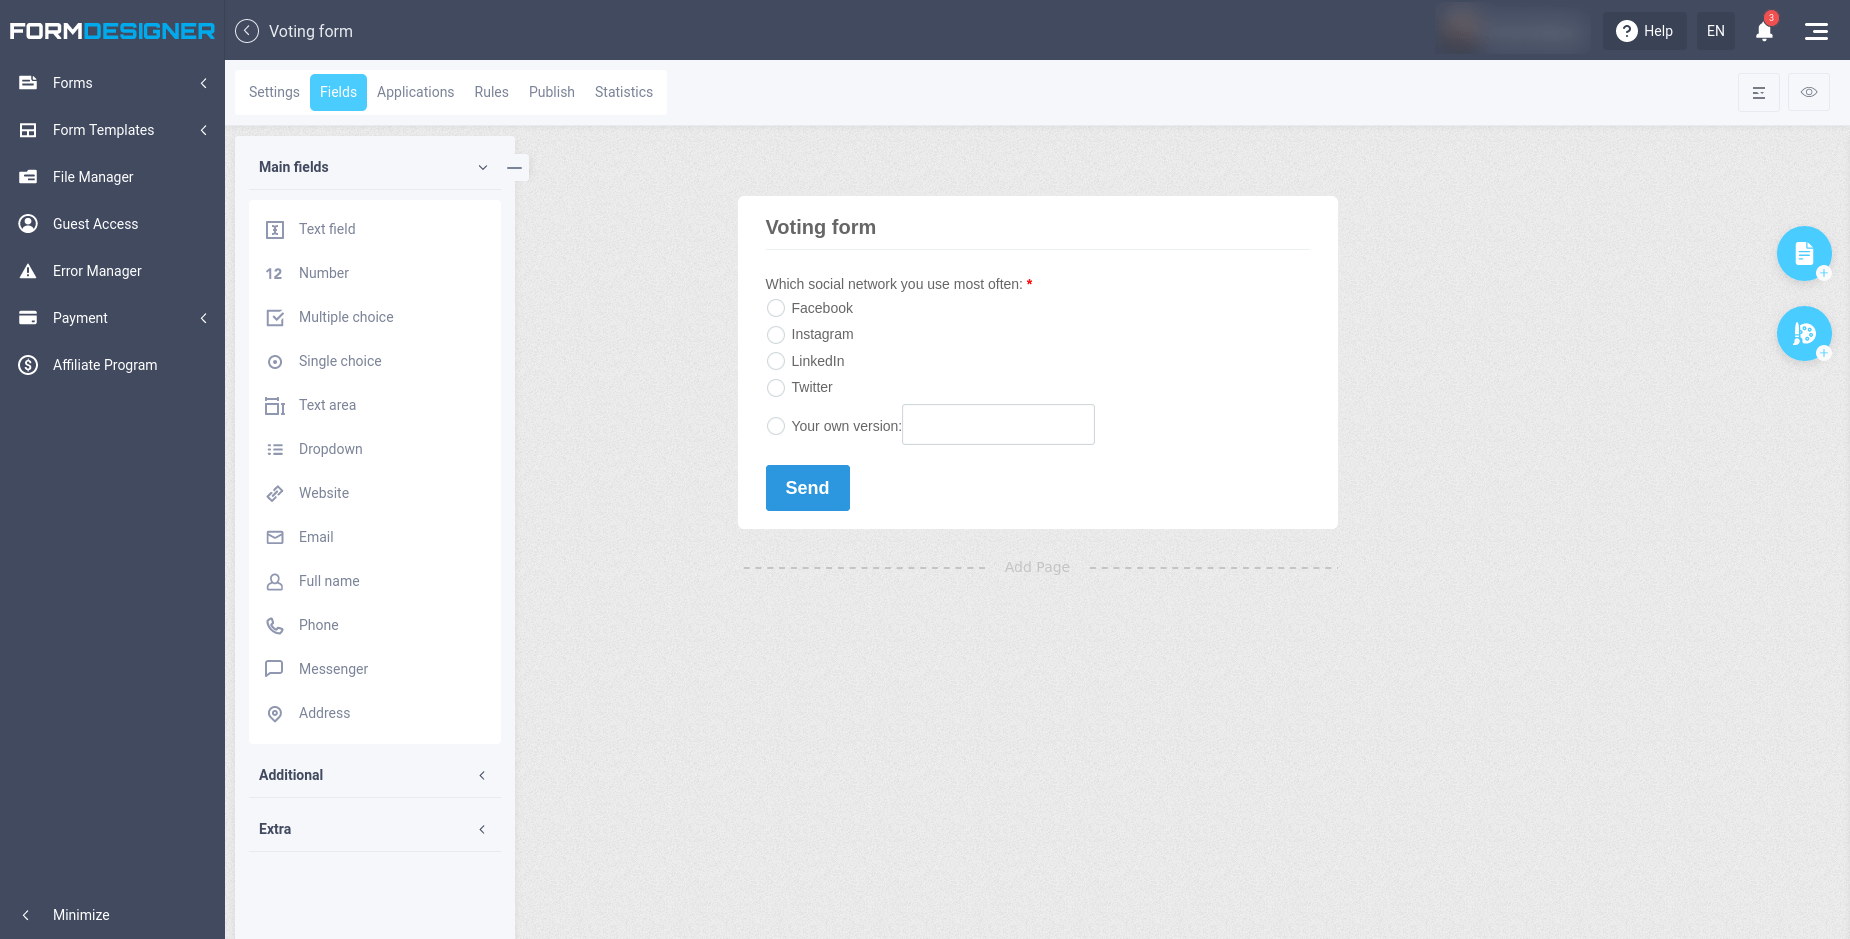
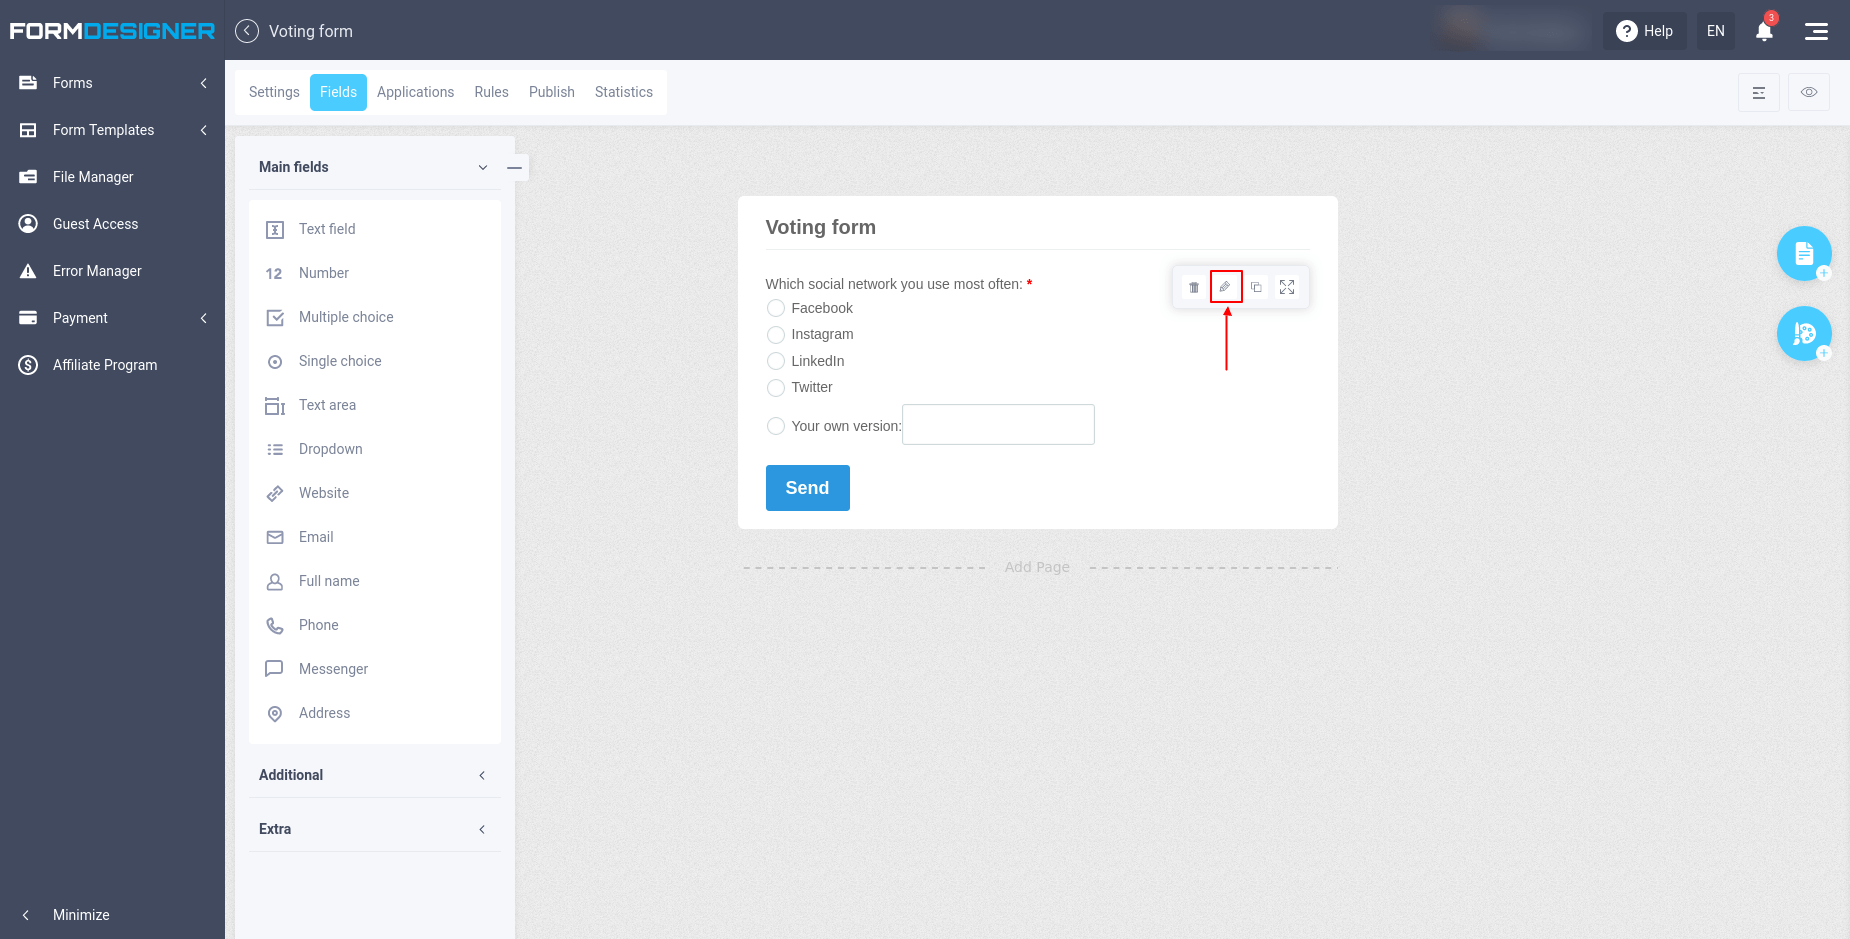
This will take you to a page where you can customize your voting questions and specify your answer choices:
Here you can see at a glance what your voting form looks like. In order to change the question or answer choices, you need to hover your mouse over the question itself and click on the edit icon:
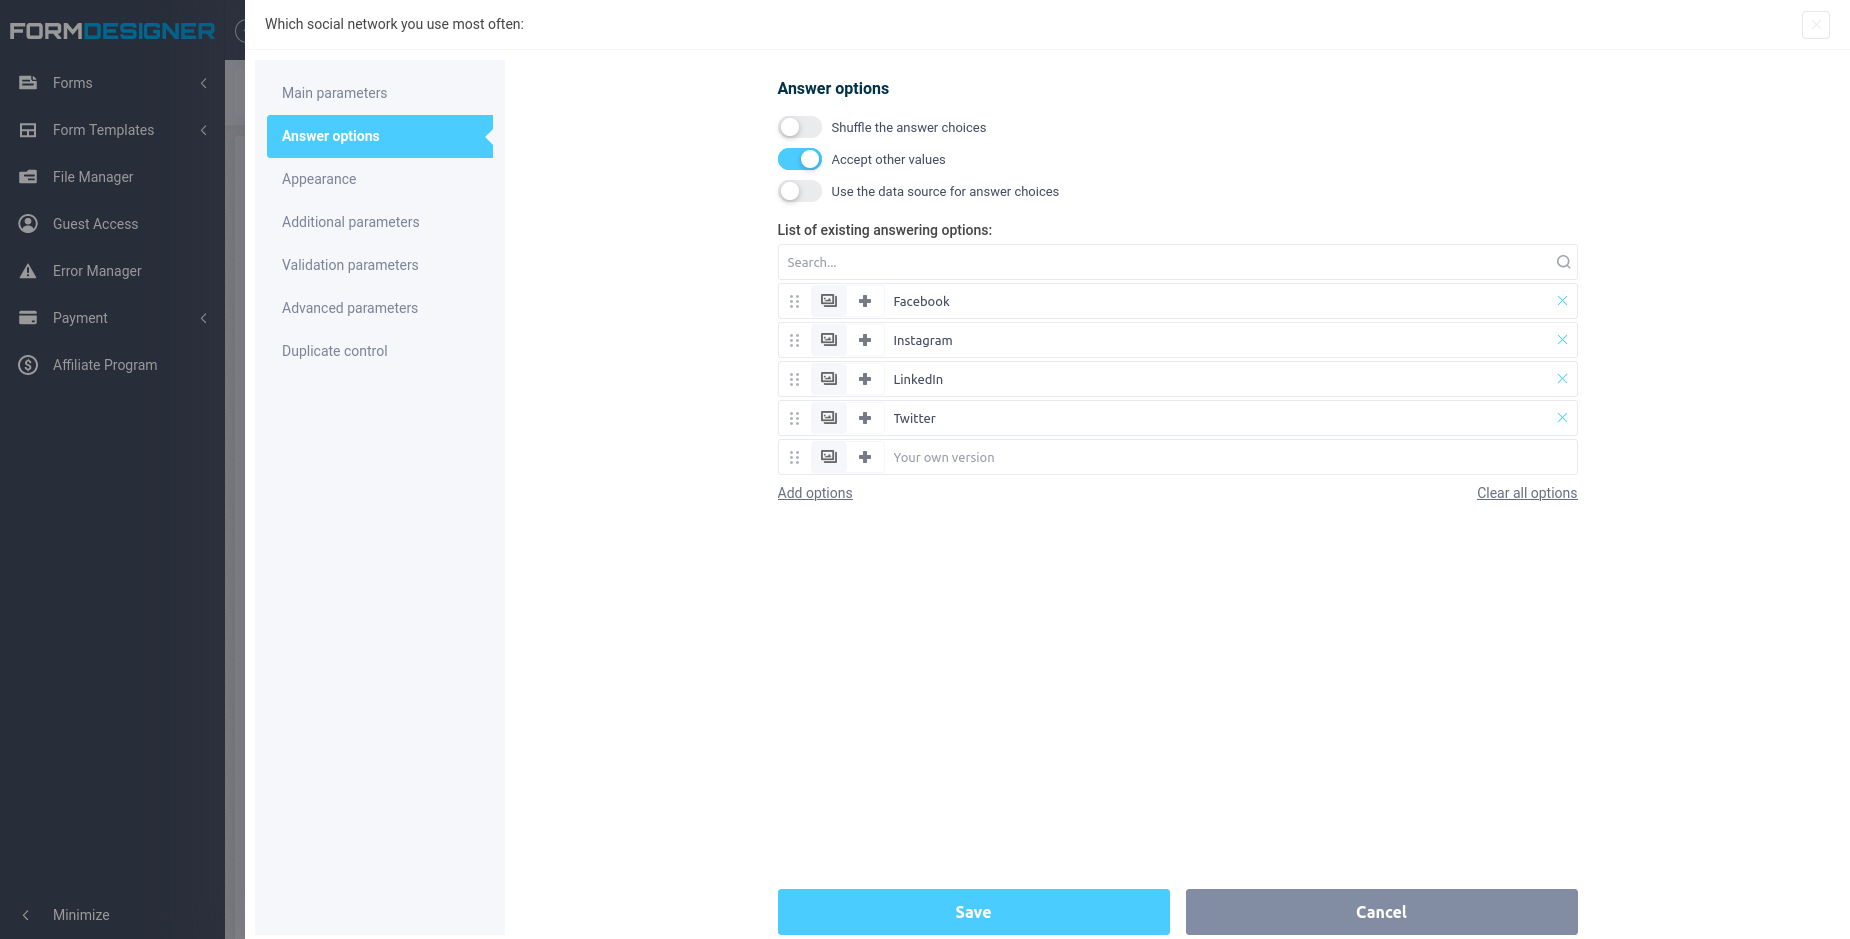
After that, a window will open in front of you where you can change the question and answer options:
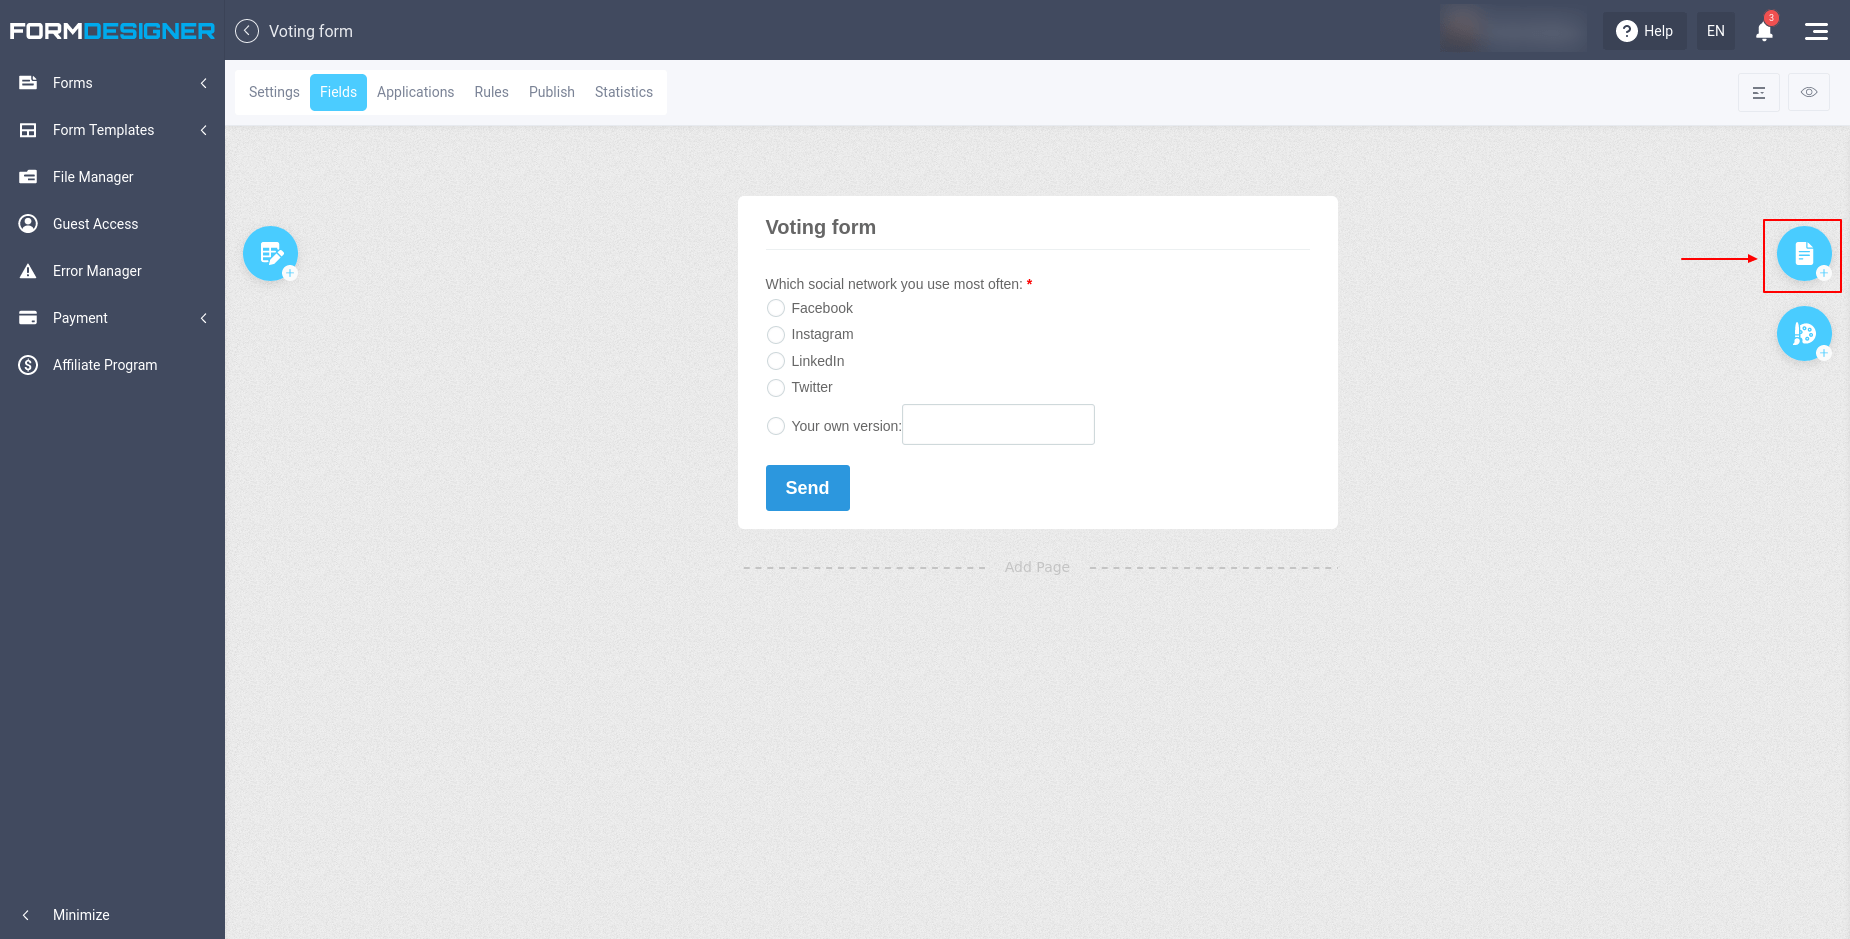
In order for the user to immediately see the results of voting, after giving his/her vote, it is necessary to customize the page of successful filling of the form. To do this, open the list of pages by clicking on this icon:
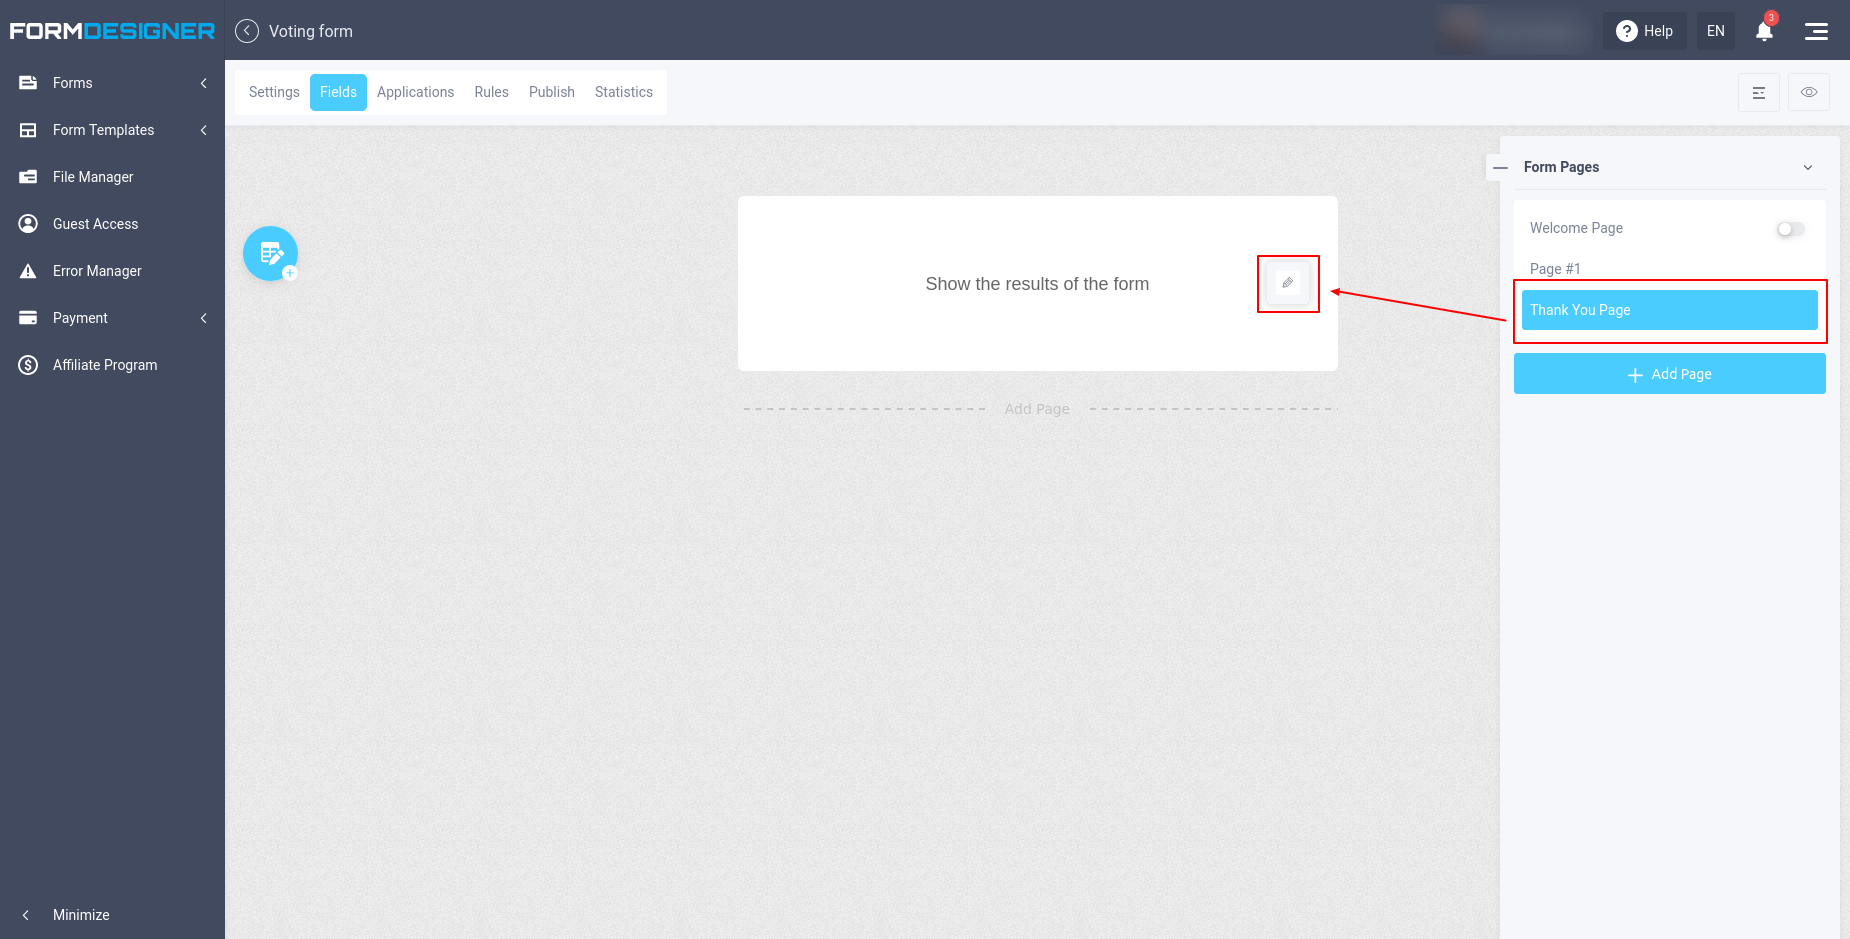
In the list of pages, you need to select "Thank You Page":
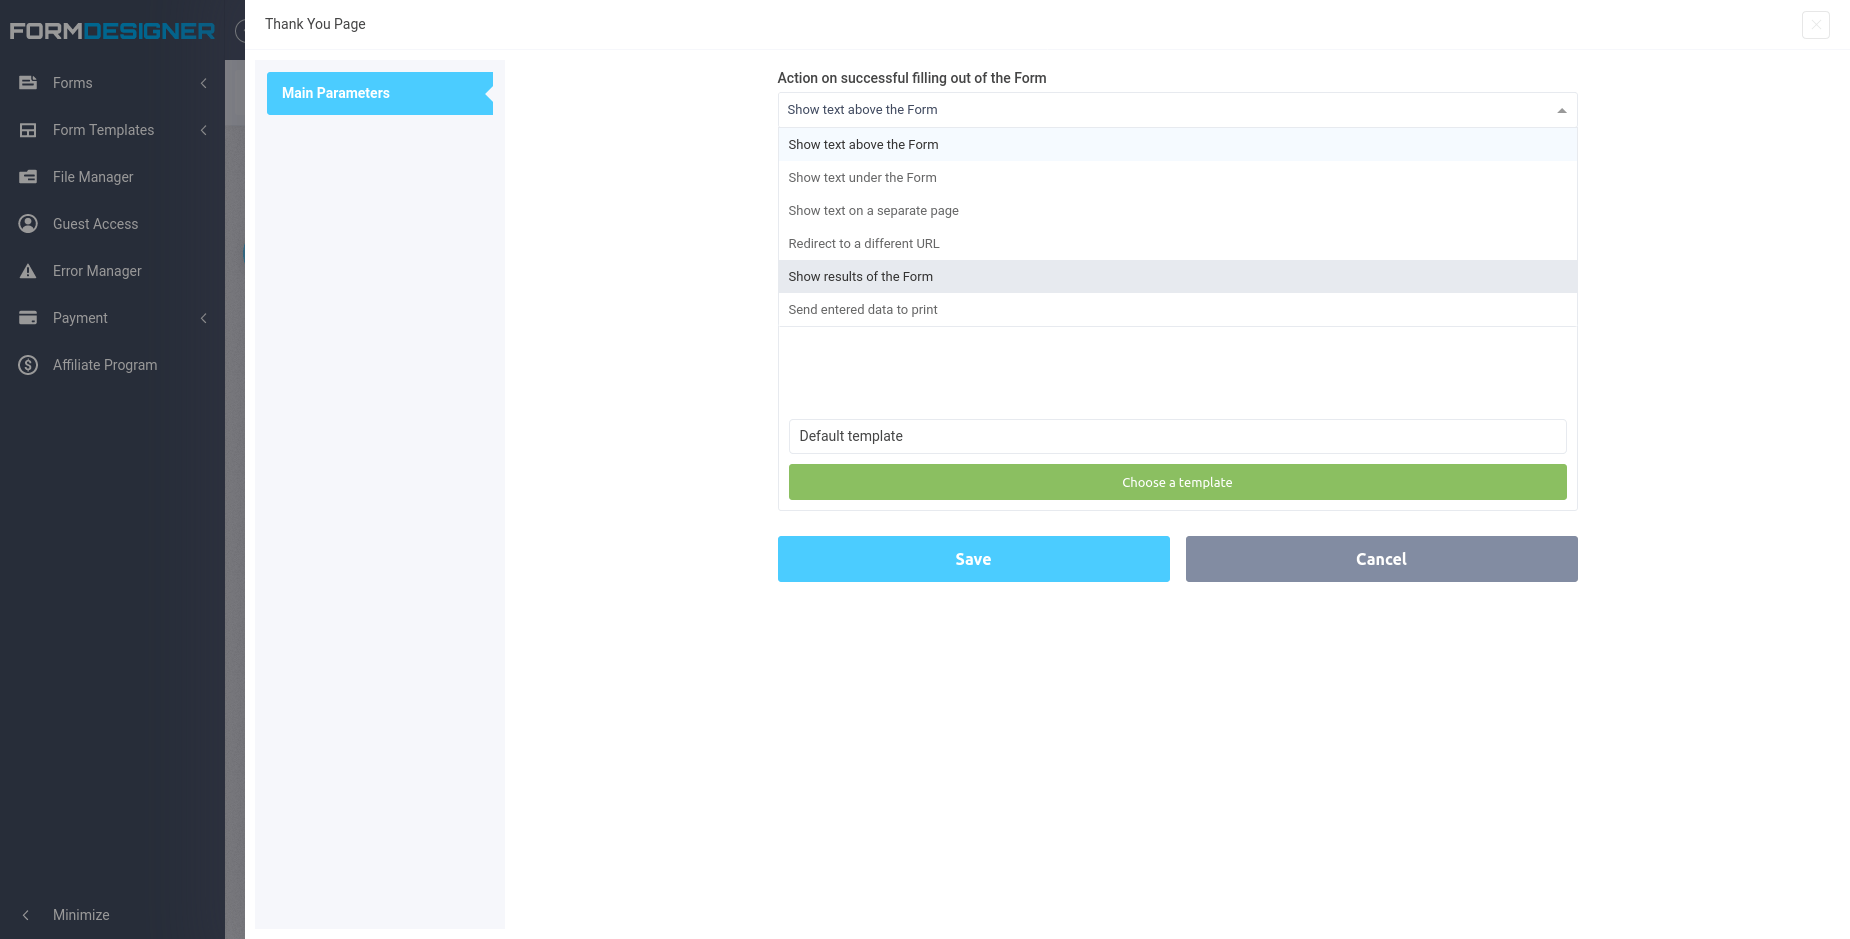
By selecting this page, we can customize the action after the form is successfully filled out. We need to customize so that after the user votes, the results of the vote are immediately displayed to them. To do this, let's click on the edit icon as shown in the image above:
The options available as an action upon successful completion of the form are:
- Show text over the form
- Show text below the form
- Show text on a separate page
- Redirect to different URL
- Show results of the form
- Send entered data to print
For the voting form, you must select the "Show results of the form" action, and then you must save your changes.
Protection against vote rigging
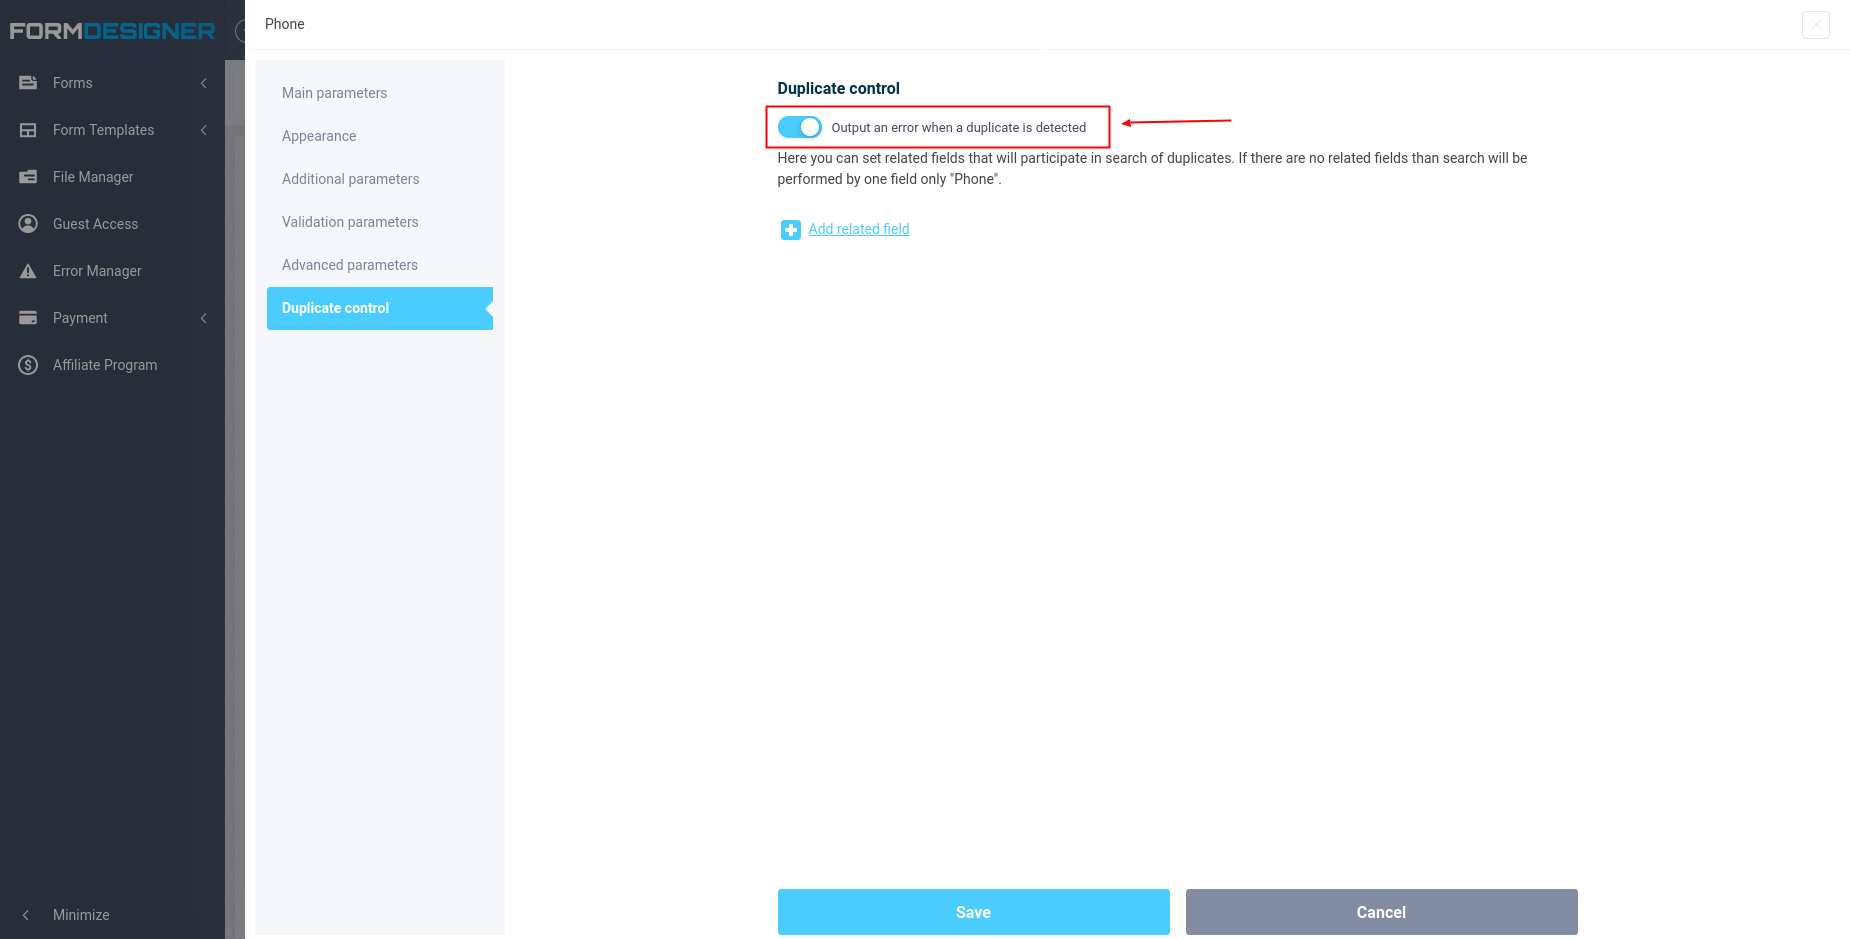
If voting is not anonymous, you can add a phone number or email address to the form and set up duplicate control in the settings of these fields:
By enabling duplicate control, the user will not be able to vote twice with the same phone number.
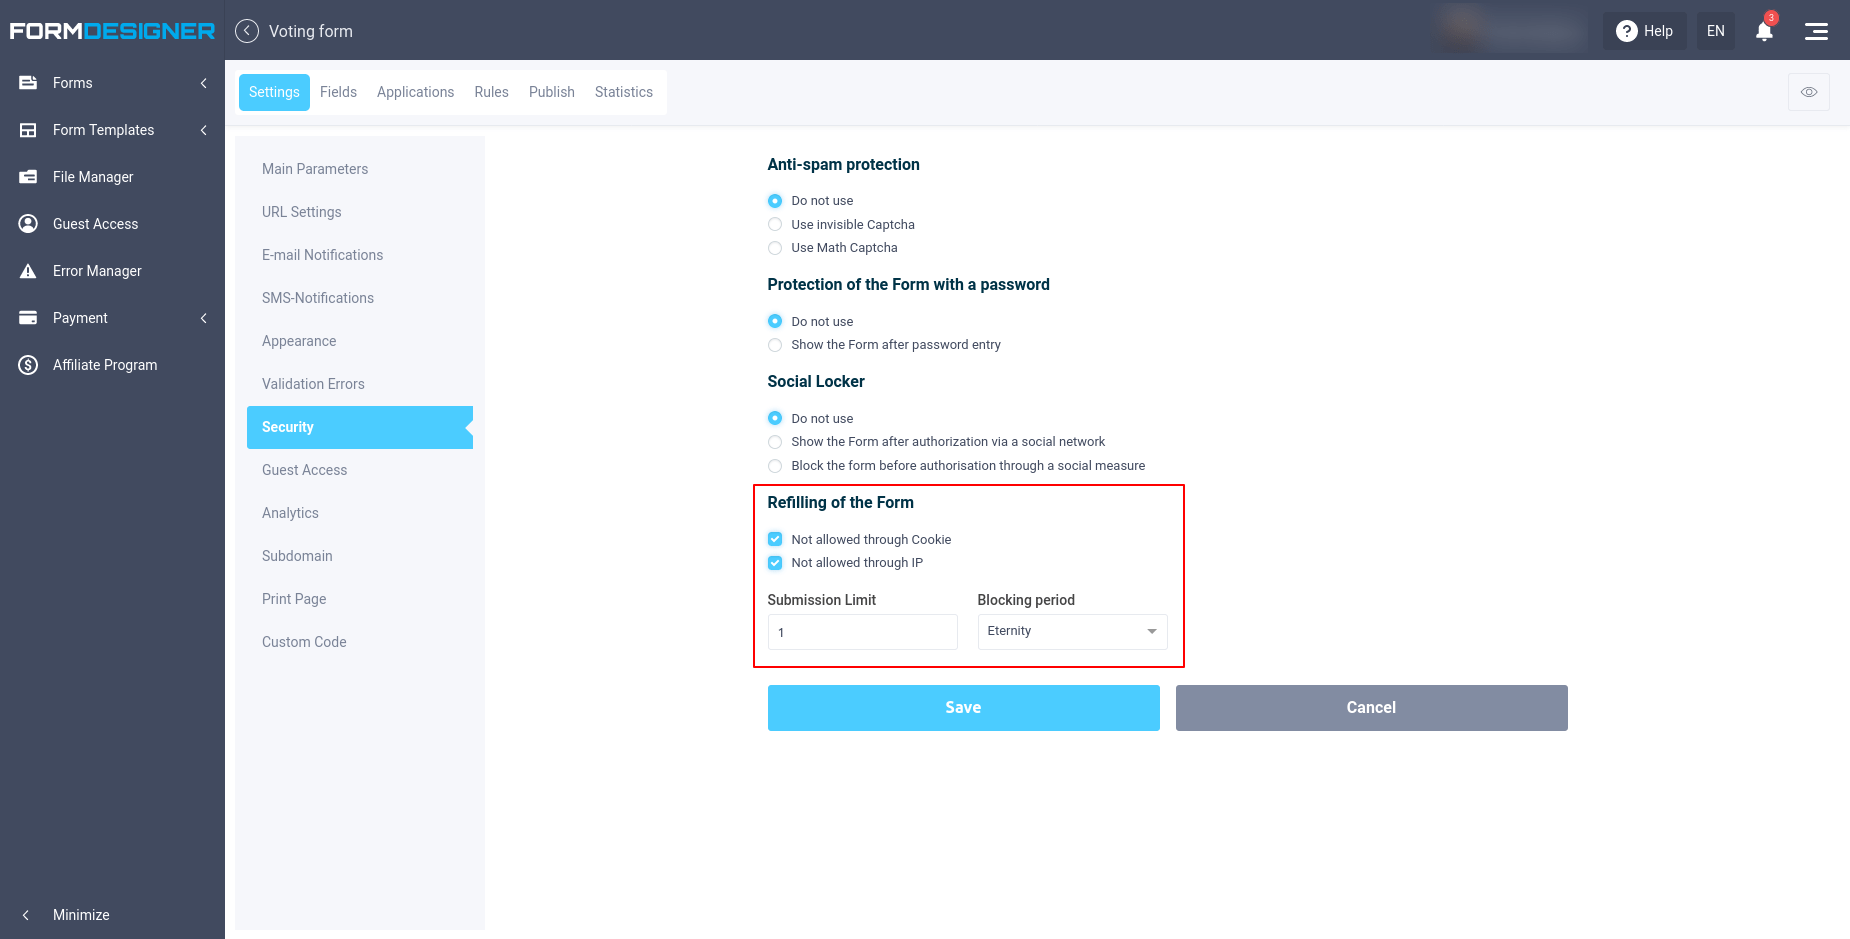
For anonymous voting you can enable protection by cookie and IP address. To do this, go to the "Security" section in the form settings:
In the "Refilling of the form" settings select the limit of submission 1 and the blocking period - eternity. I.e. you can vote from one IP address and browser only once during the whole voting period.
For extra protection against bots, you can enable anti-spam protection - invisible or math captcha.
Social locker
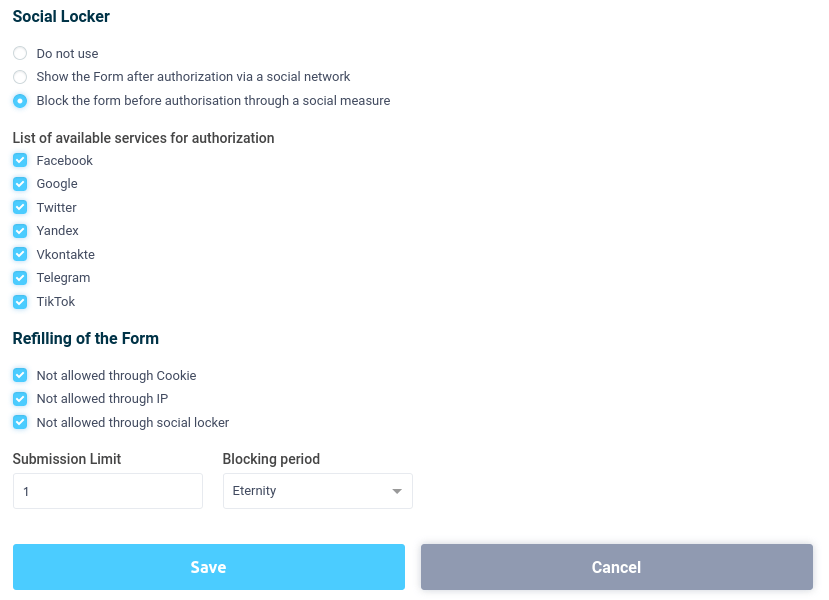
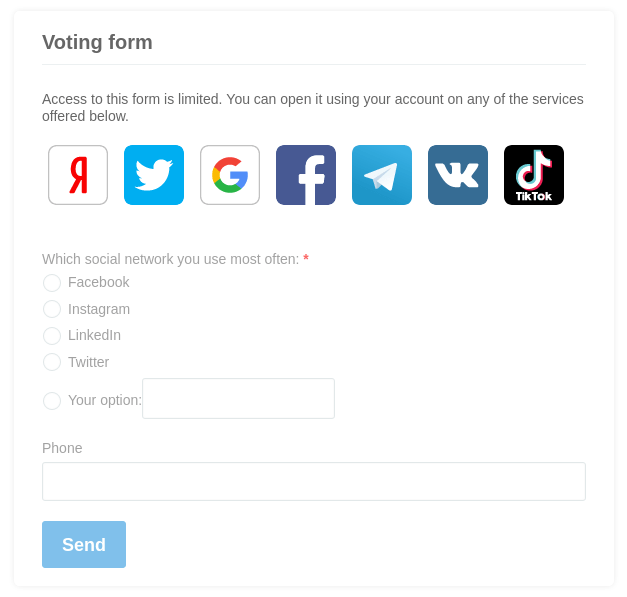
A social locker can be enabled for added protection:
This setting allows you to block the voting form until the user authorizes through the selected social network. It will be possible to vote once, through one social network.
All of these methods are not a 100% way to protect yourself from spoofing. You can use a VPN to change your IP address, clear cookies manually, create multiple social media accounts.
SMS confirmation
For better protection of voting you can connect sms confirmation module. To do this, add a phone number to the form and set up duplicate control for it. Then go to the "Applications" section and find there the "SMS confirmation" module. You can learn how to configure this module here.
By enabling sms confirmation, the user will be sent a sms with a confirmation code to the phone number specified in the form. Only by entering this code, his/her vote will be counted.
Restriction of voting by geographical location
You can also restrict voting only from the specified list of countries, thus excluding the use of VPN from other countries. To do this, you need to connect the "Geo IP" module in the list of applications. In the settings of this module you can activate the check by country code and allow sending the form only from the country you specify in the settings. You can learn more about configuring this module at this link.
Code for embedding voting on the site
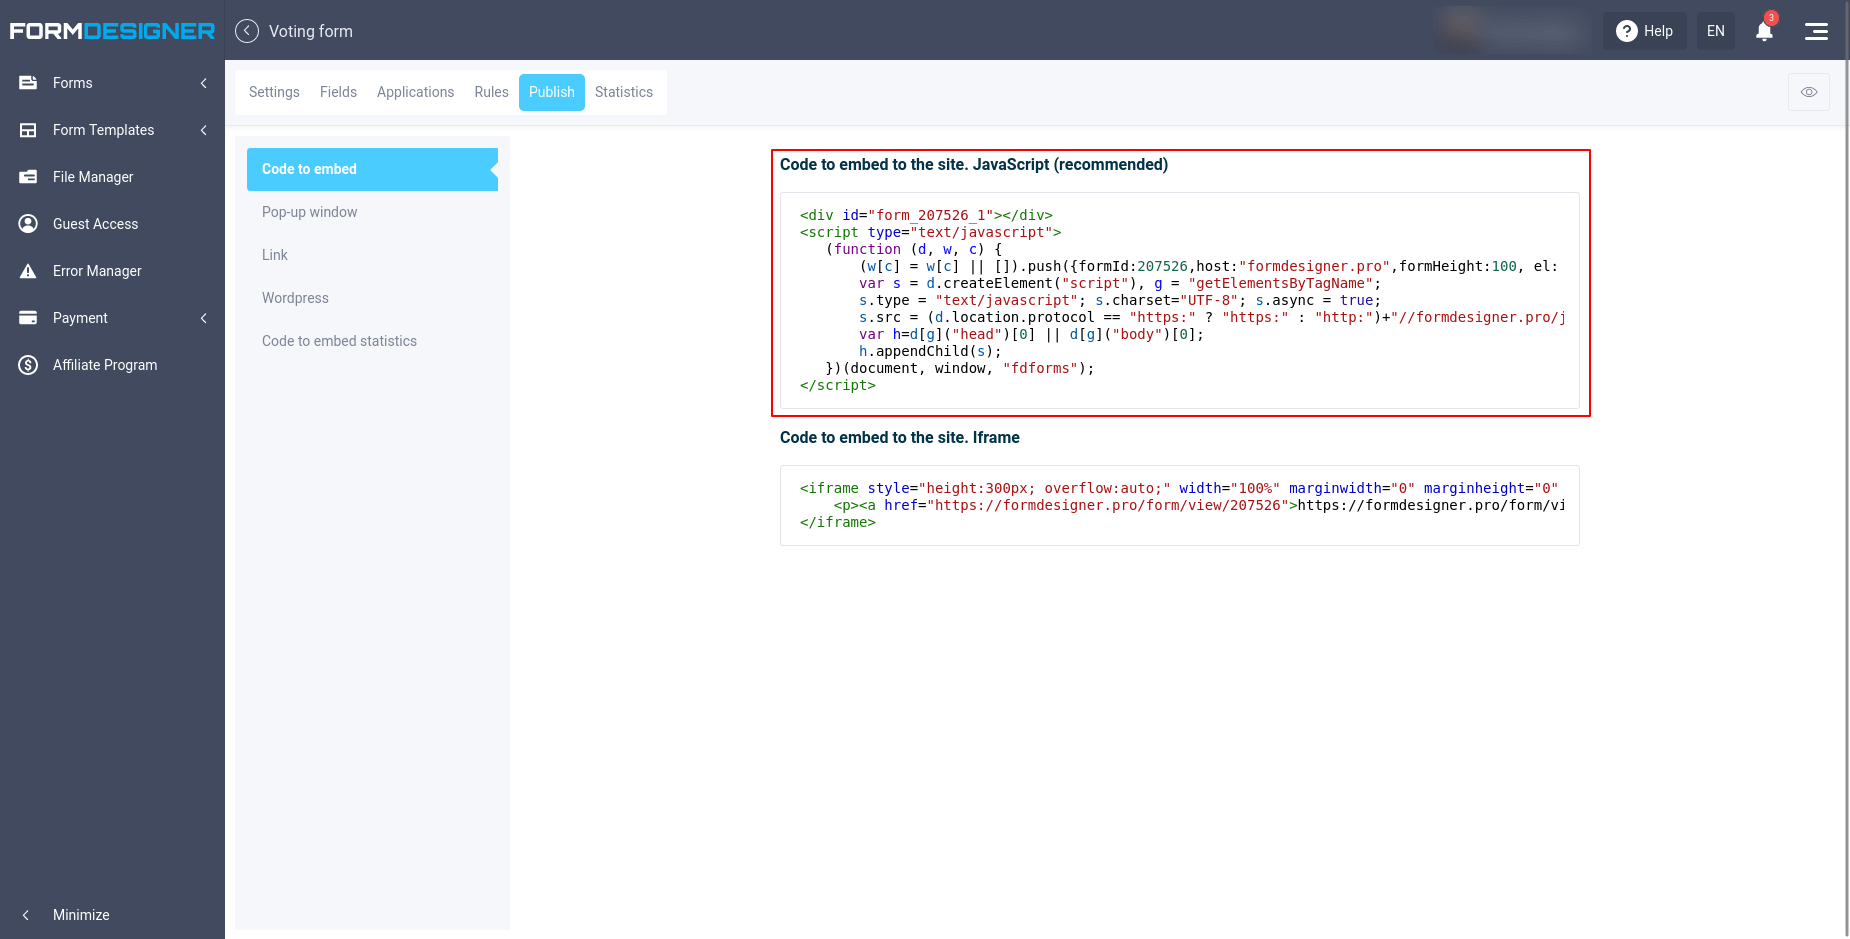
In order to place a vote on your site, you need to go to the "Publish" section:
We recommend using javascript form code to place a vote on your site. Just copy the ready-made form code and paste it in the right place on your site.There is also an option to open the voting form in a pop-up window or via a direct link on our website. To do this, select the appropriate item in the menu on the left.
Voting results
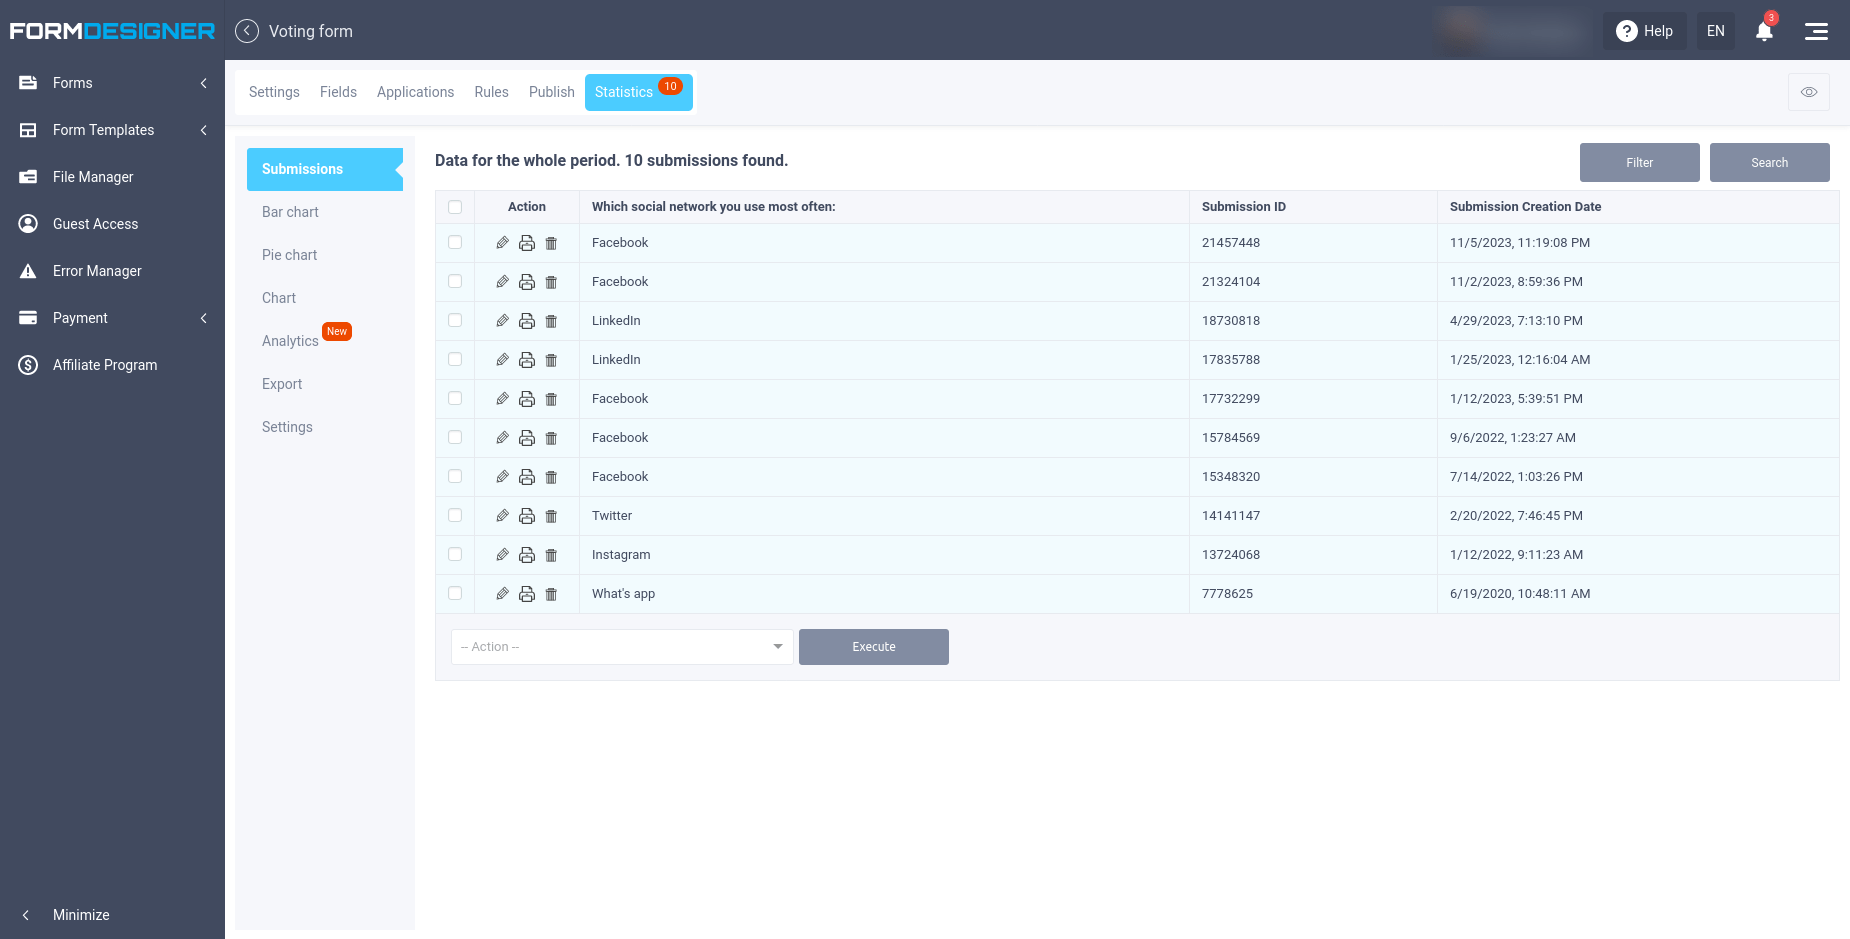
All voting results are stored in our system and are available for viewing in the "Statistics" tab. Going to this tab opens the "Submissions" section by default, where every vote from the form is shown:
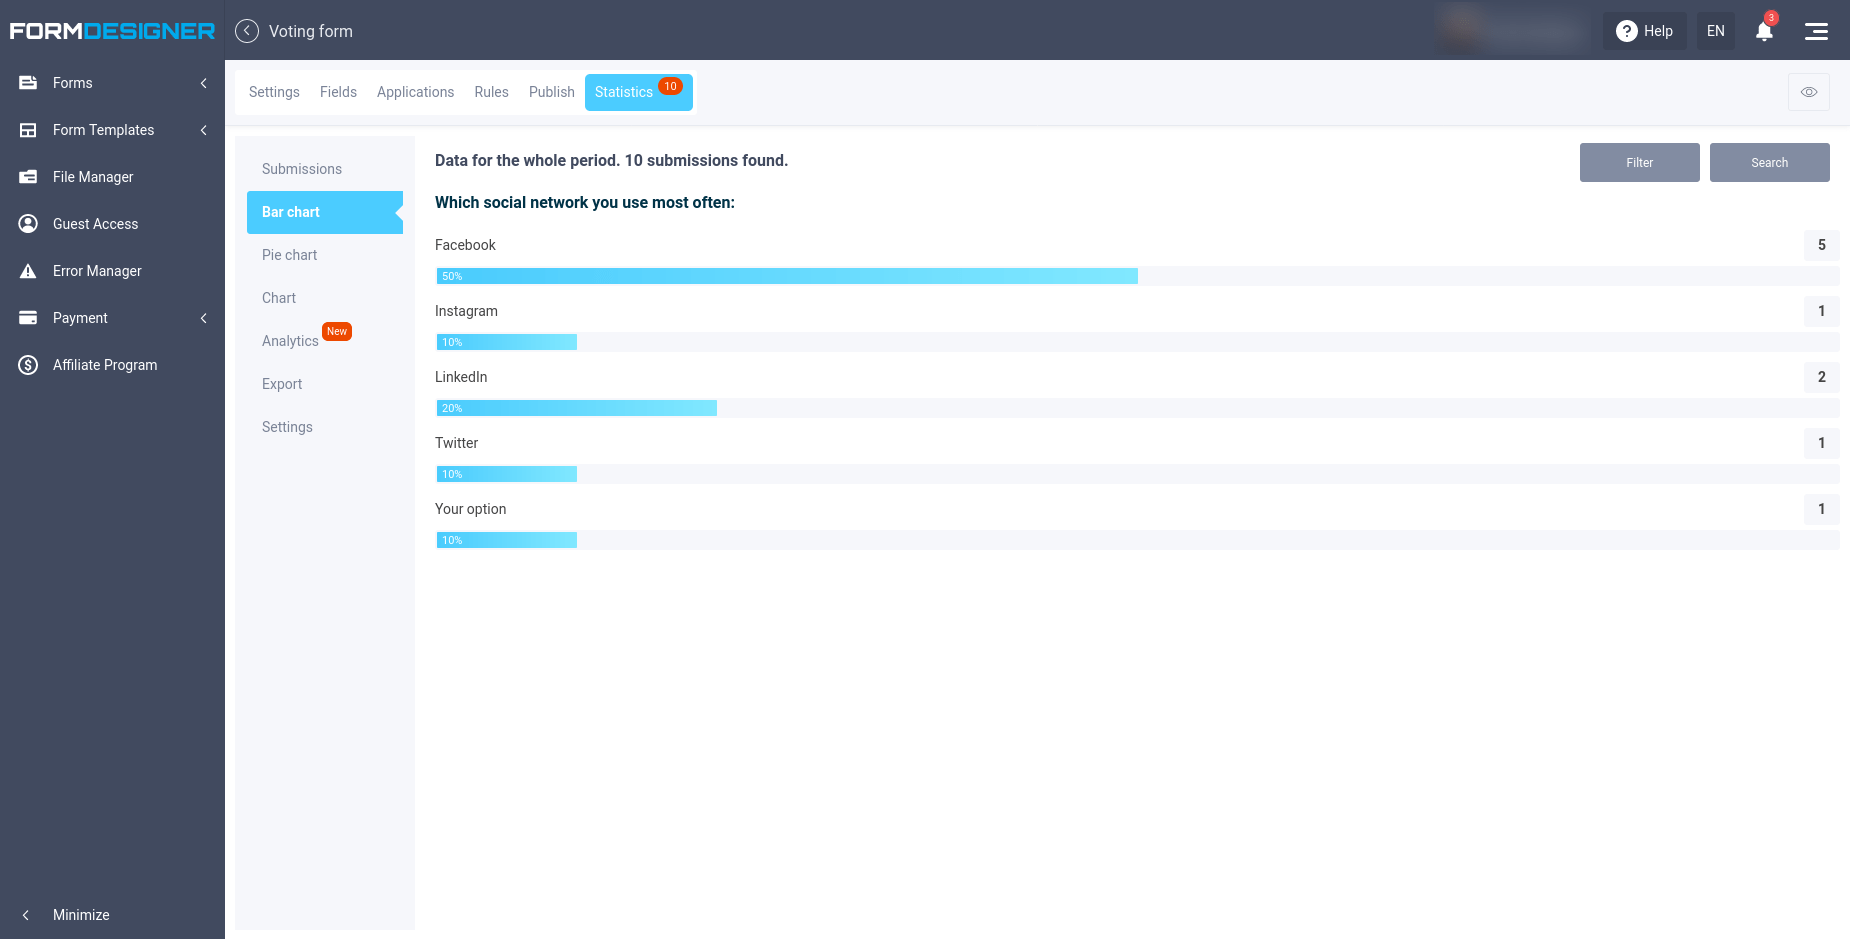
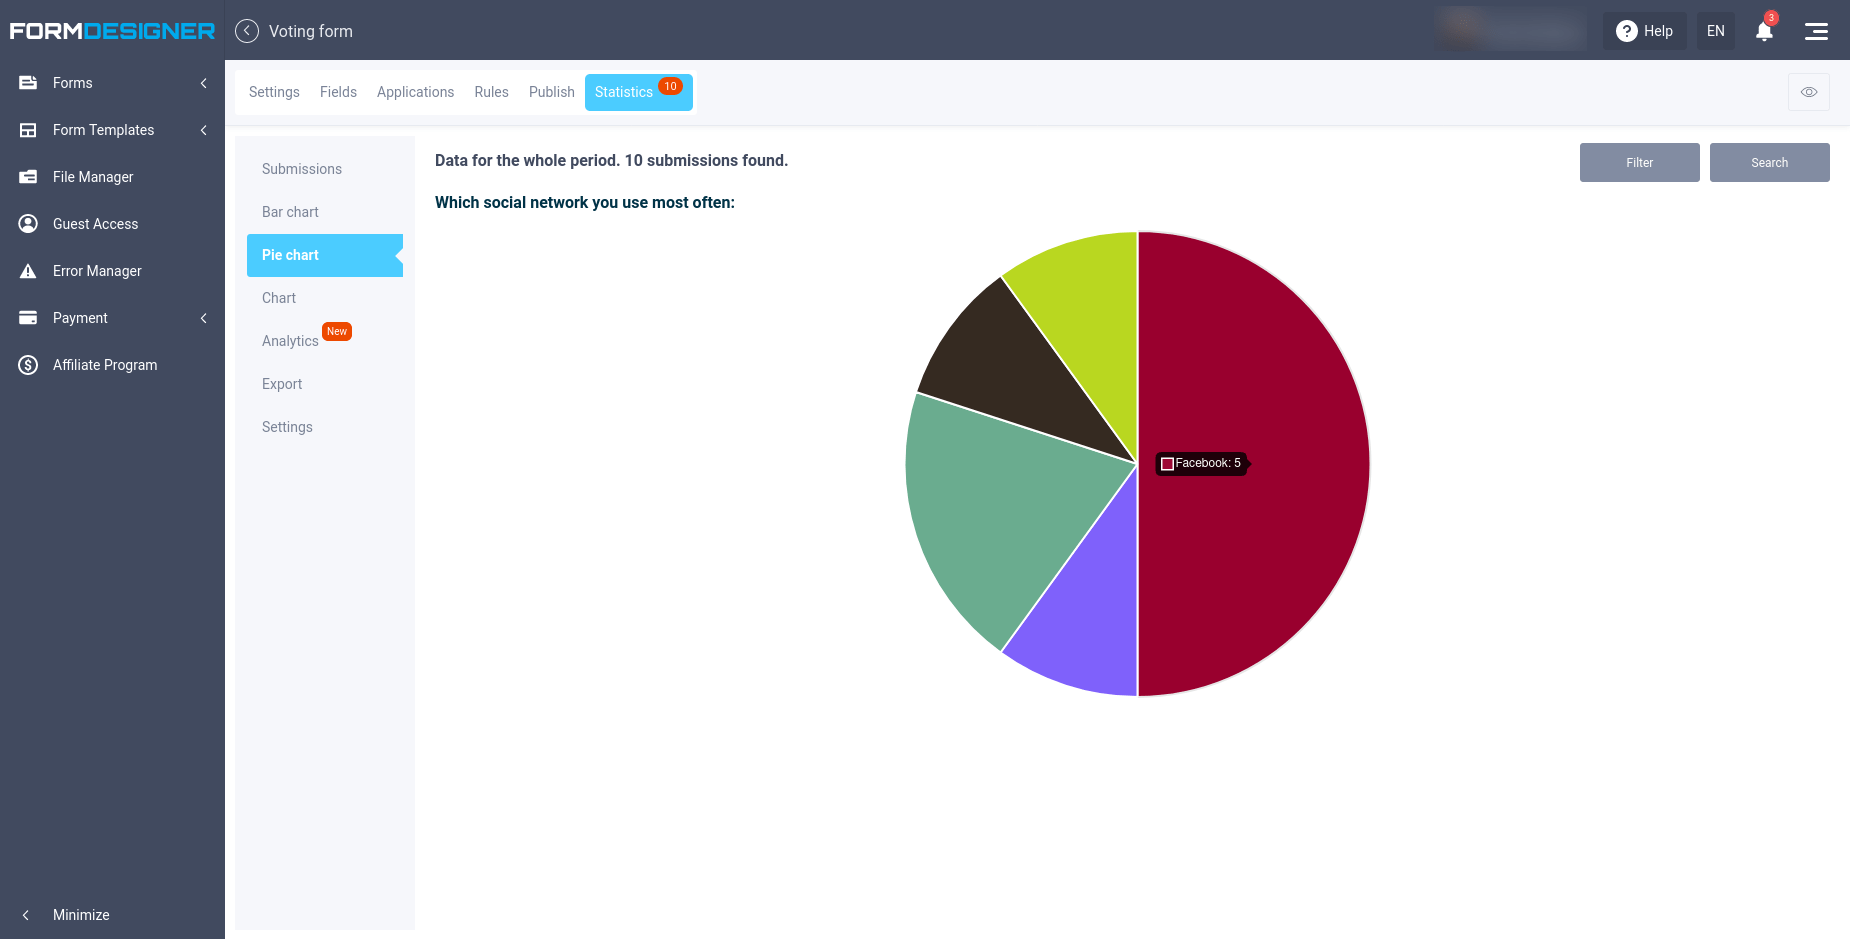
In addition, you can see the cumulative rating of any question in your poll or survey at any time by opening the bar chart item in the Statistics tab:Also, you can see the voting results in the form of a "Pie Chart":In addition, you can see the cumulative rating of any question in your poll or survey at any time by opening the bar chart item in the Statistics tab:Also, you can see the voting results in the form of a "Pie Chart":Voting form design
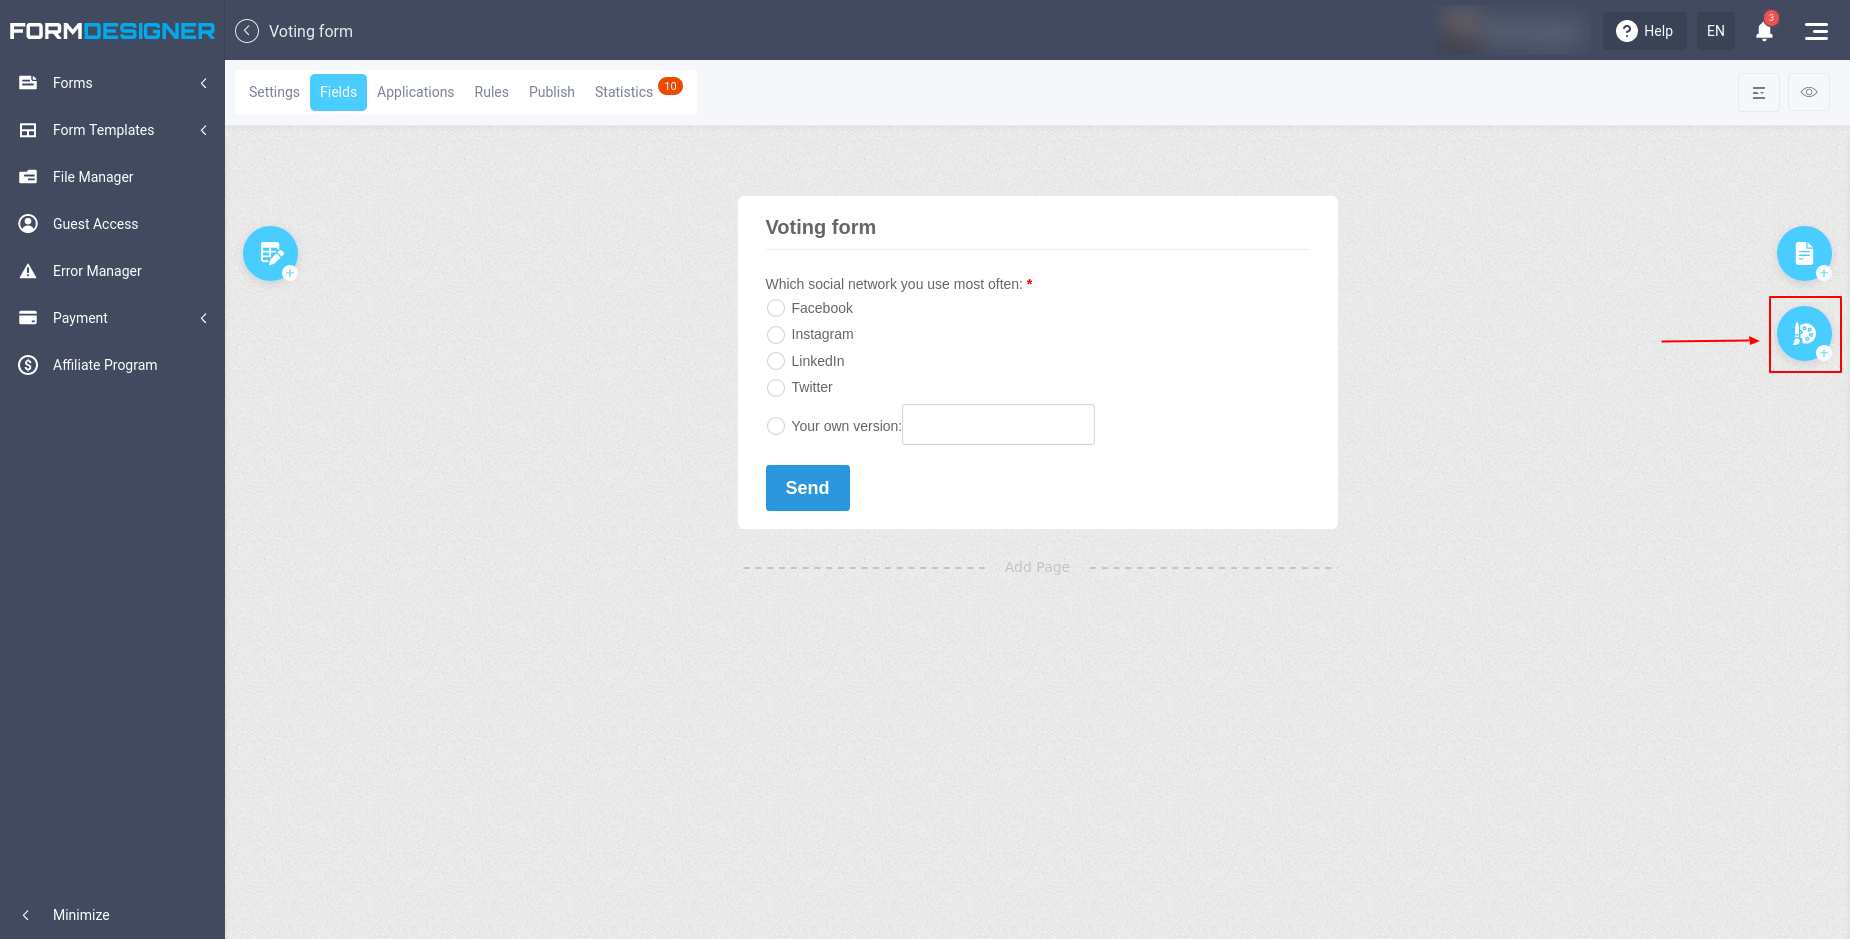
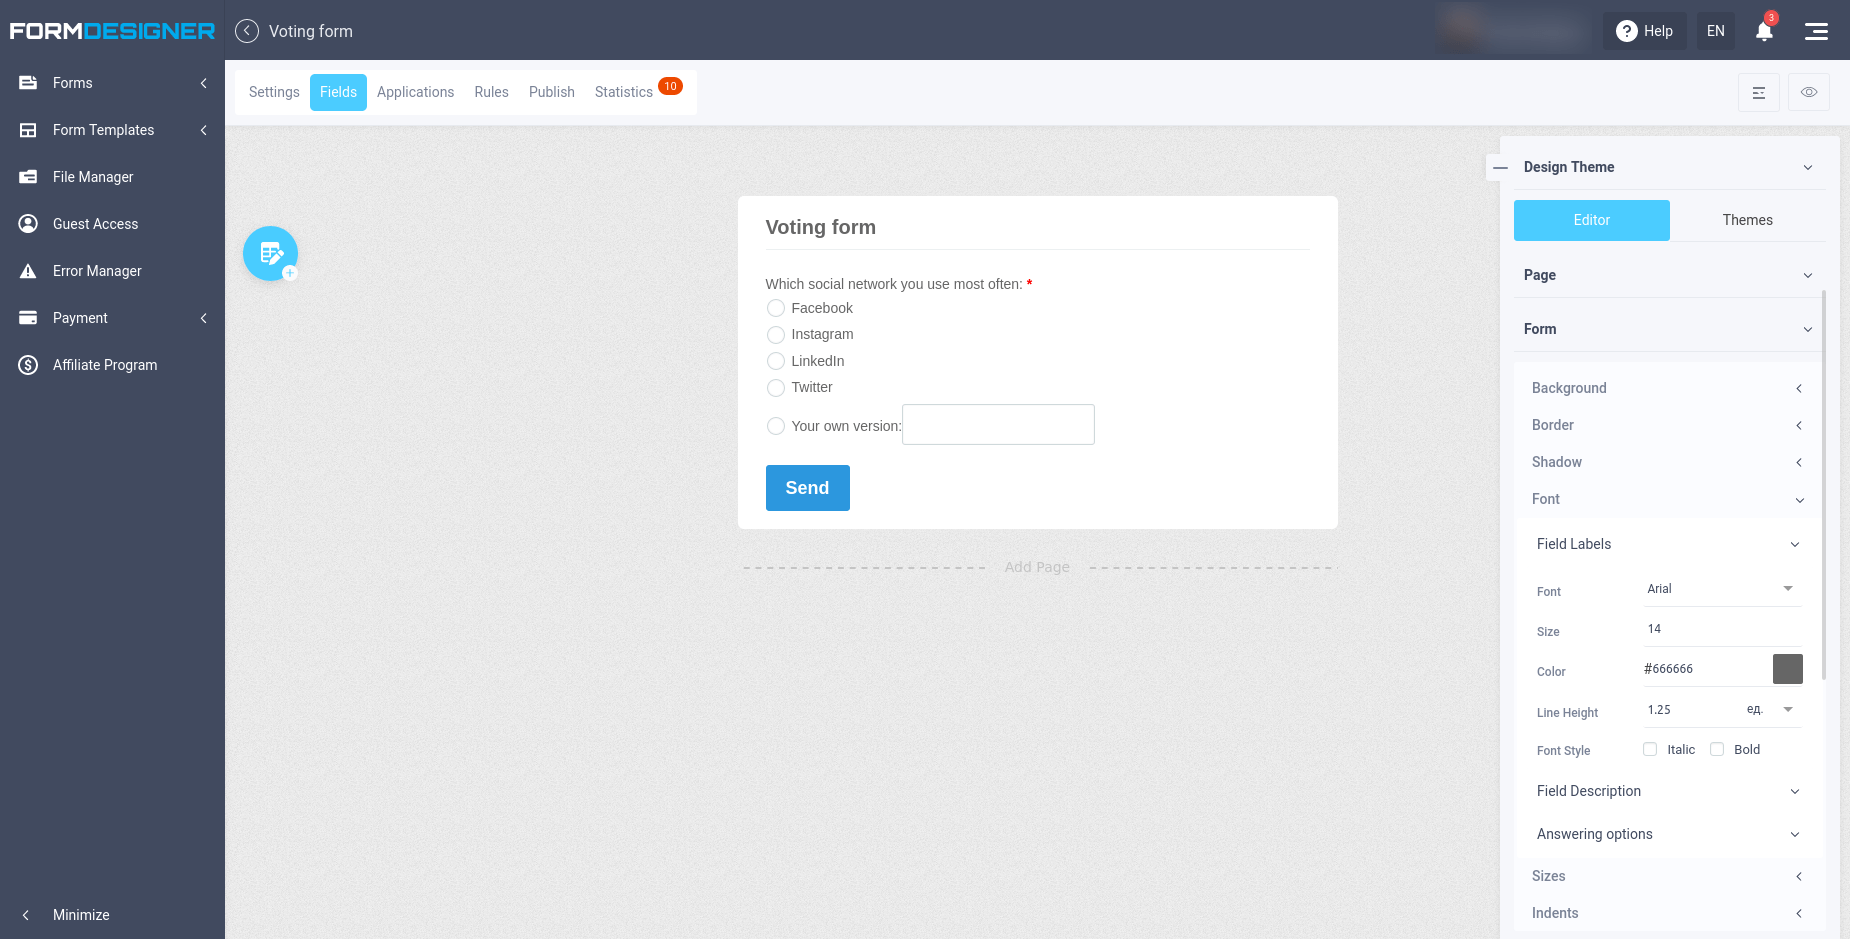
You can customize the appearance of the voting form in the "Fields" tab by clicking on this icon:
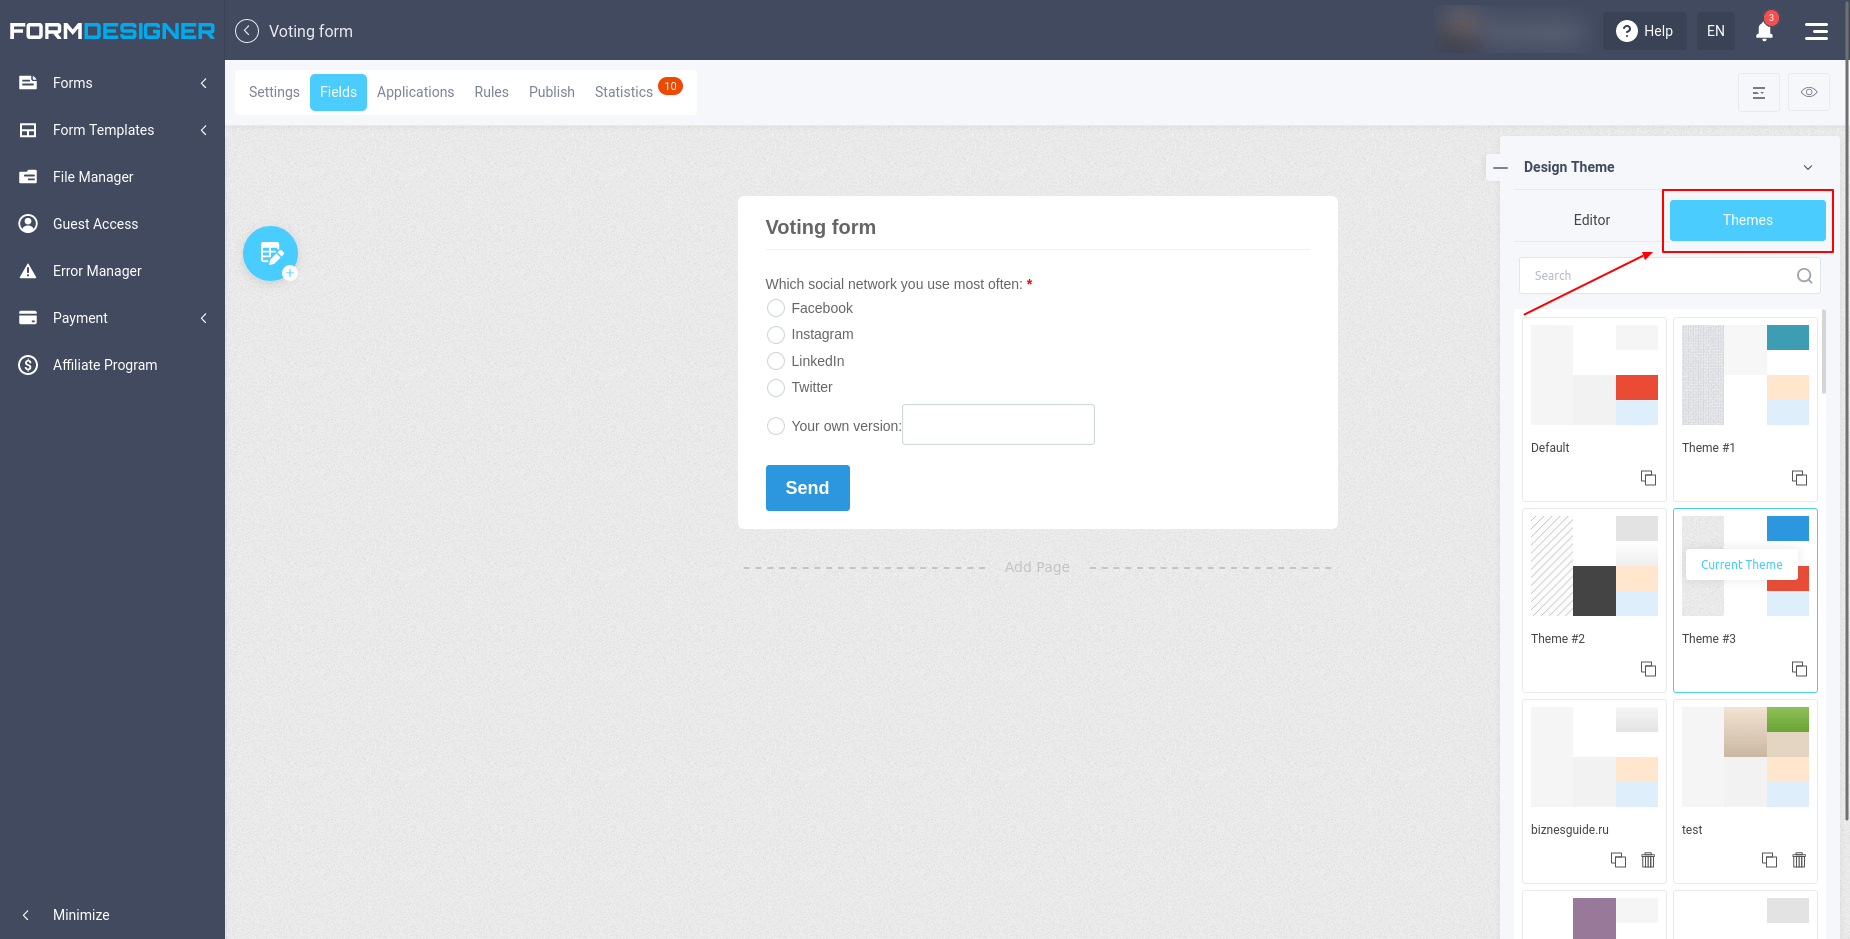
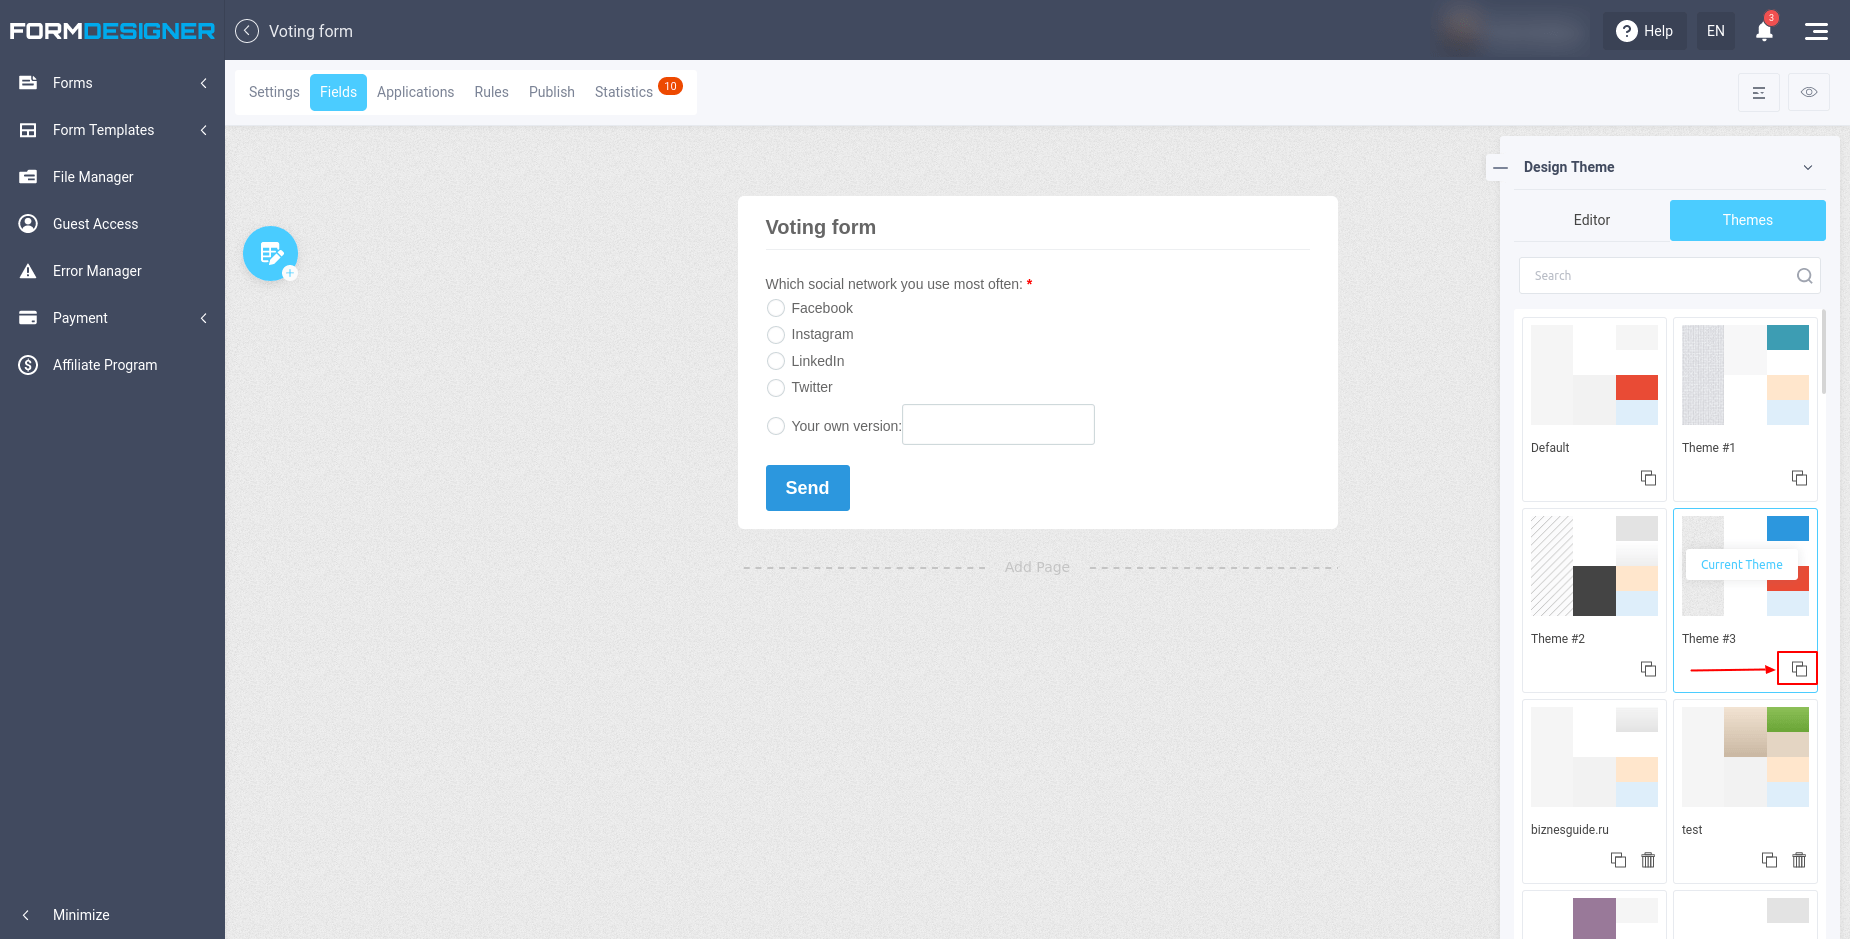
You will be presented with the design theme editor. You can select one of the standard themes by going to the "Themes" section:Select your favorite design theme by clicking on it. In order to make changes to the design of a standard theme, you need to copy it by clicking on the corresponding icon:Once you have copied the design theme, you can go to the theme editor and make the necessary changes to the form design:You will be presented with the design theme editor. You can select one of the standard themes by going to the "Themes" section:Select your favorite design theme by clicking on it. In order to make changes to the design of a standard theme, you need to copy it by clicking on the corresponding icon:Once you have copied the design theme, you can go to the theme editor and make the necessary changes to the form design:You can change the background, font, border, shadow and more for all web form elements.Placing surveys and polls on your site you make them more alive. Remember that without a live audience the resource will not develop! Knowing, and most importantly, taking into account the opinion of readers, you will be able to make your site more popular and visited!

