What is a Quiz and how to create it correctly?
The quiz can be called a new effective marketing tool with which you can identify the needs of the website visitor. A Quiz is a step-by-step capture form that helps to make the client more and more interested in each subsequent question, rather than immediately scare the client off with a questionnaire of 10 - 20 questions on one page, and as a result, leave a request and get his contact information.информацию.
Quiz advantage
Quiz allows you to consistently bring your customer closer to submitting a request. Quiz or Quiz-Landing is implemented in a game form, where the visitor is asked several questions step by step:
- Who is he?
- What does he need?
- How much money is he ready to spend?
- When?
Quizzes are actively used for educational and entertainment purposes, and now they have a bright trading effect. Quizzes offered a worthy, we can say, "softer" alternative to a more "aggressive" request - to leave a request. The website visitor answers with interest to questions, because he knows that at the end he will find out, for example, what discount he will get for a product or service. Here are some direct benefits:
- Conversion of tickets is from 12 percent.
- In fact, every second user opens the test for review.
- Price of creation.
- Creation of a tool for selling goods and services in a short time.
- After sending the order, the sales department immediately sees what the client needs.
- Gives the opportunity to make a specific "hot" offer, according to the needs of the site visitor.
- Can be used simply to increase site traffic.
Psychological aspects
- A certain "passion" for passing tests and polls
- The feeling of incompleteness, if not completely passed the test
How to create quiz correctly?
To motivate a visitor to take a survey, you need to clearly explain why he needs it. The purpose of passing the quiz may be to decide his interest or get a bonus or a gift. The quiz consists mainly of several pages: the entrance page with an offer to pass the test (survey) and bonuses for passing the test, and the page with questions and the application form at the end. Passing the survey, the potential client finds the most attractive product. All quests are used as game mechanics. A visa is like a one-page site, one-page landings, which is made according to all the requirements of the landings, but has one narrow header, solving a certain "pain" of the client, gives for it, some gifts, bonuses, discounts, offering to pass the test.
The step-by-step presentation of information involves and the visitor wants to pass further. When we create a quiz, we do not have to show all the questions at once, we give 4-6 questions, to which a person consistently answers and at the end leaves his contact information. After filling in the receipt quiz by the customer, you will understand exactly whether the customer or not.
Quizzes can be variable. In the sales department, having received answers from the questionnaire, you can immediately see what the client needs, and he does not need to call and ask a bunch of questions. For example, on the site when ordering a cab, in questions you need to specify who is going, what class of car, route and at the end of the necessary bonus in the form of discounts on the trip or the price per kilometer. The main thing is to choose the right questions, to make them varied, so that the visitor, having chosen one answer, then went one way, choosing another - the second (third). Questions should not be complicated, "annoying", it is better that they are accompanied by explanations (example of a closet, the material of which), so that the client simply chose the option of the answer.
Answer choices can be in the form of an image or text plus an image. There should also be an answer choice: "I don't know" or "no answer".
Errors in creating tickets
- Do not consider different types of clients. In a question, you need to select the type of client at once
- Leave the answer manually, i.e. force a potential client to enter a lot of numbers and text manually.
- No date election, i.e. open the calendar - select month, day
- Attach project file (you can make it optional, make it optional)
- Drop-down lists and small items that are difficult to get into (from a mobile device)
- Do not consider that a person does not know. In other words, there should be a point - I do not know.
- Do not give hints (it is hard with terms, if the potential client is "off topic")
- Ask many questions (no more than 4-6)
- Do not explain why the question is asked (use the prompts in the fields).
- Ask more than one question per step
- Do not motivate the user on the last step (set a discount on the phone number).
Ways to create quizzes
You can contact professional developers, who will set everything up for you for a fee, but you can use a special constructor to create a quiz. One such constructor is FormDesigner.
Not so long ago we created a special theme of design, for the visa. Now it won't take you much time to create a ticket. To see it live, we have created a special blank for the quiz. Click on the button below to see how it works.
How do you create a quiz like this?
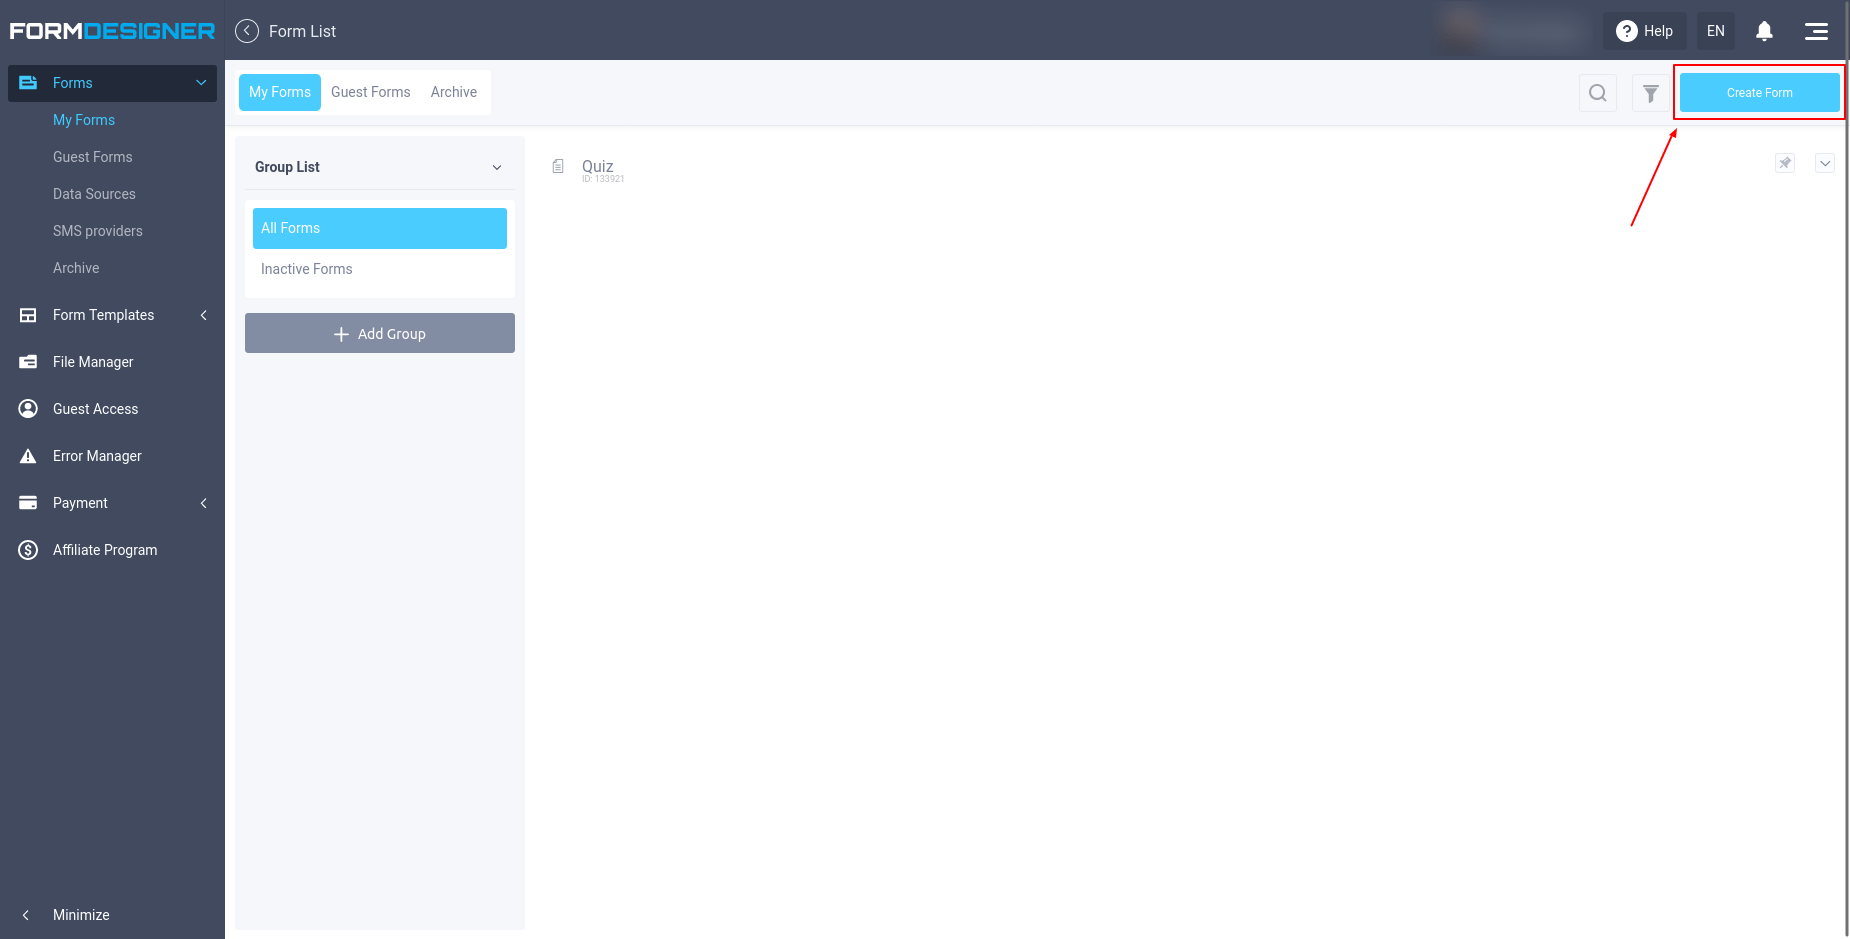
It's actually very simple, using FormDesigner quiz builder. First, we need to create a blank form. To do this, go to the list of forms and click on the "Create Form" button:
We will be taken to a page with ready-made web form templates. Let's choose the "Quiz" template from the list on the left:
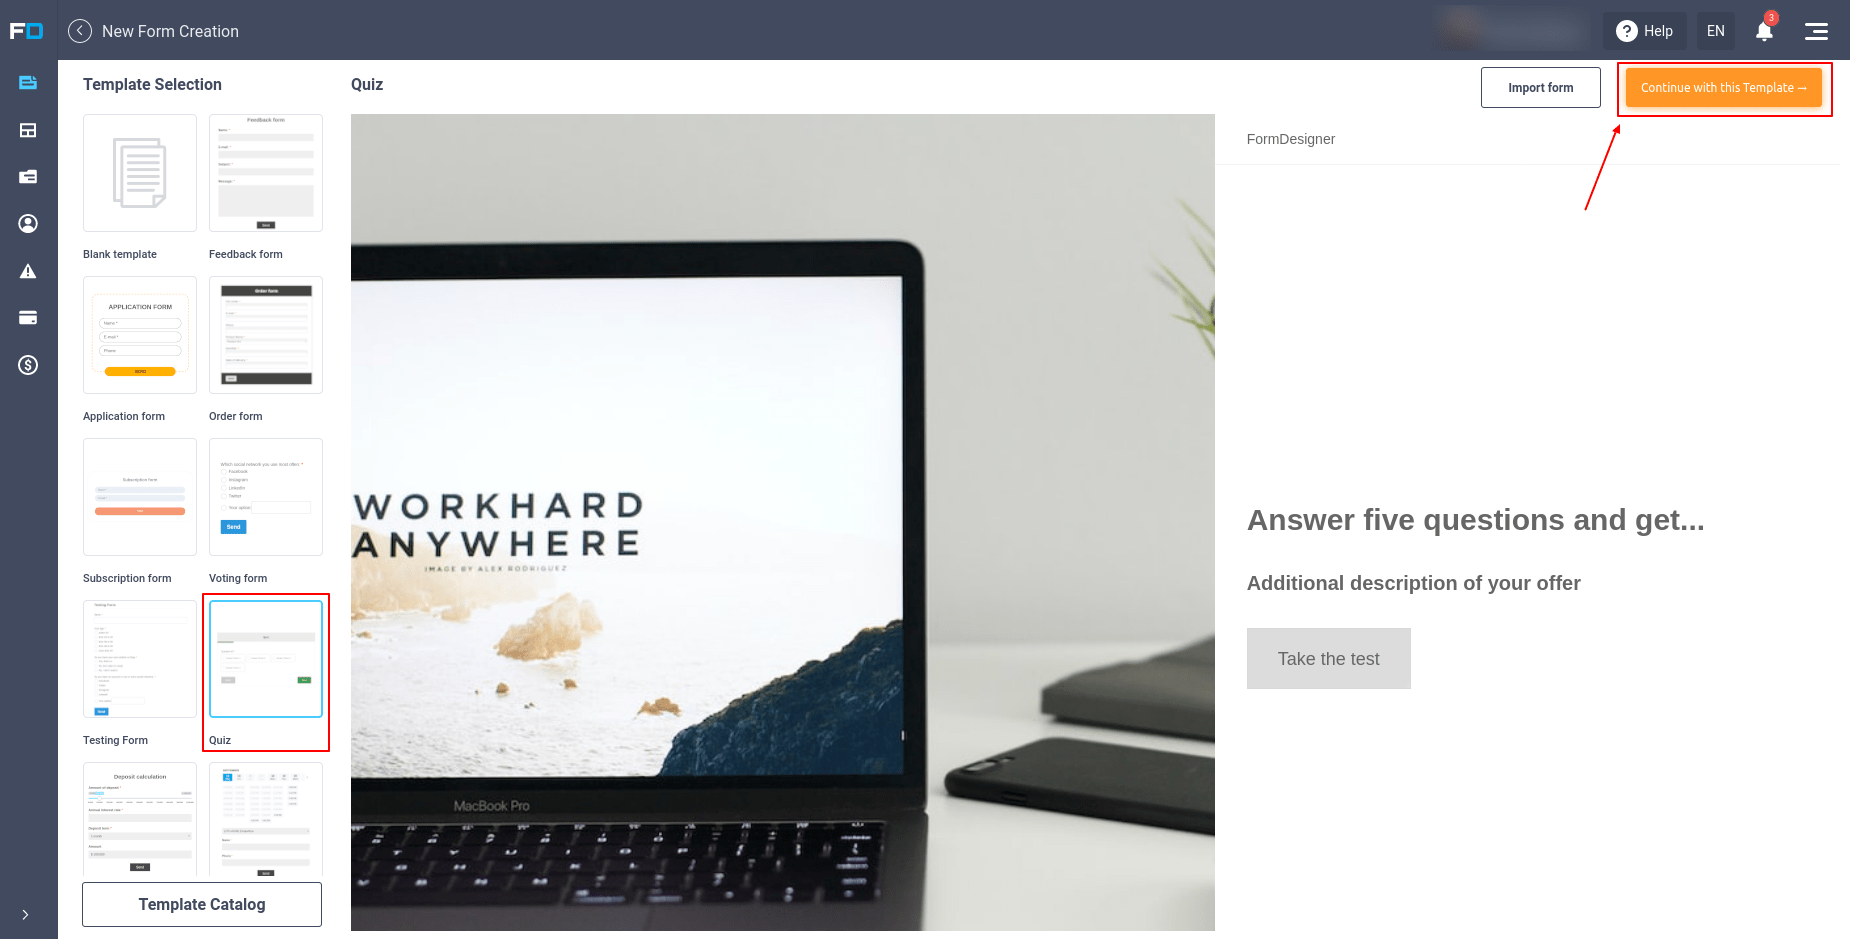
Next you need to click the "Continue with this template" button, after which a window will open where you need to enter the name of your future quiz. A window will open where you need to enter the name of your future quiz:
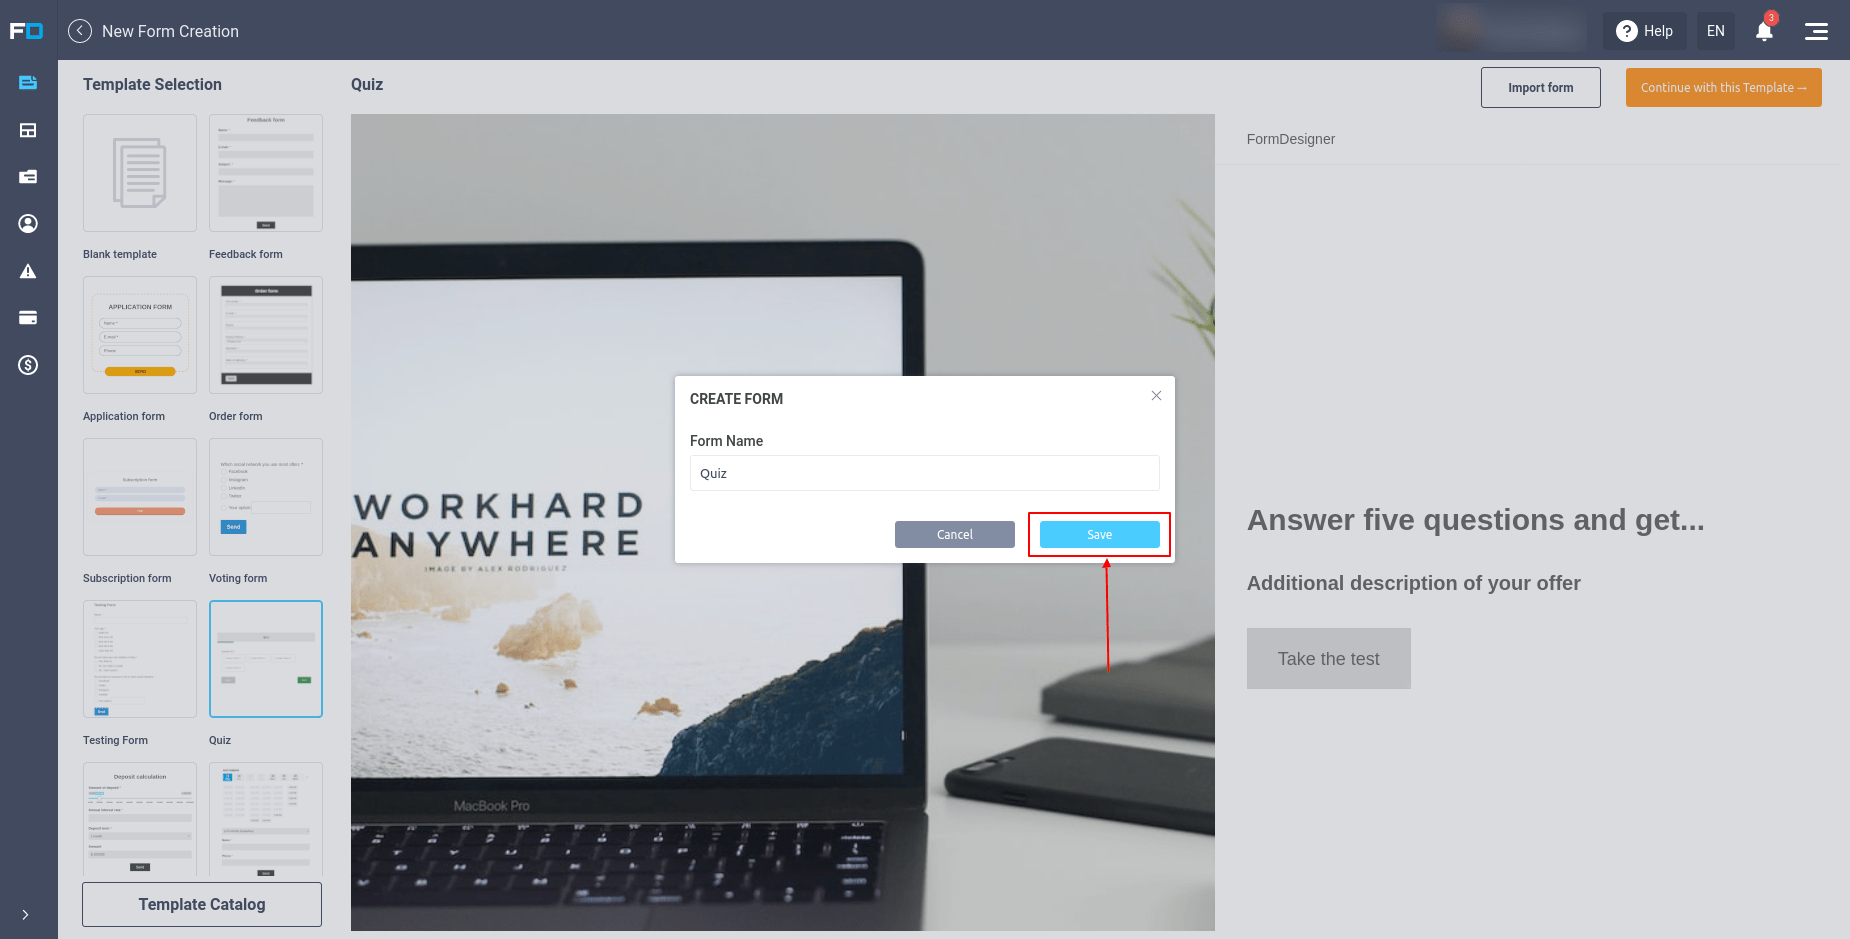
After you click on the "Save" button, the main quiz editor will open in front of you, where all the questions are customized:

Since we're we're using a pre-made template, so we've already added some questions and pages. You can either edit them or remove them altogether. To add a new question to the quiz, select the desired item from the menu on the left and drag it to the desired location on the form.
In order to change the question and customize your answer options, you need to put the mouse cursor over the desired question and click on the edit icon:
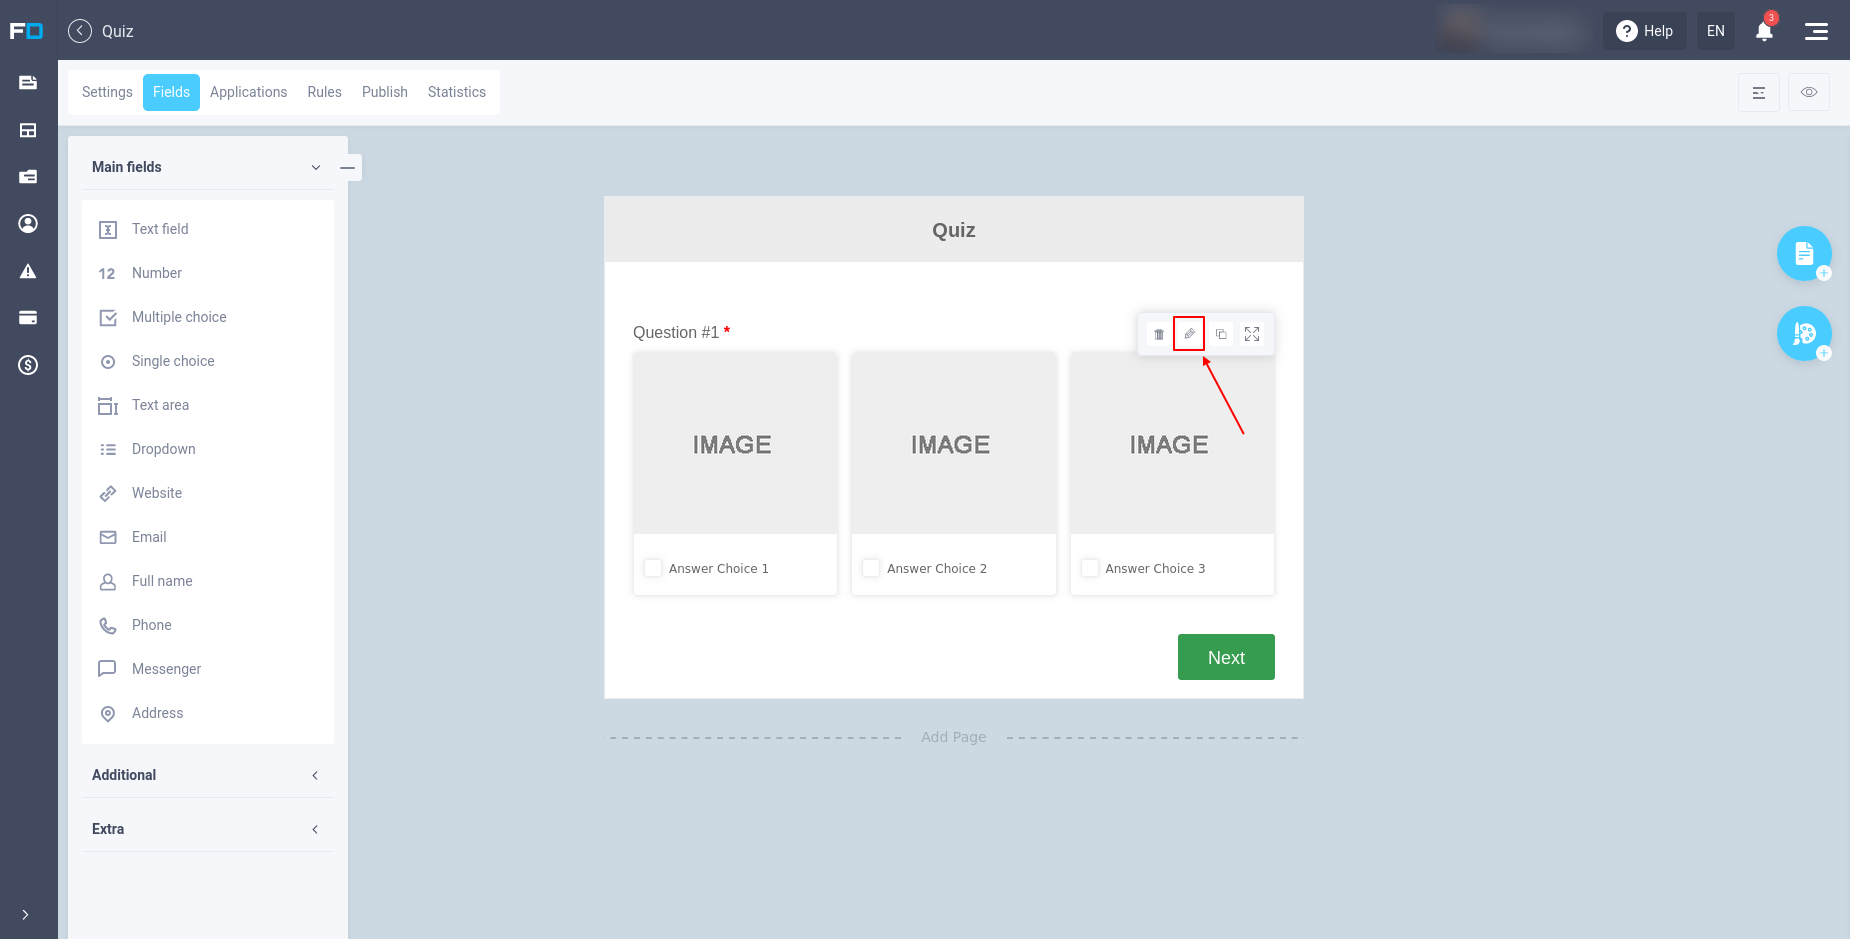
After that a window with all the settings of this element will open in front of you:

For convenience, all settings are divided into separate sections, which are displayed in the menu on the left. Here you can customize the field name, description, validation parameters (require or optional field). For fields with answer choices, you can choose whether to arrange them in a column or split by column, and much more.
In "Answer Choices" section, we can customize the answer choices themselves. We can add an image to each answer choice. To do this, click on the image icon or the plus sign:
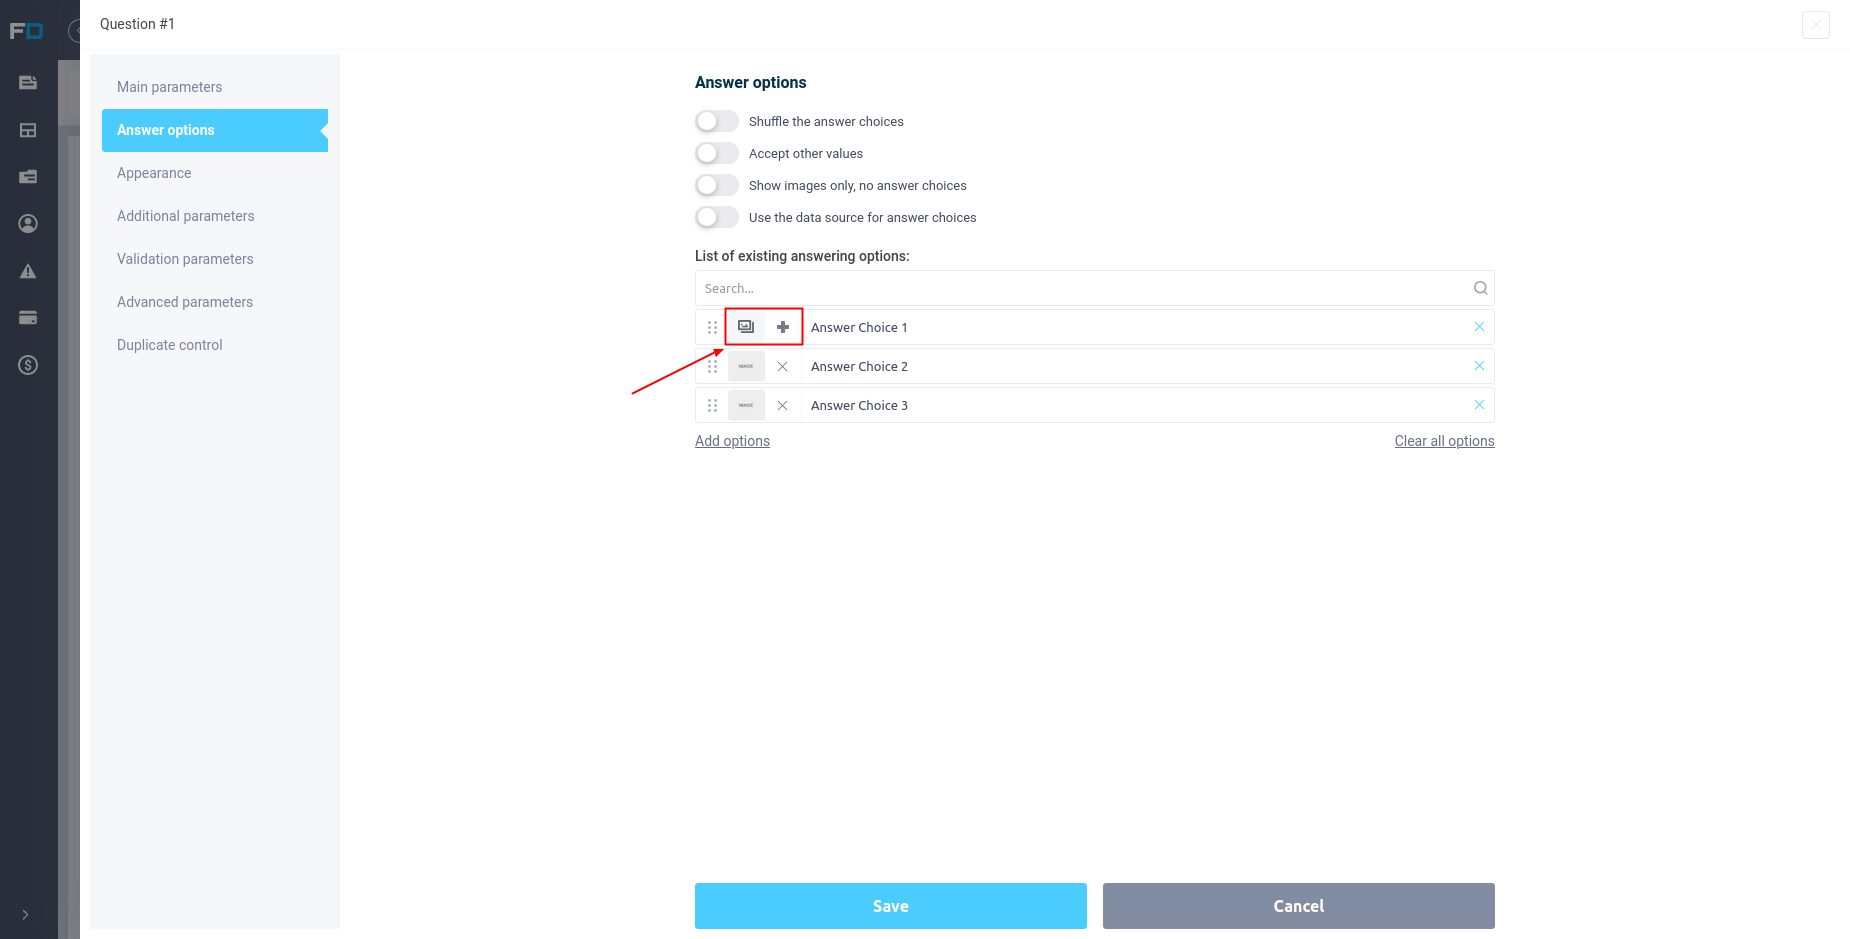
After that, a file manager will open in front of you, where you can select a previously uploaded image or upload a new one.
Upload images of the same width and height so that it looks aesthetically pleasing in form.
Pages in the quiz
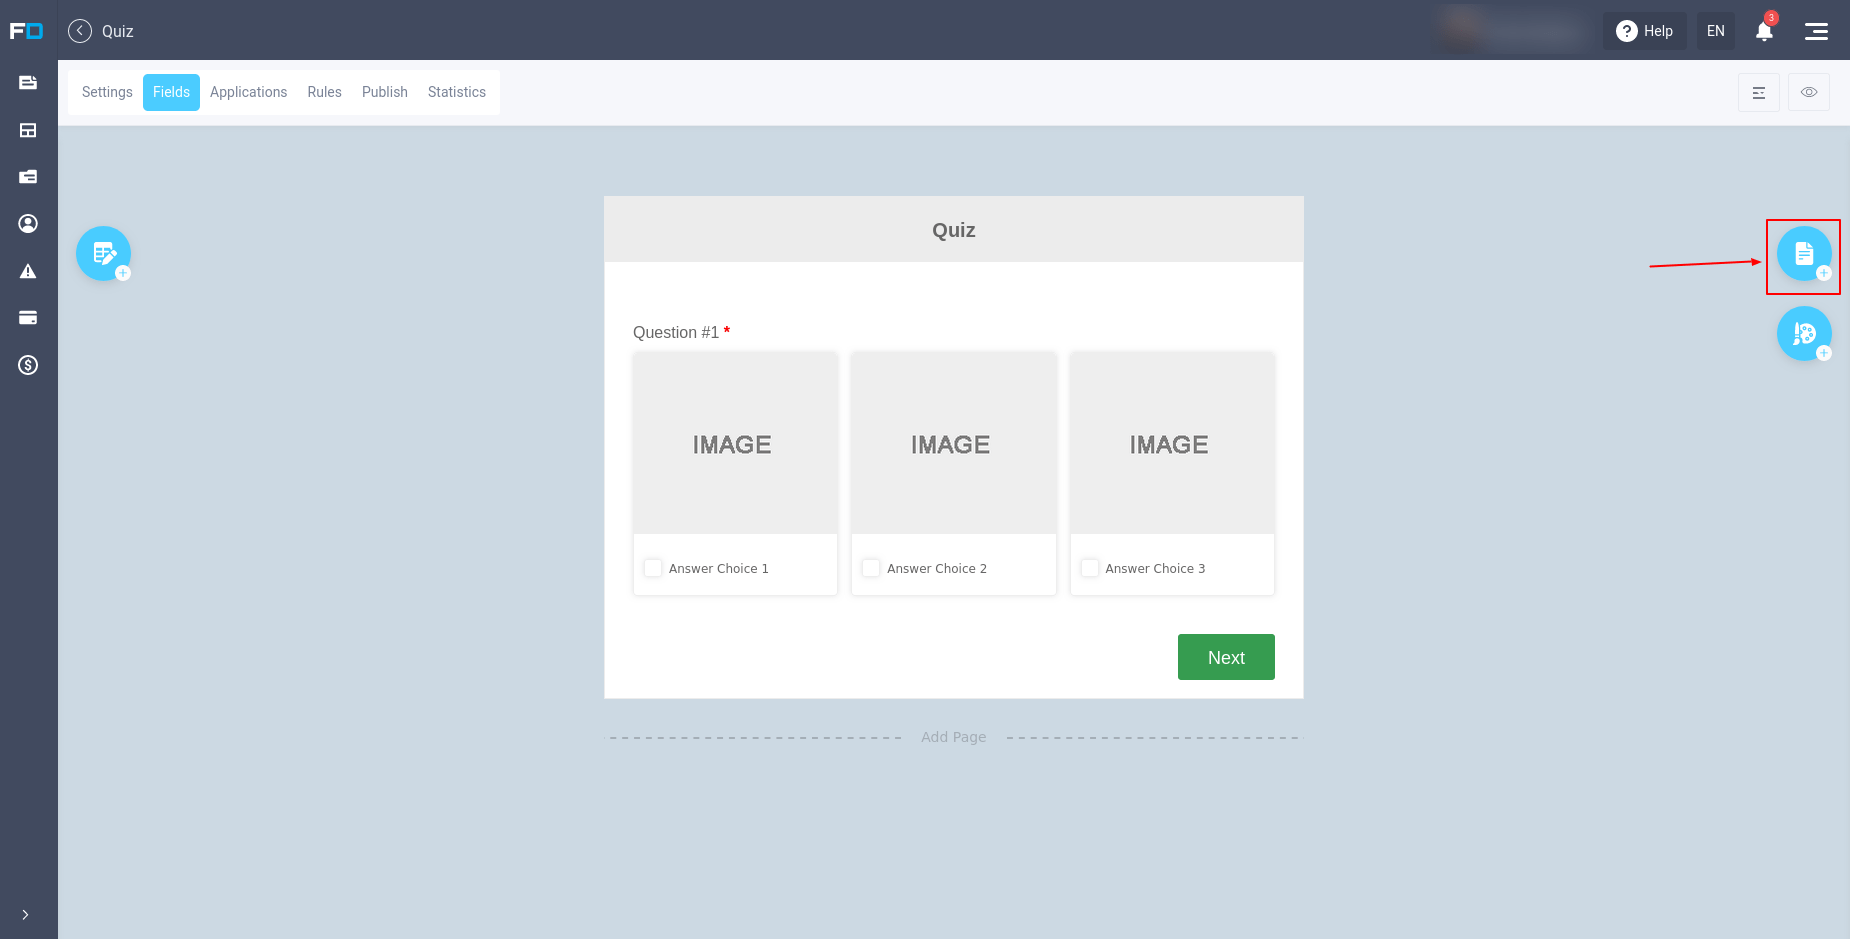
Our quiz builder allows you to place many questions on one page, but as a rule, in a quiz, a separate page is created for each question. In order to add a new page or select an existing page, you need to open the list of pages. To do this, click on this icon:
You will see a list of all the pages in the quiz. Here you can select the desired page by clicking on it. In order to add a new page, you need to click on the "Add Page" button in the list of pages:
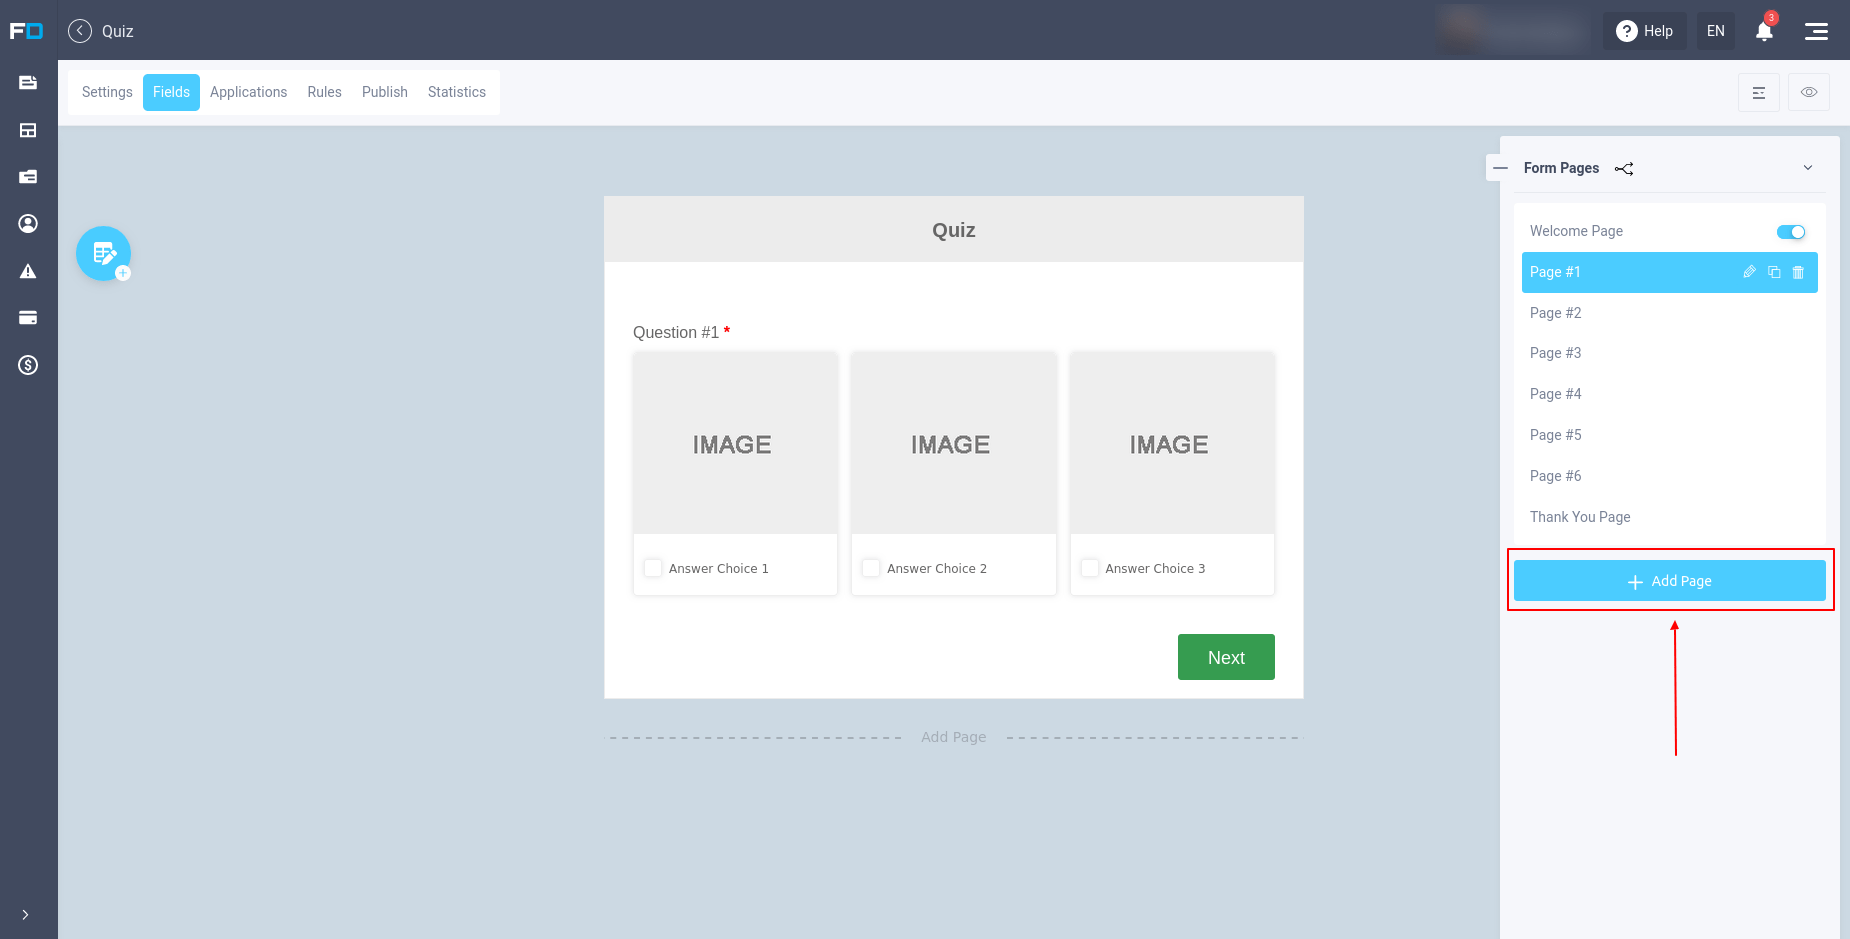
This way we will add a new page to the end of the list. All pages can be renamed, deleted or copied with all fields.
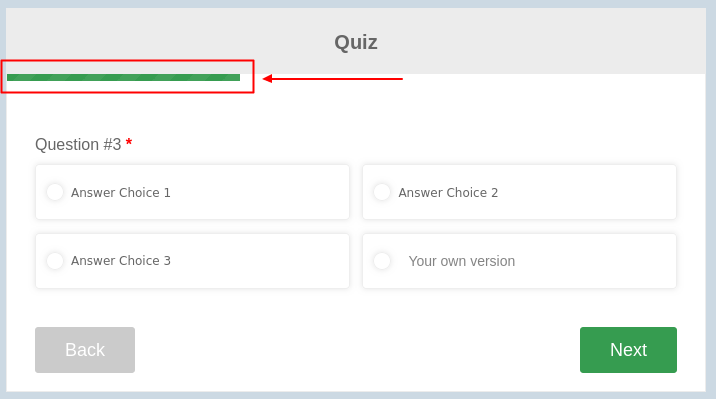
Quiz progress bar
For the convenience of users to understand how many questions they have already answered and how many more are left, a progress bar can be added to the quiz:
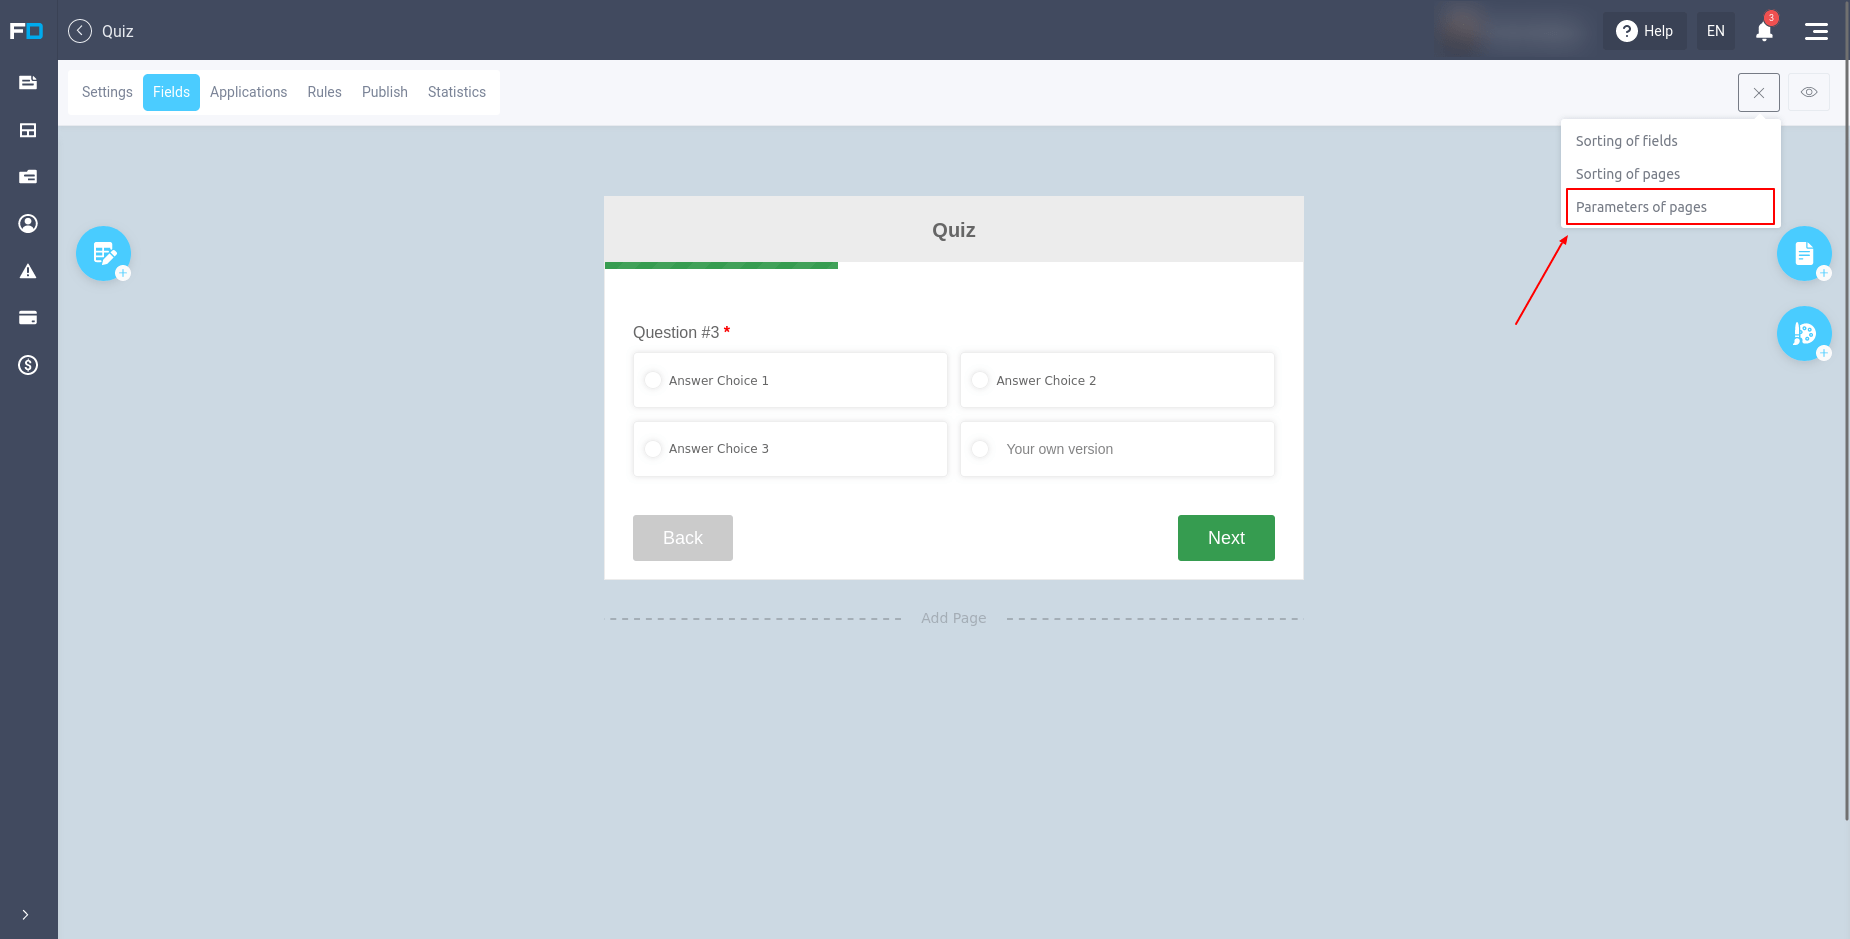
This can be easily customized in the page settings by clicking on this link:
After that, all page settings will open in front of you:
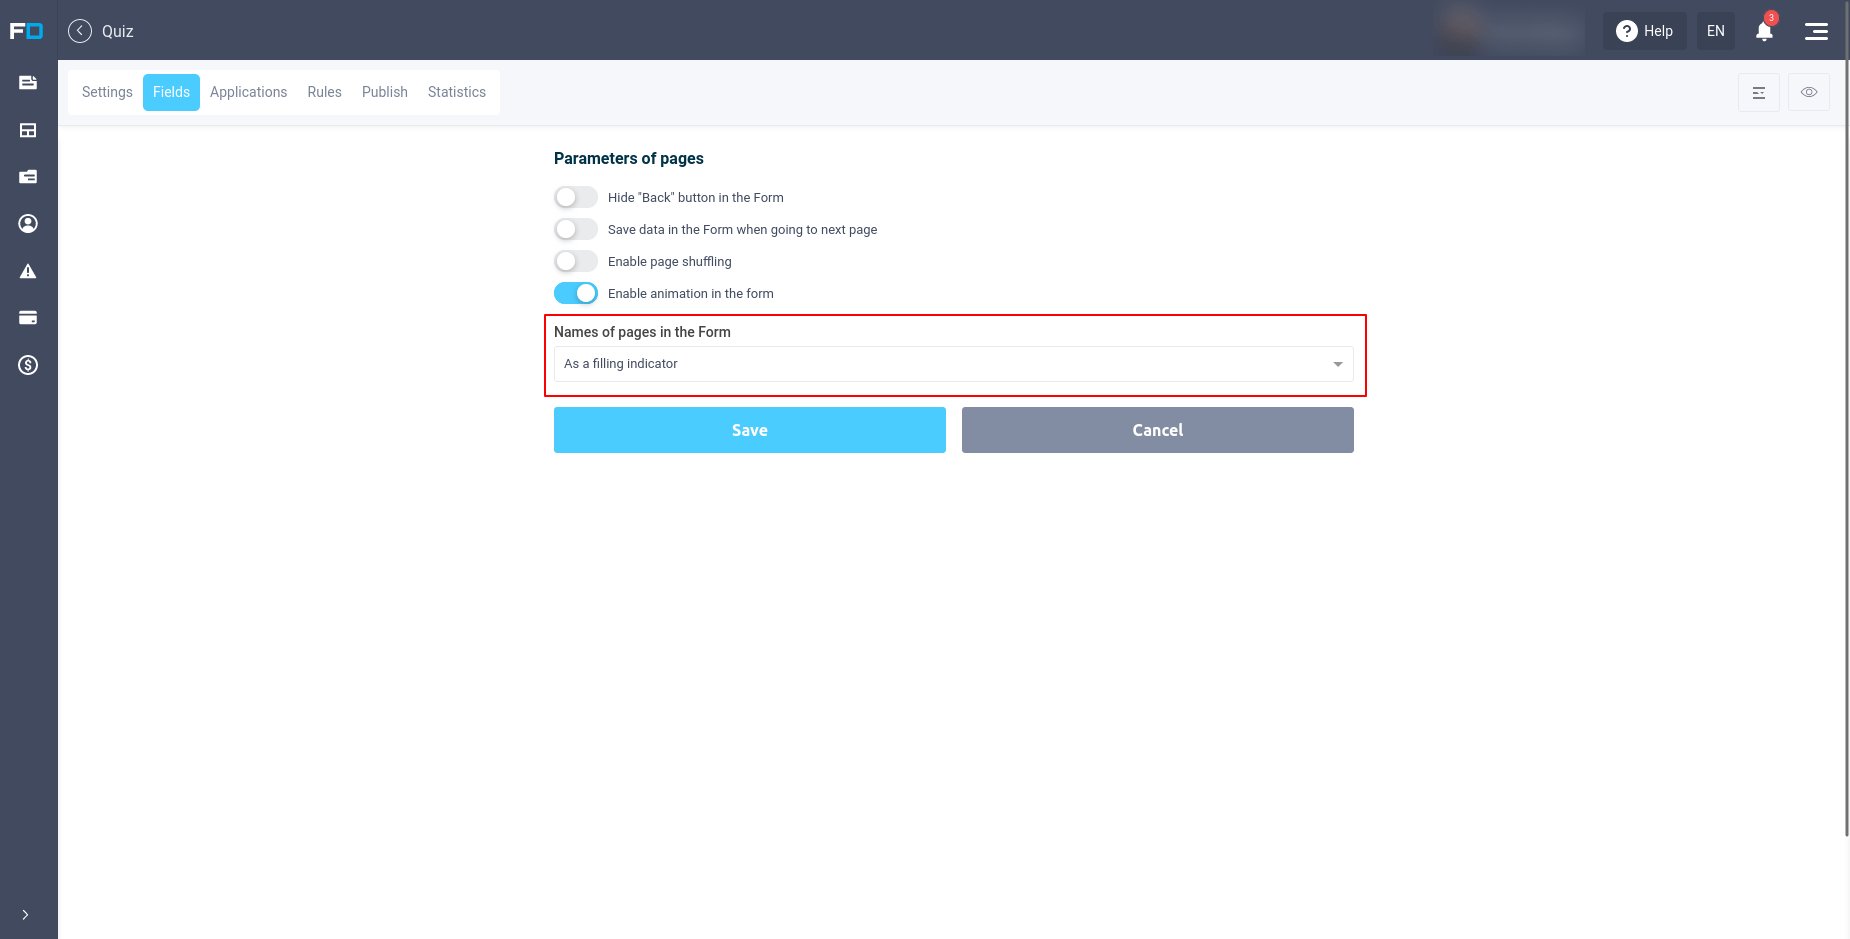
Here you can hide the "Back" button in the quiz, enable page shuffling and animation, and customize the display of page names as a fill indicator. If you enable the switch "Save data in the form, when going to the next page", then the data in the quiz will be saved every time you move between the pages of the quiz and you will see them in your statistics at once. You can learn more about it here.
Quiz Welcome Page
The welcome page in a quiz is the first page a user sees in the quiz. It contains the call to take the quiz, an image, a description of your offer, contact information, and a "Take the quiz" button.
This page might look like this:

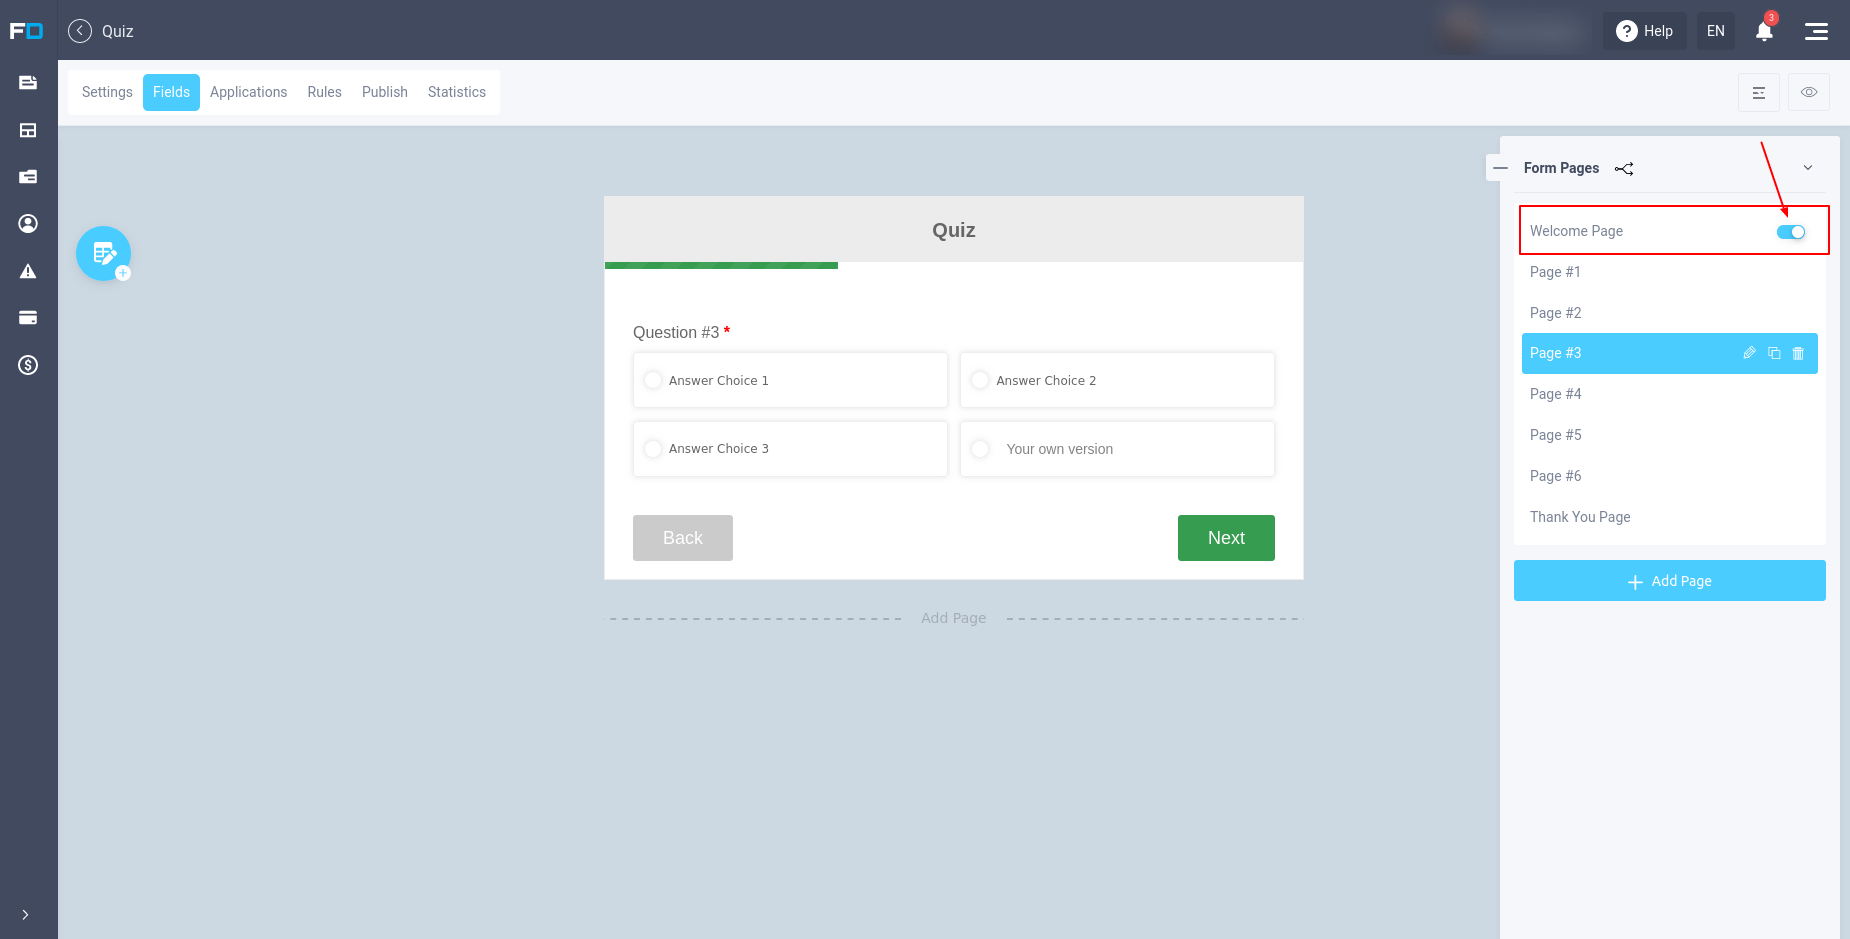
In order to enable the display of the welcome page in the quiz, you need to enable this switch in the list of pages:
Then by selecting this page you can change all the welcome page settings by clicking on any edit icon. You can learn more about customizing the welcome page here.
Branching questions in a quiz
It is often necessary to show different questions in a quiz depending on the user's previous answers. In the FormDesigner quiz builder, this can be easily customized in the visual editor. To do this, click on the branching icon here in the list of pages:

After that, an editor will open in front of you, where by simply dragging and dropping pages and setting conditions, you can customize transitions between pages:

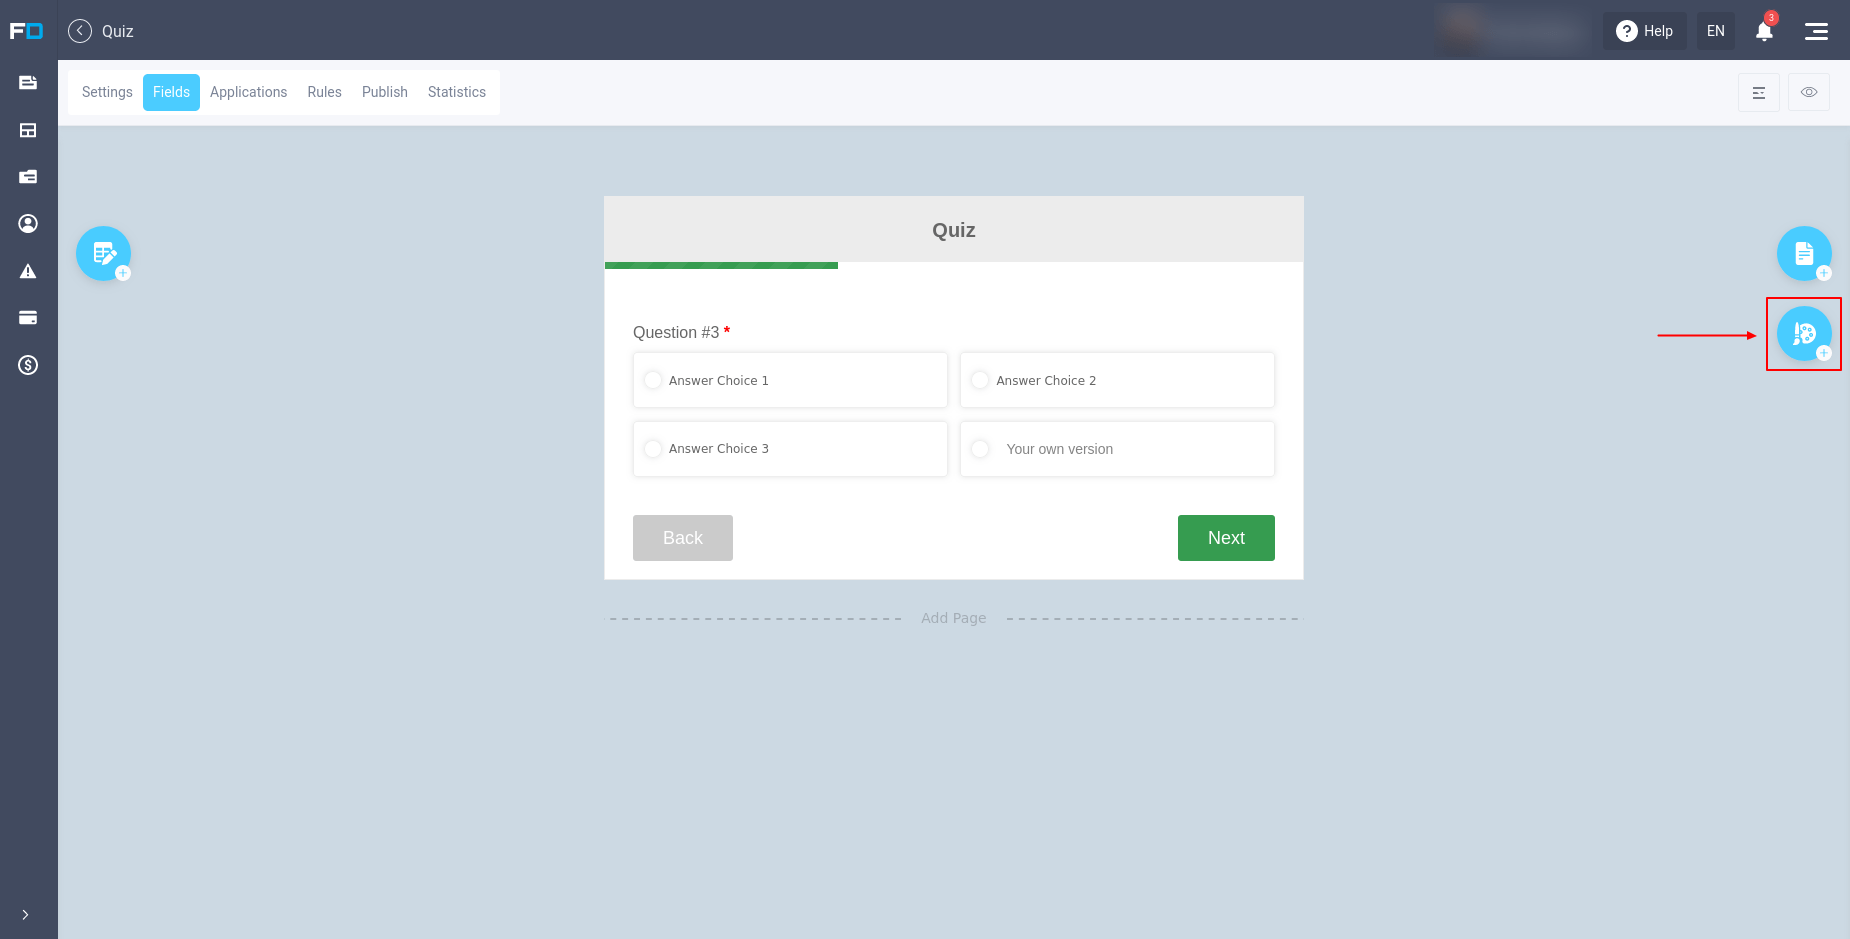
Customizing the appearance of the quiz
You can customize the appearance of the quiz in the "Fields" tab by clicking on this icon:
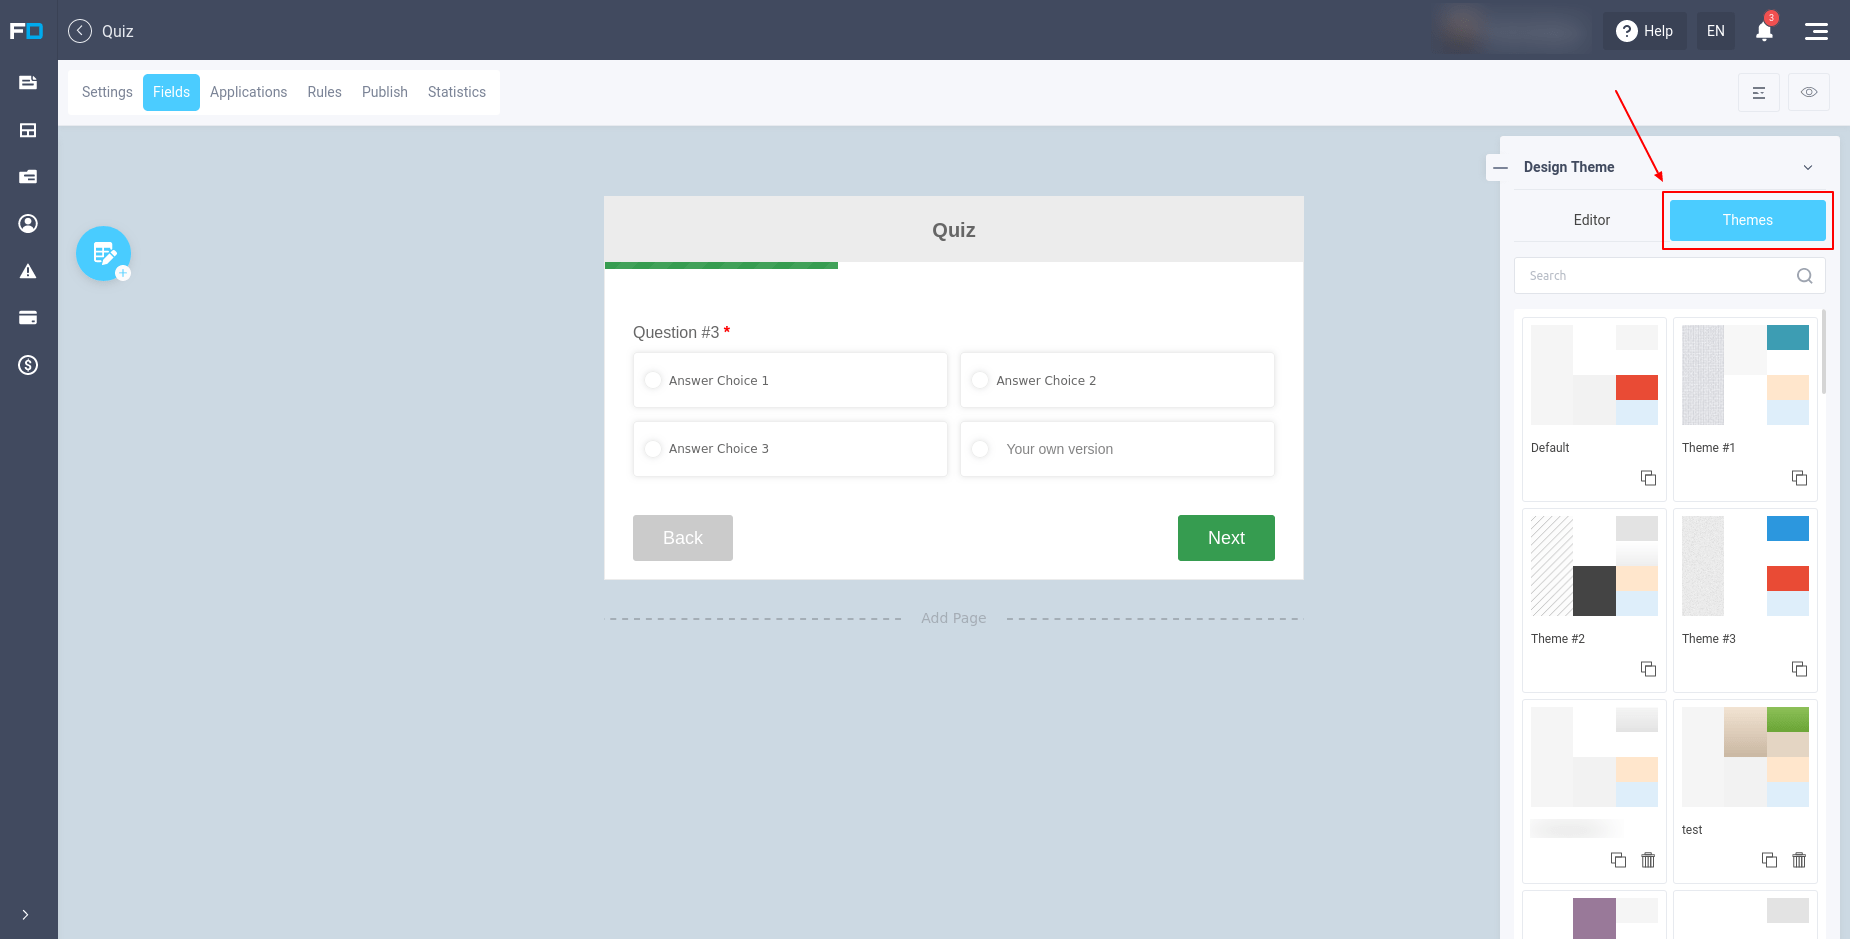
You will be presented with the design theme editor. You can select one of the standard themes by going to the "Themes" section:
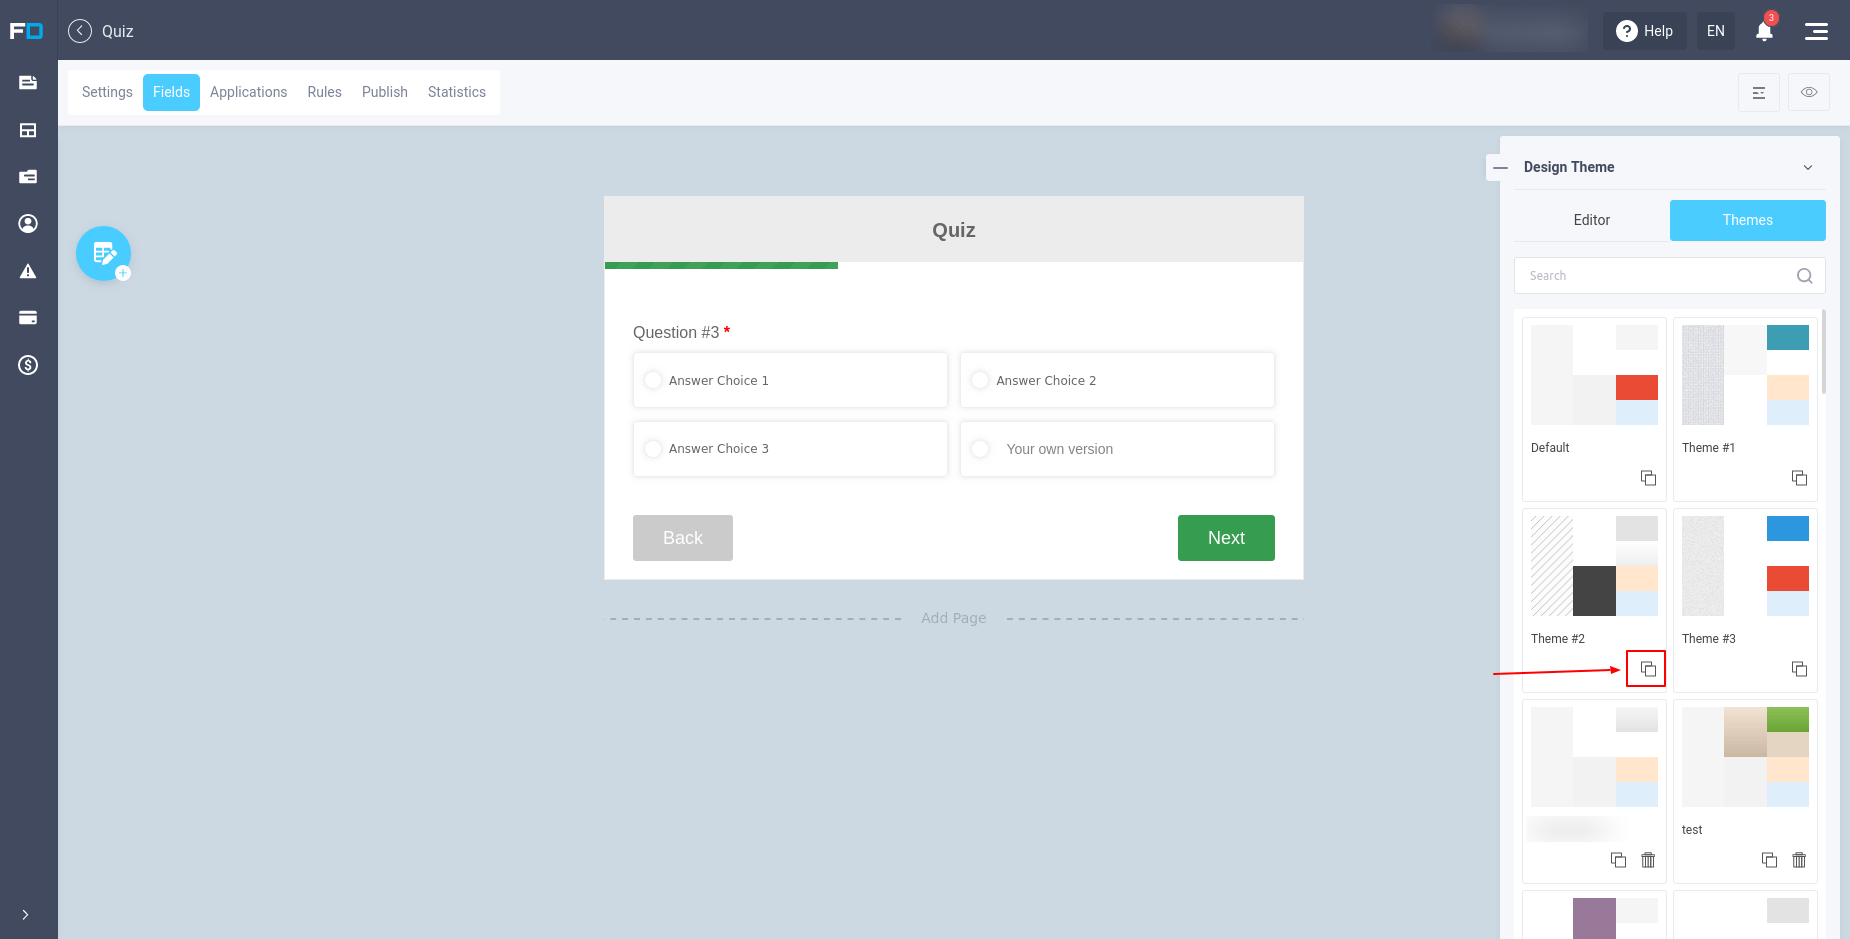
Select your favorite design theme by clicking on it. The appearance of the quiz will immediately change to match the selected theme. In order to make changes to the design of a standard theme, you need to copy it by clicking on the corresponding icon:
Once you have copied the design theme, you can go to the theme editor and make the necessary changes to the quiz design:
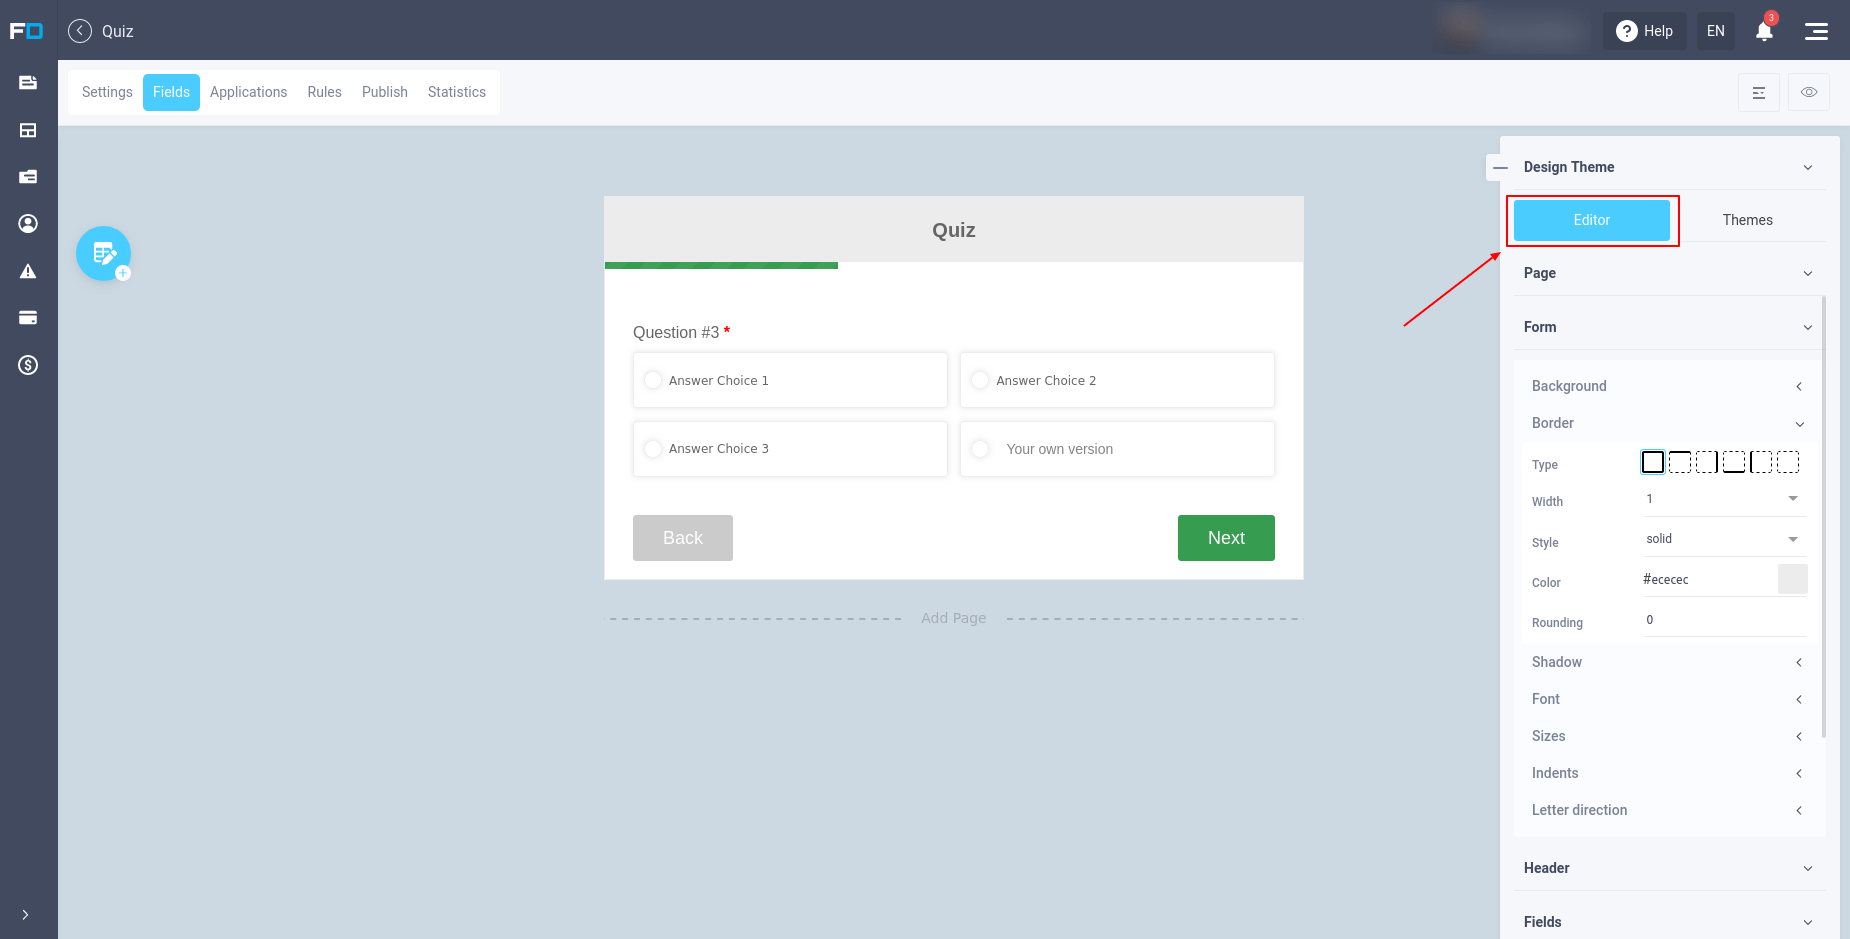
You can change the background, font, border, shadow and more for all web form elements.
Output of test results
After the user answers all the questions of the quiz, the result of the quiz is displayed. This text can be customized by going to the list of pages and selecting "Thank you page":
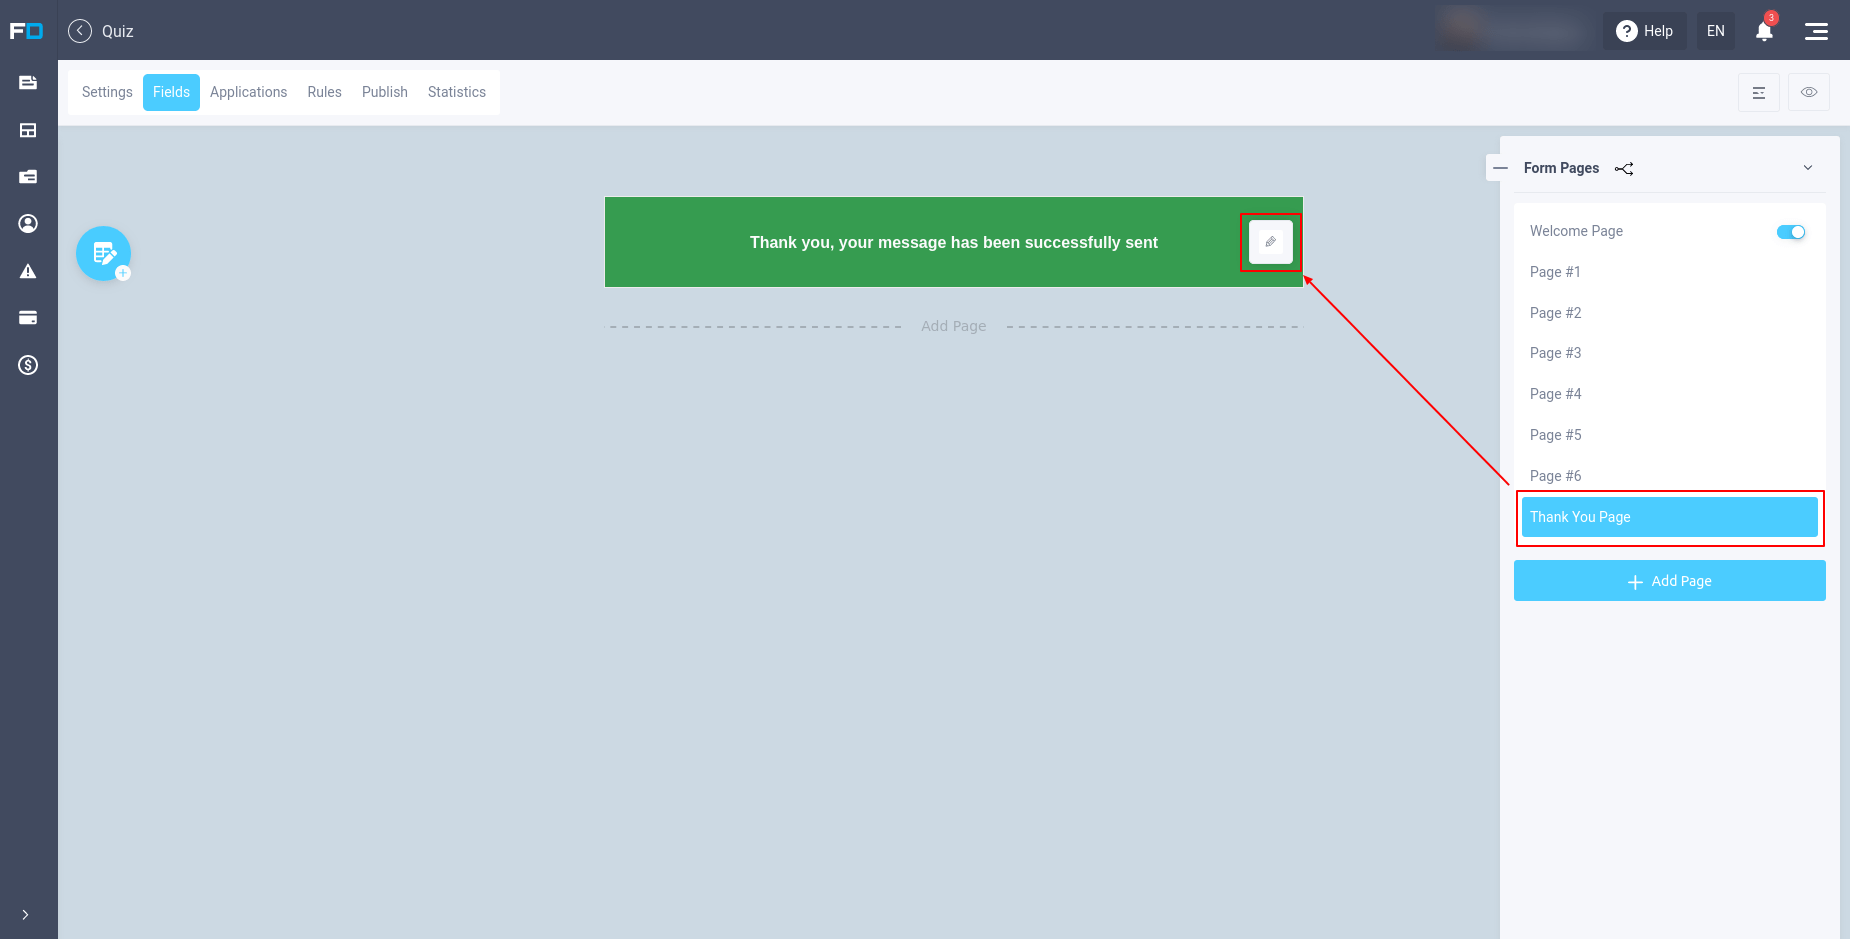
By default, the standard template is displayed. You can hover your mouse over it and click on the edit icon, after which you will see the settings for the successful quiz page:
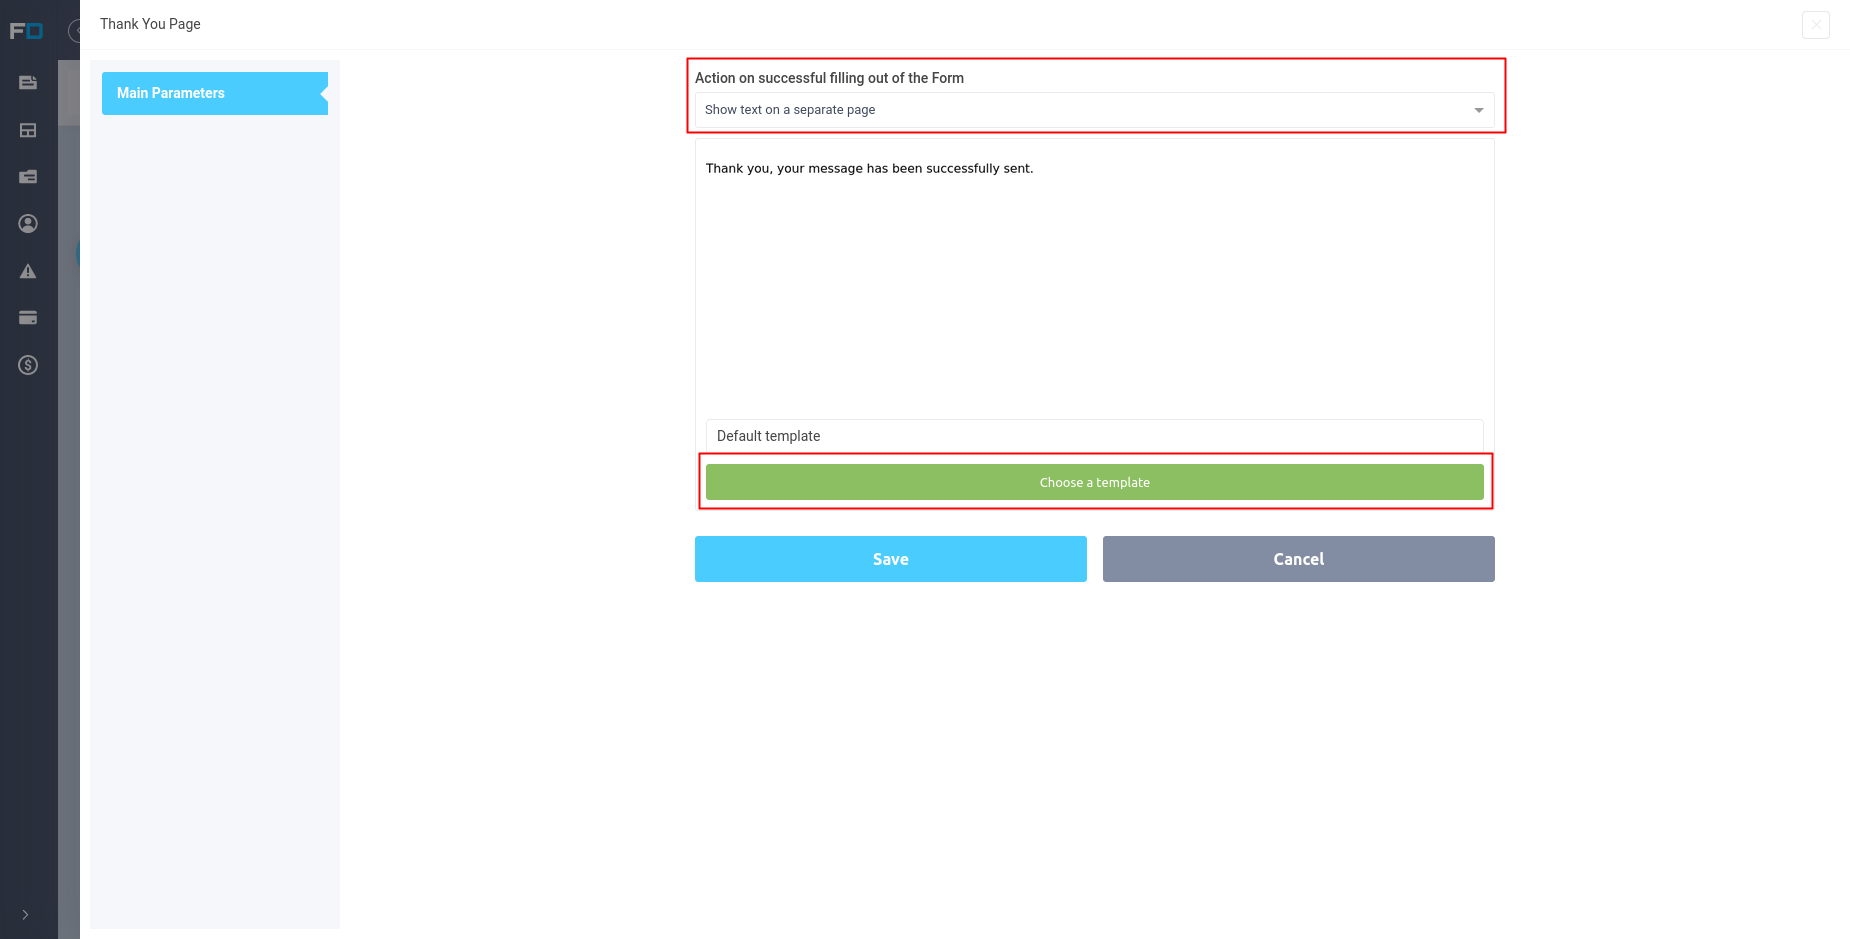
The options available as an action upon successful completion of the form are:
- Show text over form
- Show text below the form
- Show text on a separate page
- Redirect to another URL
- Show the results of the form
- Send data to print
We need to select "Show text on a separate page". With this setting, the form itself is hidden and only the text with the specified template is displayed.
The template itself, which will be displayed, we can select below if we click on the "Choose a template" button. After that a window will open where all created templates will be displayed:
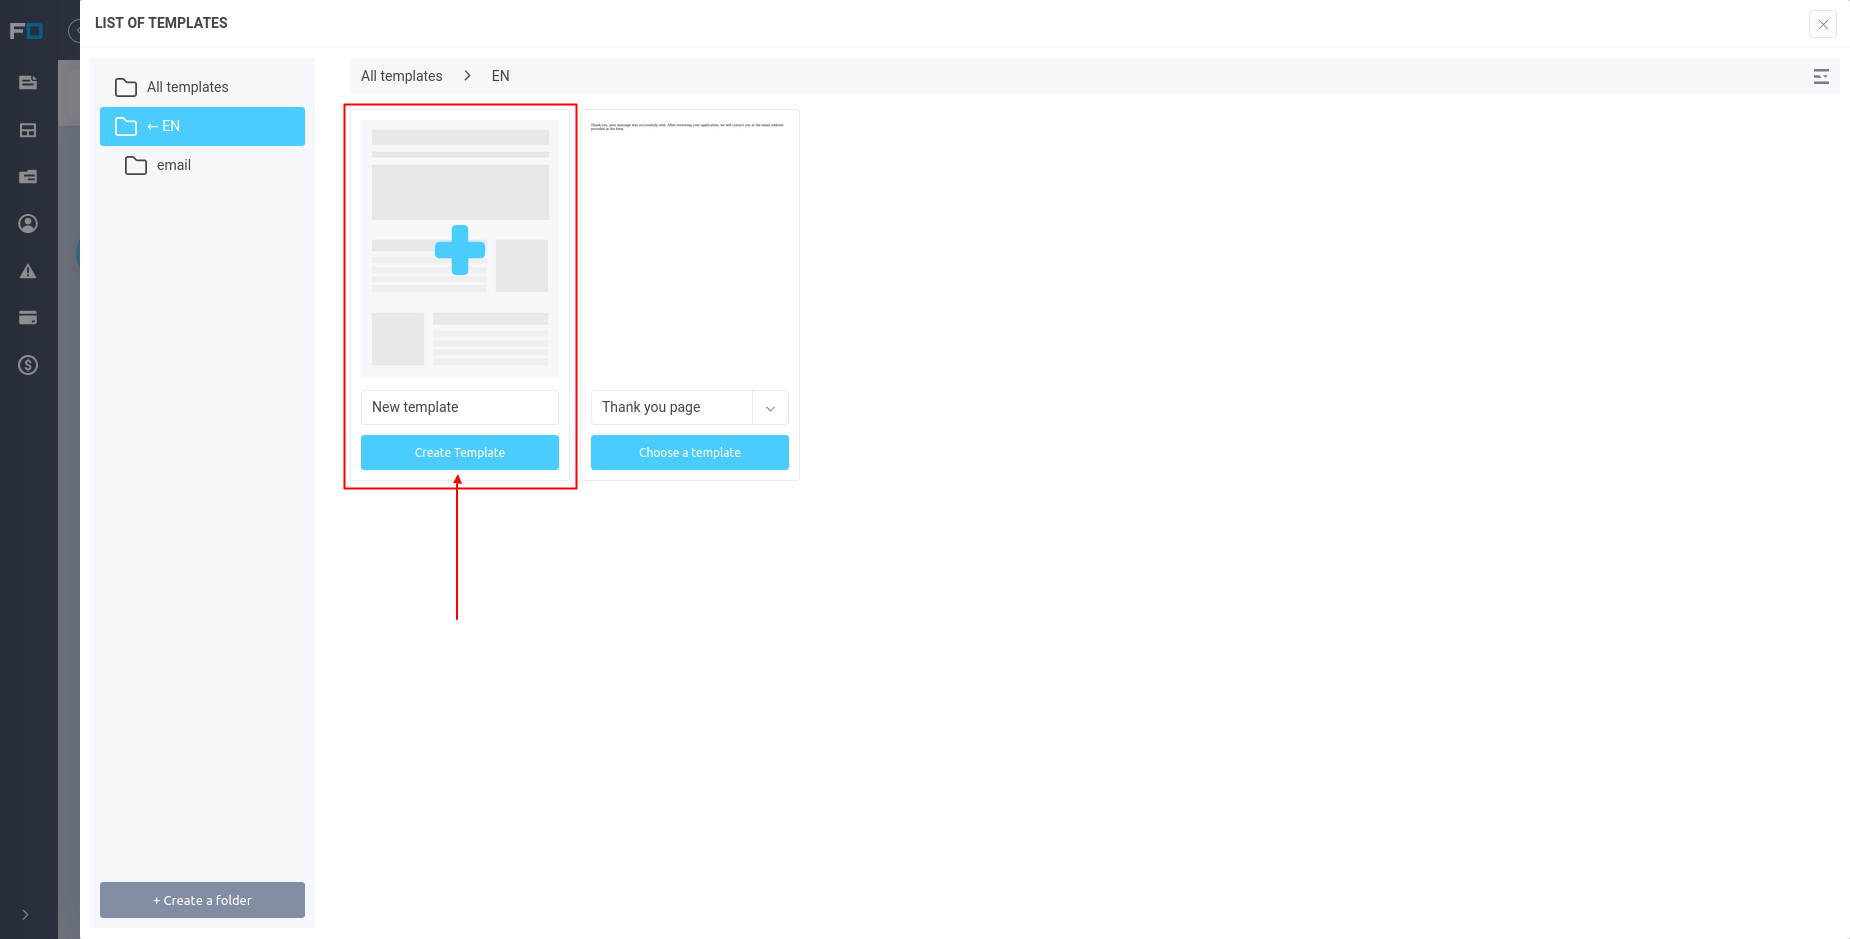
You can choose any existing template or create a new one. To do this, click on the "Create template" button. A window will open in front of you, where you can choose which editor to use to create the template:
- Block editor
- Simplified editor
- HTML editor
Once the template is created, you need to click on the "Choose a template" button.
Customize different results depending on the answers in the quiz
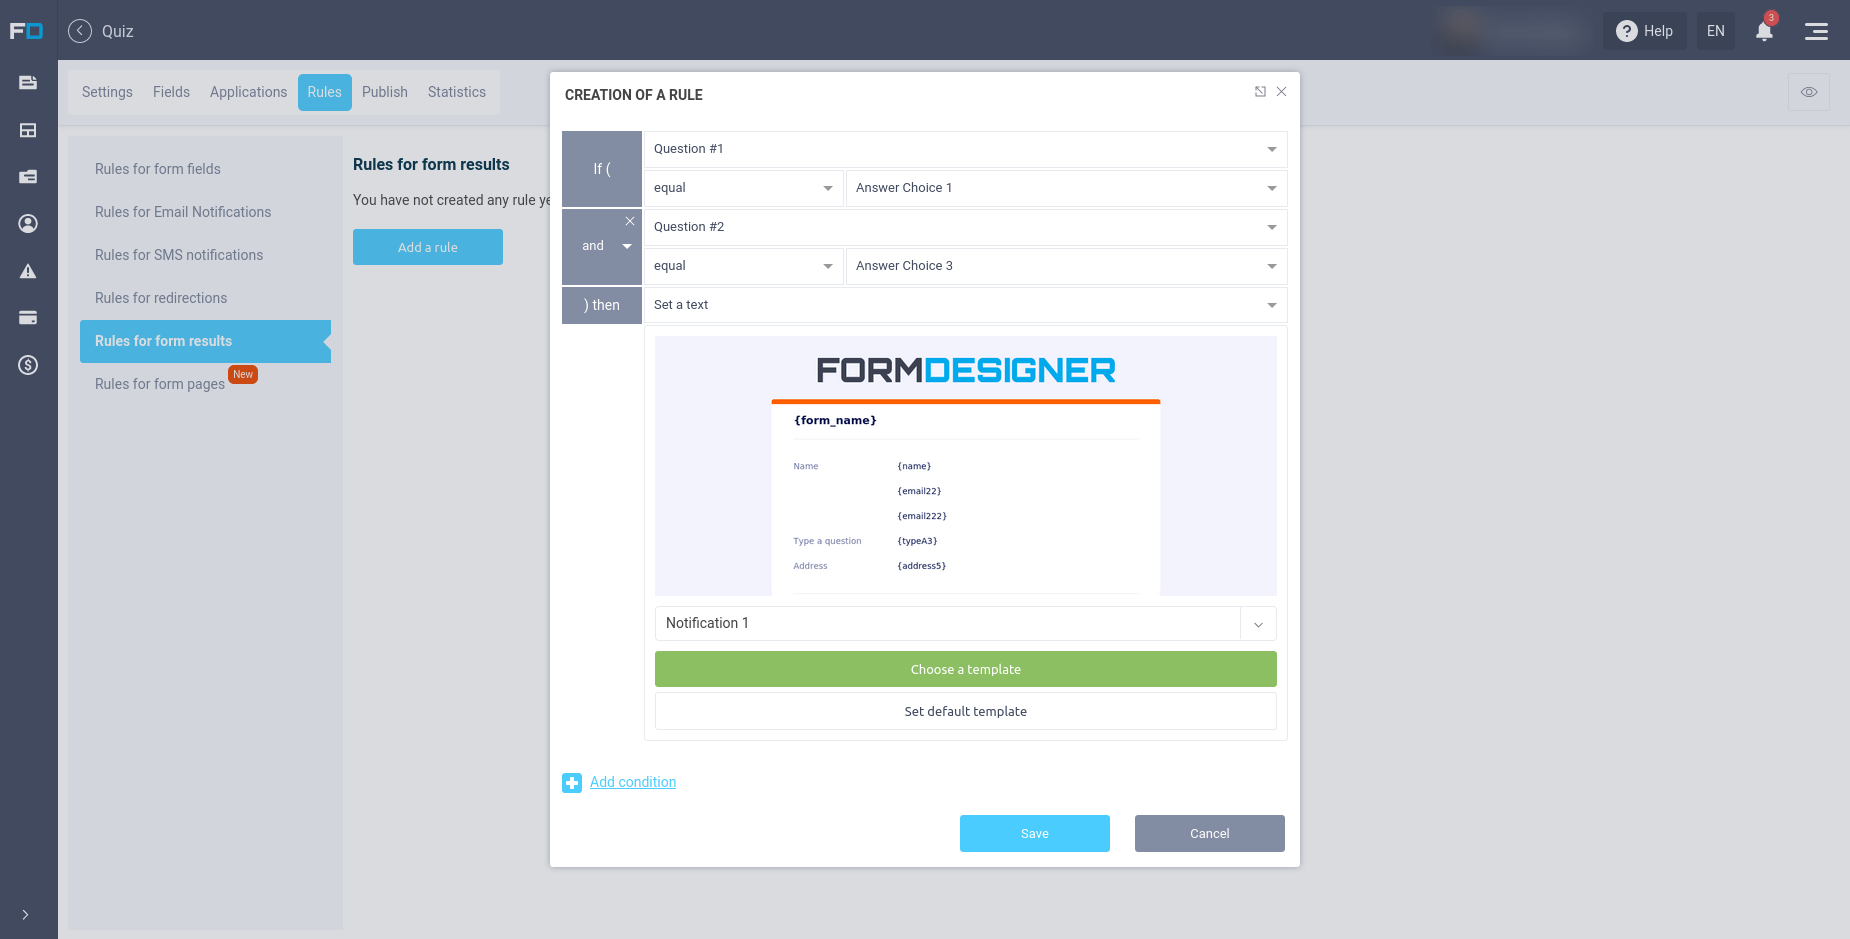
Very often, when developing a quiz, there is a need to display different test results depending on the answers to the questions. You can easily customize the display of different results by going to the "Rules" tab. On this page, select "Rules for form results" from the menu on the left:
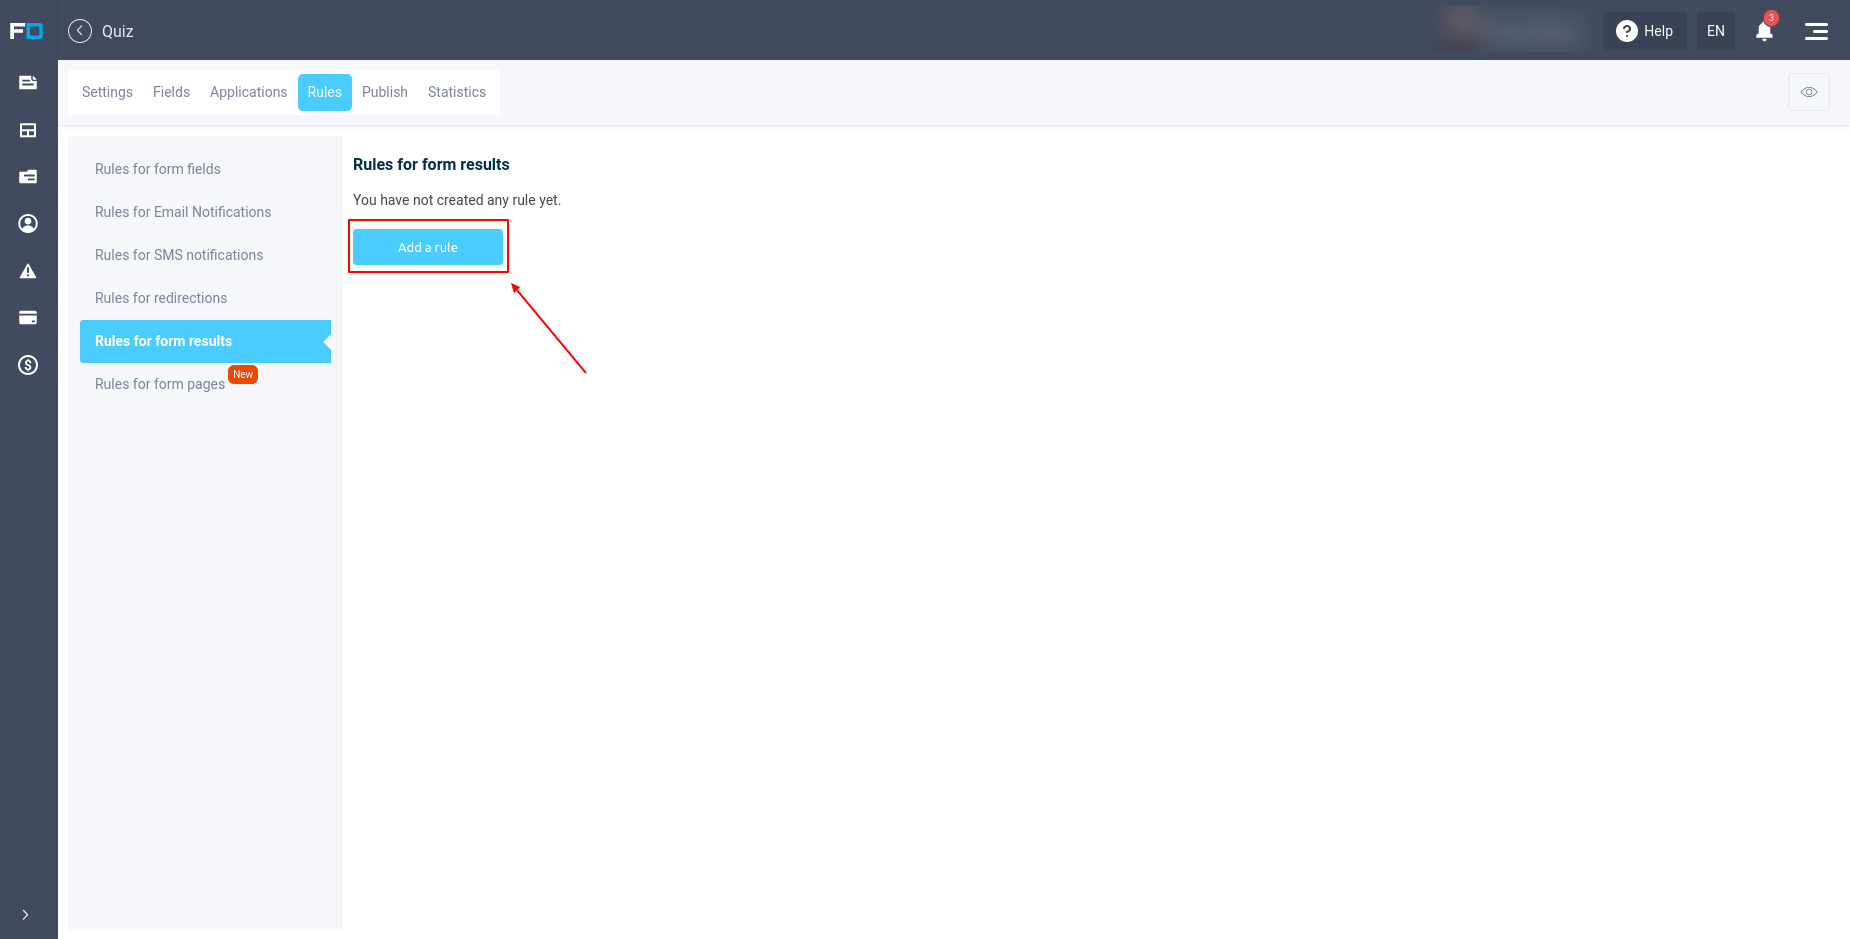
To add a new rule, you should click on the "Add a rule" button, after which a window will open where we can customize which template to display, depending on the answers to the questions:
You can learn more about configuring logical rules here.
Code for embedding the quiz on the site
In order to place the quiz on your site, you need to go to the "Publish" section:
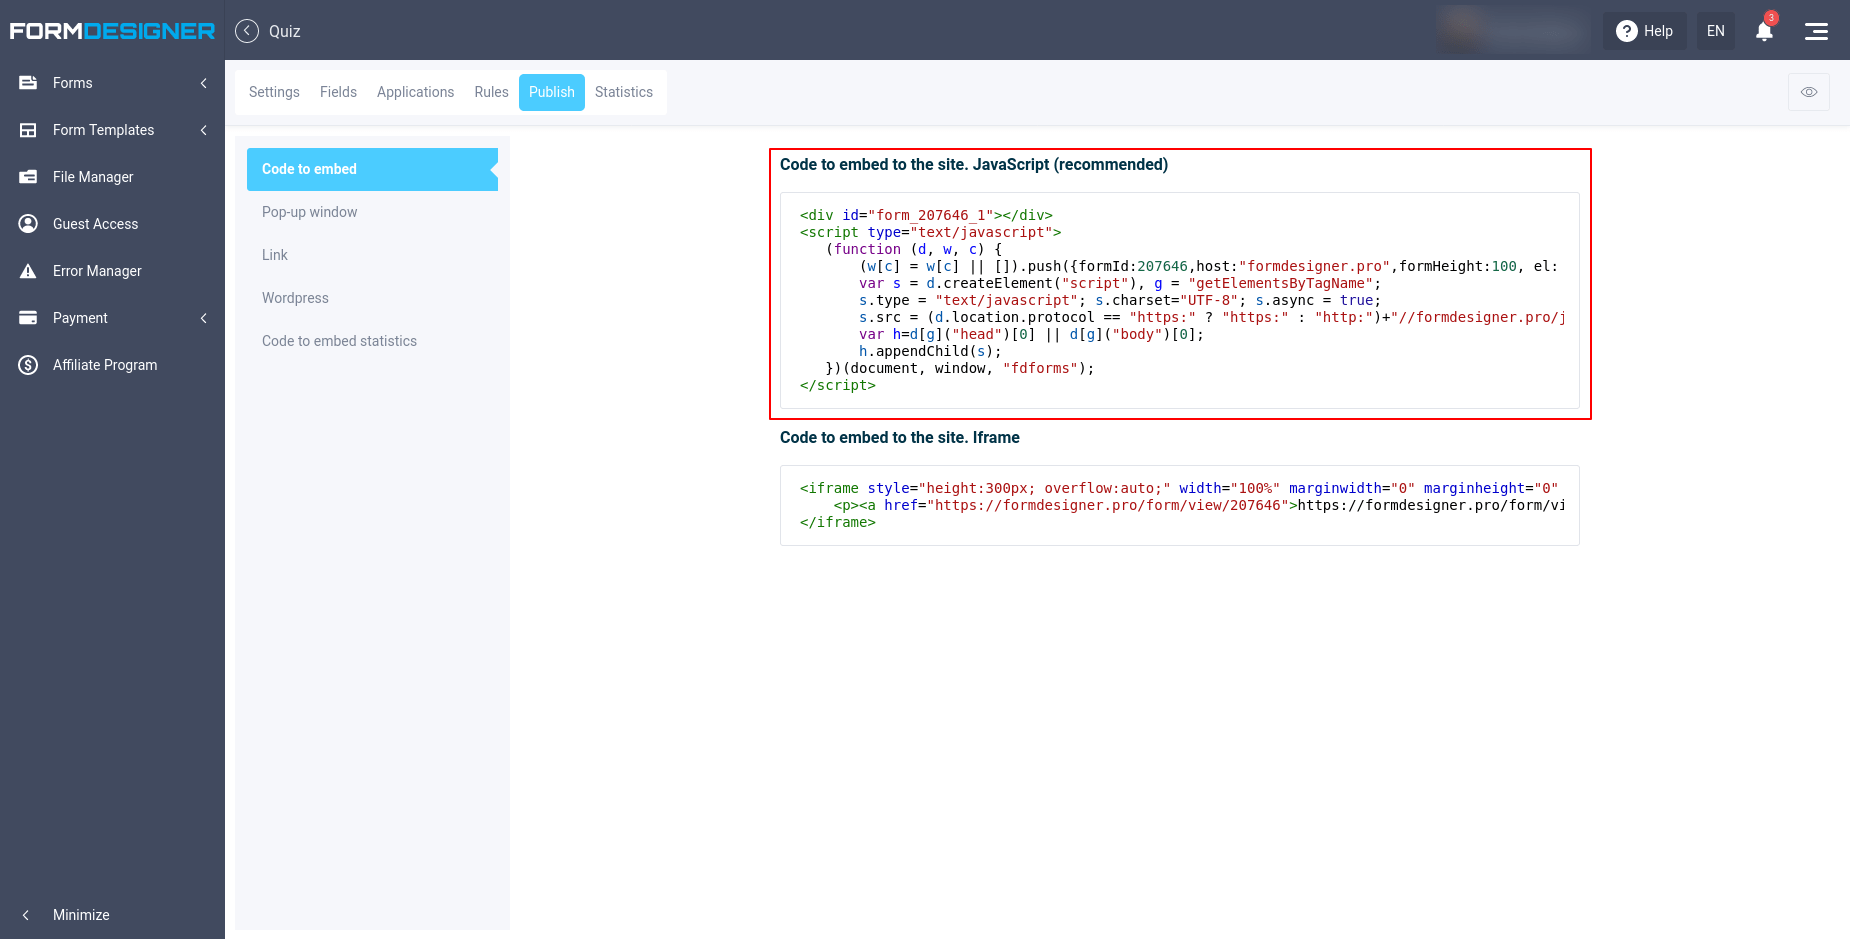
We recommend using the javascript code of the form to place the quiz on your site. Just copy the ready-made quiz code and paste it in the right place on your site.
There is also an option to open a quiz in a pop-up window or via a direct link on our site. To do this, select the appropriate item in the menu on the left.
Submission processing
Answers to all quiz questions are saved in our CRM system and displayed in the "Statistics" tab:
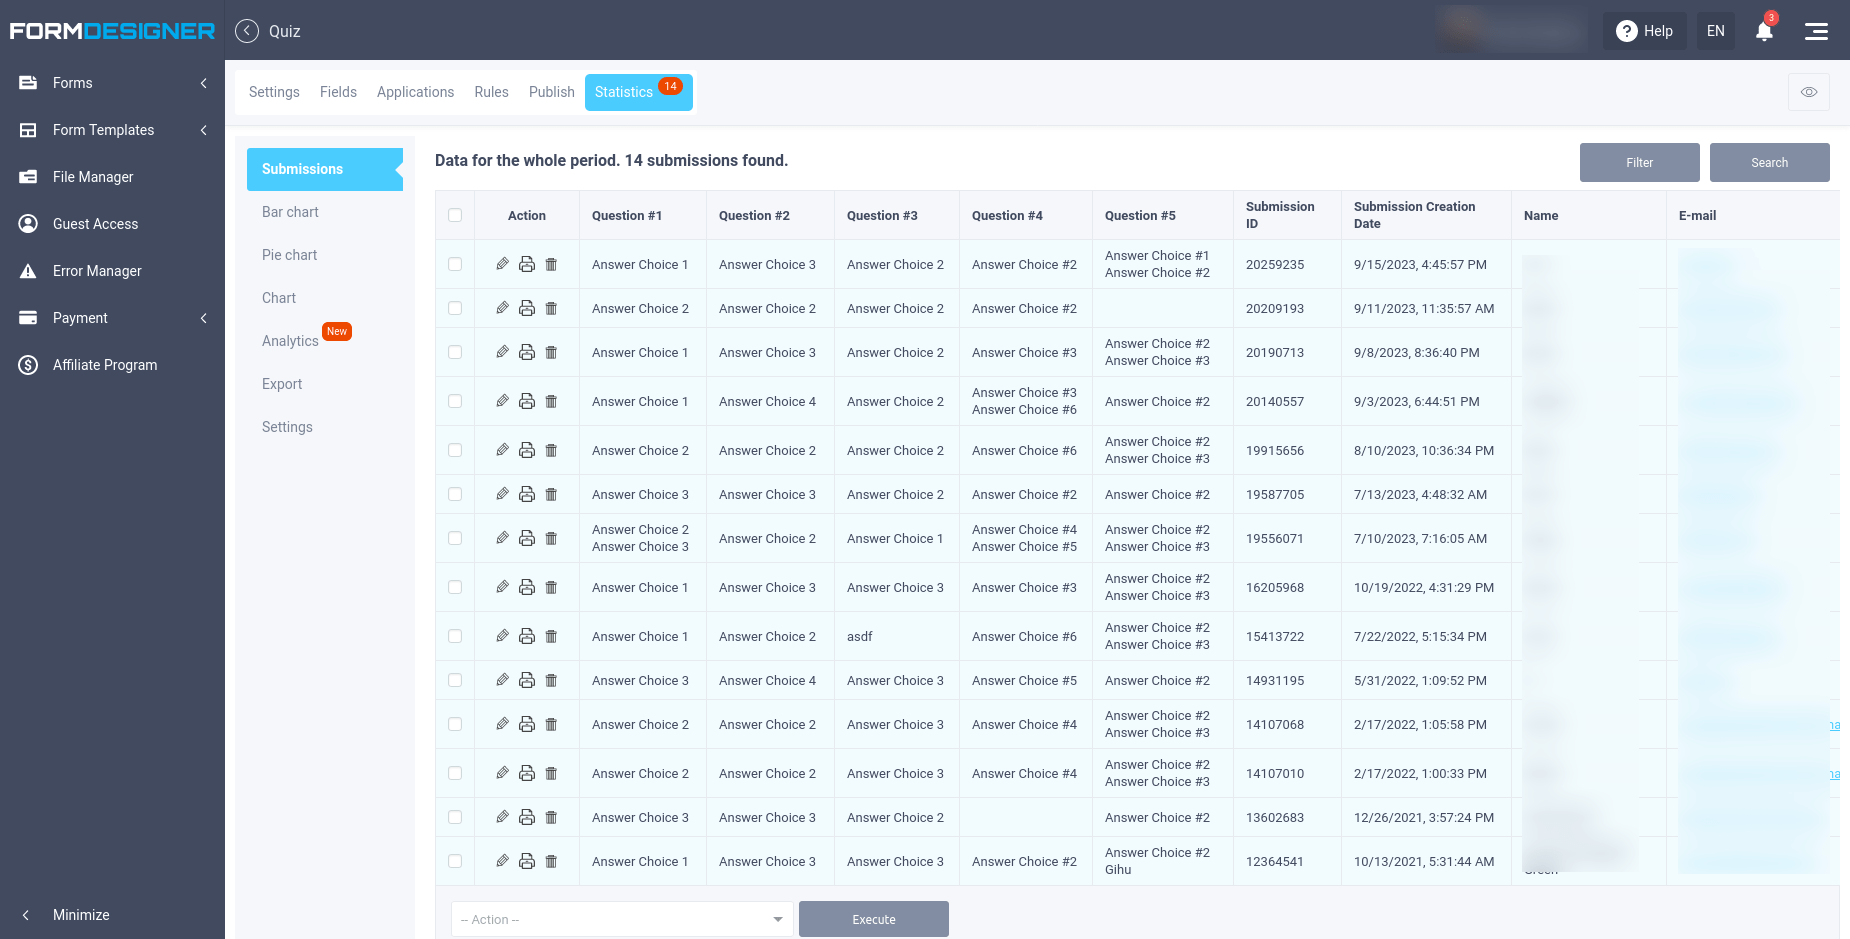
By default, the "Submissions" section is opened, where all responses for each request are displayed. Above the table you can filter requests for a certain period of time or search by specified parameters.
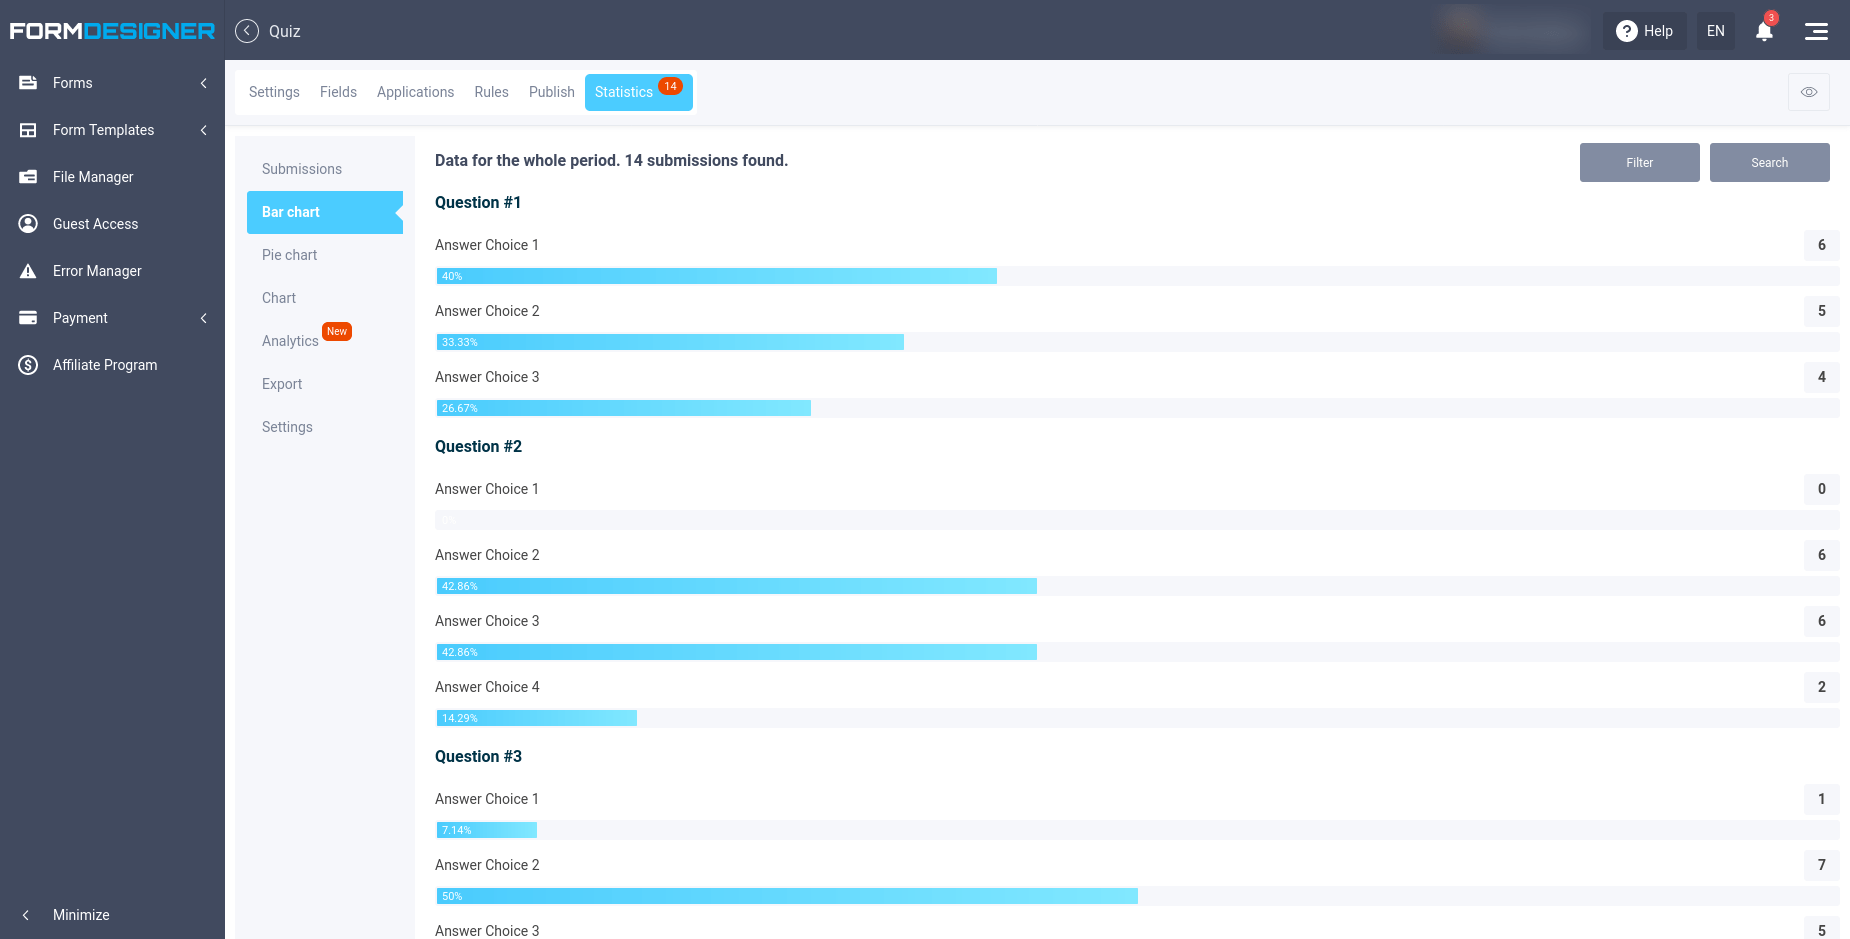
In the Bar Chart and Pie Chart section, we can see what percentage of users gave an answer to a particular question:
In the Analytics section, we can see the entire quiz funnel and track at which question users most often stopped going through the quiz:
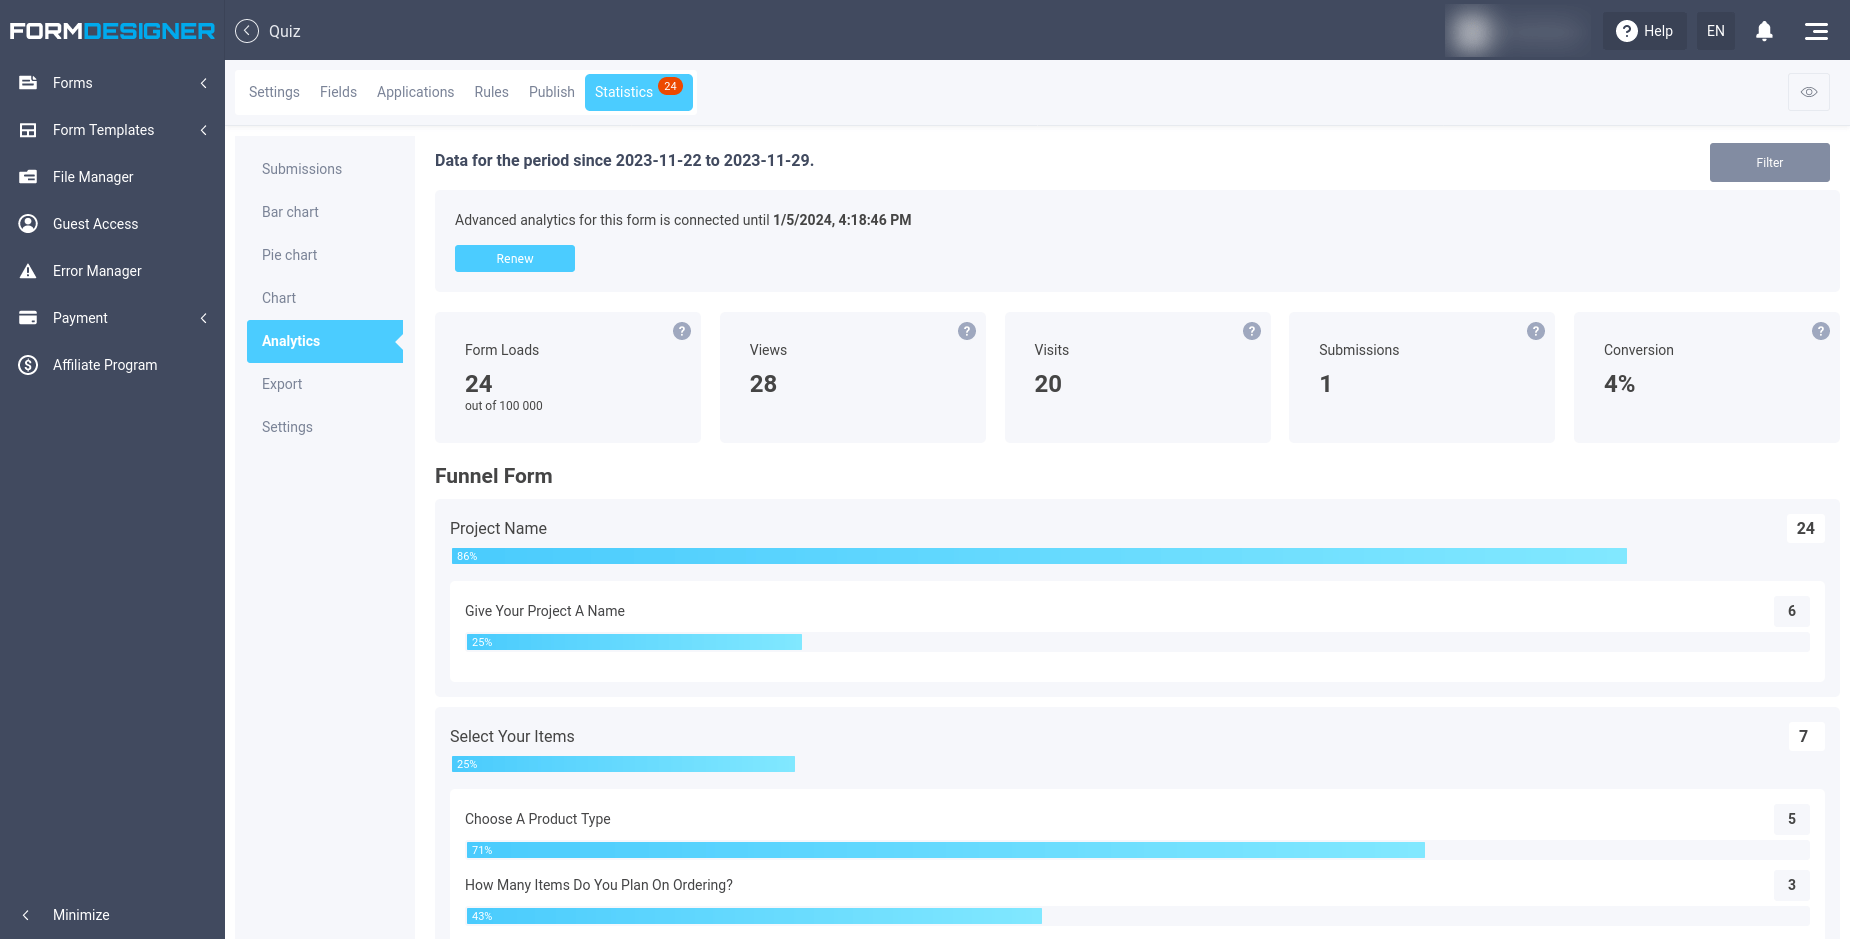
Knowing this, we can identify weaknesses in the quiz and redesign the questions to maximize conversions.
Just like that, you can create a quiz for your website and increase the conversion from visitors to submissions several times over!
High conversions! If something is not clear, leave your comments below.