Let's look at an example of setting conditions for fields. The user should be offered a choice of real estate actions. Depending on the selected item, the necessary fields will be displayed. The diagram shows: if the user selected "Rental property" or "Buying real estate" or "Real estate for sale", then the next step will be to select the property category: secondary market apartment, new building, and detached house.
Under the condition that "Rental property" or "Buying real estate"" is selected and in the next step: "Secondary market apartment" or "New building", the user will be offered a block with the choice of the number of floors of the property and a block with the number of rooms. After the user will need to fill in their data in the fields: "Name", "Contact phone number" and "E-mail'.
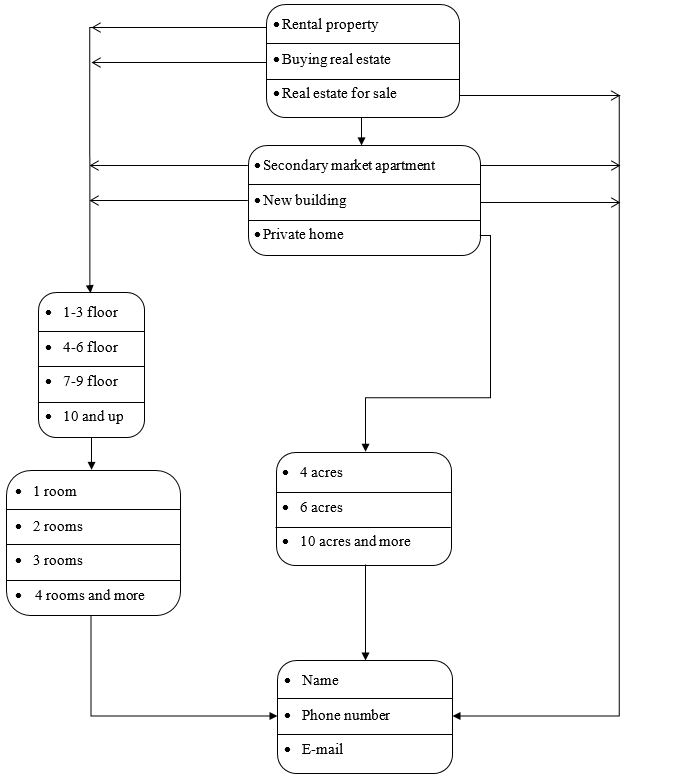
If the user selected "For Sale" and "Secondary market apartment" or "New building", he will also get to the block with contact information. And if the user has chosen any option in the first block and the "Detached house" in the second block of options the user will enter the block with the area of the plot and further to the block with the contact data.
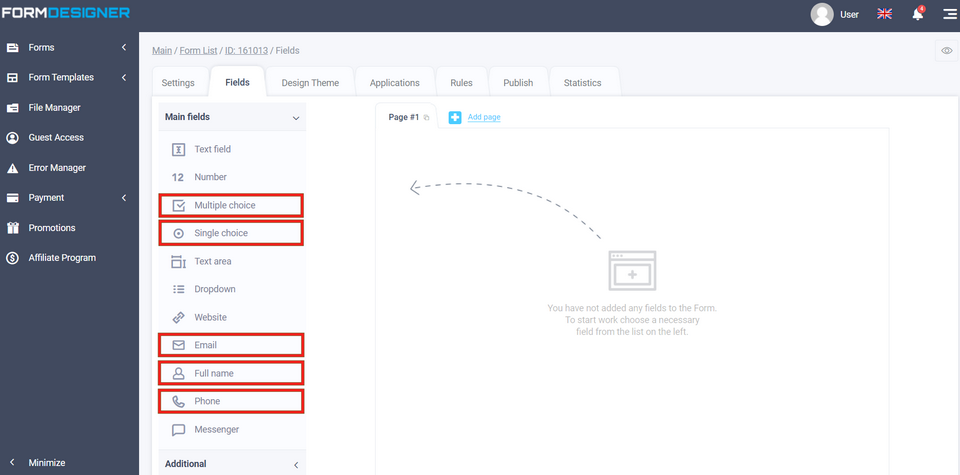
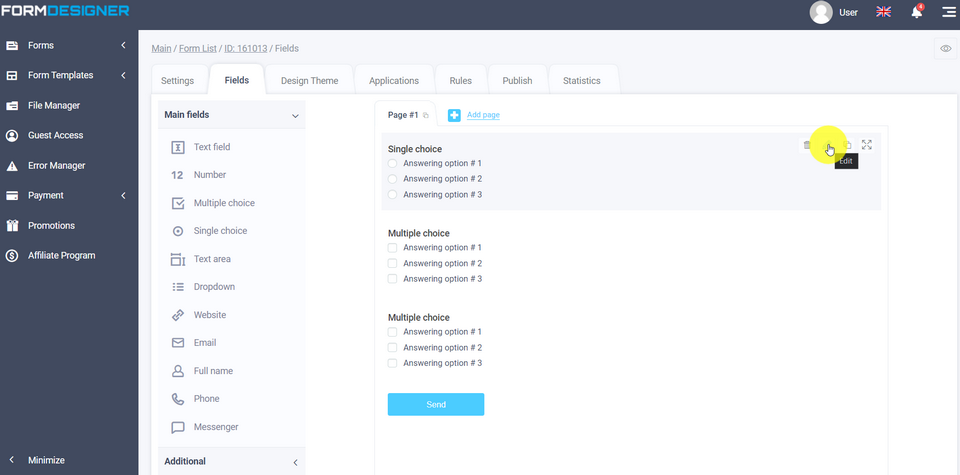
Now in the personal area, let's add elements to the form: "Switchers", "Checkboxes", "Name", "Phone field" and "E-mail field". To do this, click the item you want and it will appear in the Workspace:
Let's change the standard variant names and add the required number by clicking on the edit icon:
When you've added your answer choices, fields for entering your name, contact number, and email address, go to the "Rules for Form Fields" tab in the "Logic" section.
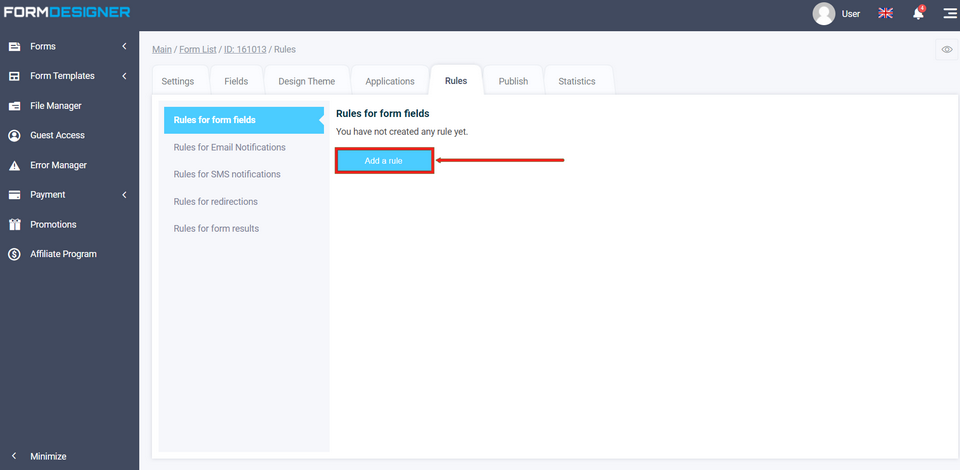
At this point we don't have any rules, so after clicking the "Add Rule" button, the following window will appear:
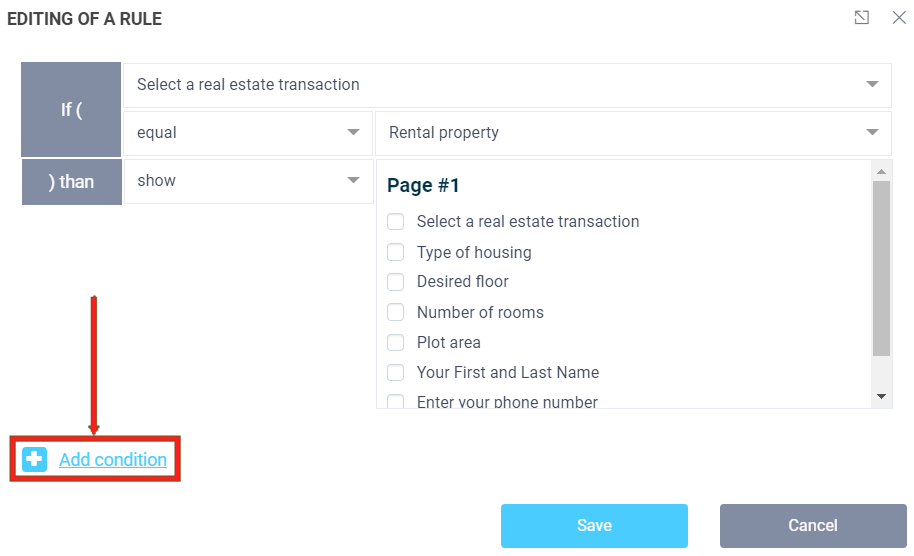
We need to select a condition so that when we select an answer choice using the Real Estate Operation switch, the correct checkboxes are shown. To add an additional logical condition "AND", "OR", you need to click the icon "+Add Condition":
.
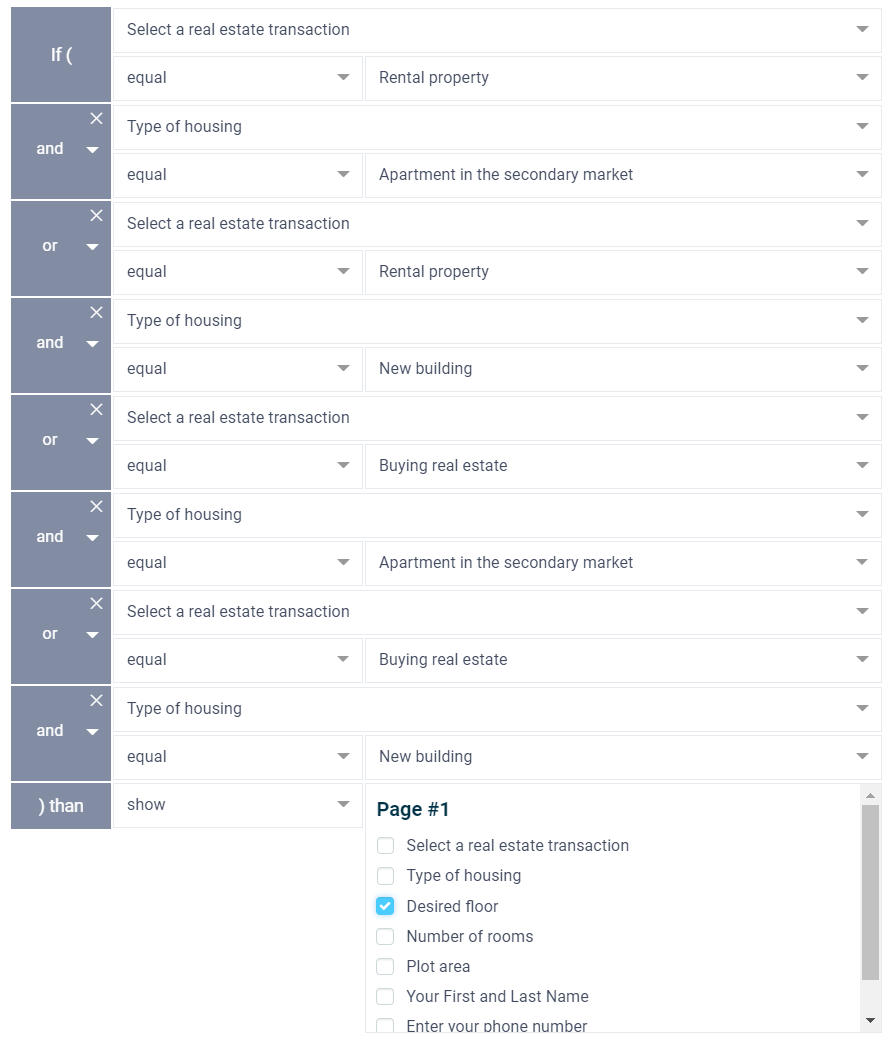
It's worth noting here that if we're setting conditions from different blocks, we should use the logical "AND". And for grouping conditions, we should use a logical OR.
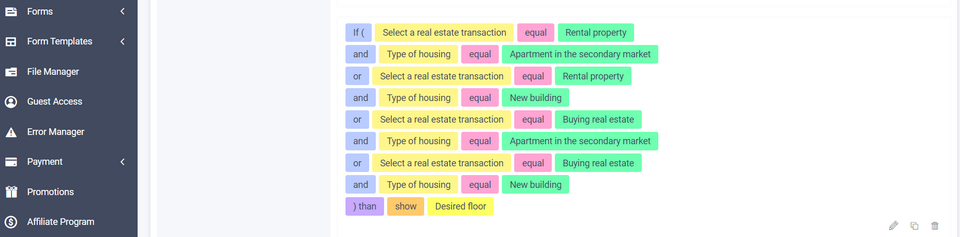
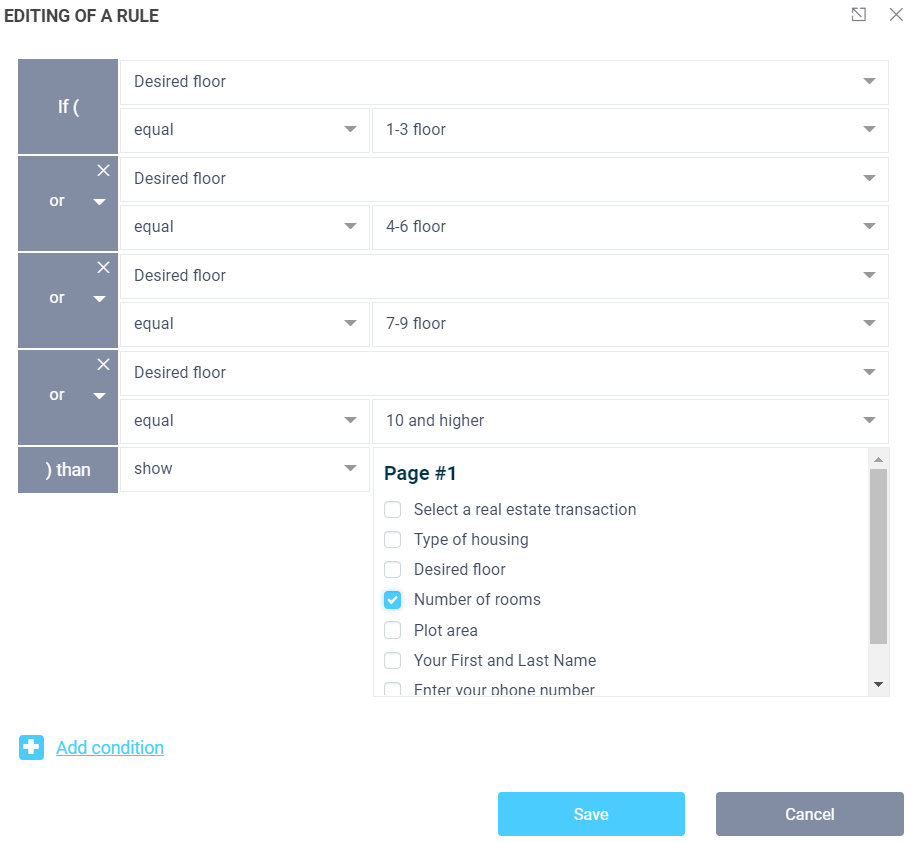
After adding the conditions for displaying the "Desired Floor" block you should press the "Save" button. Then you will get this kind of conditions:
According to the scheme, let's add the conditions for displaying the housing type checkboxes:
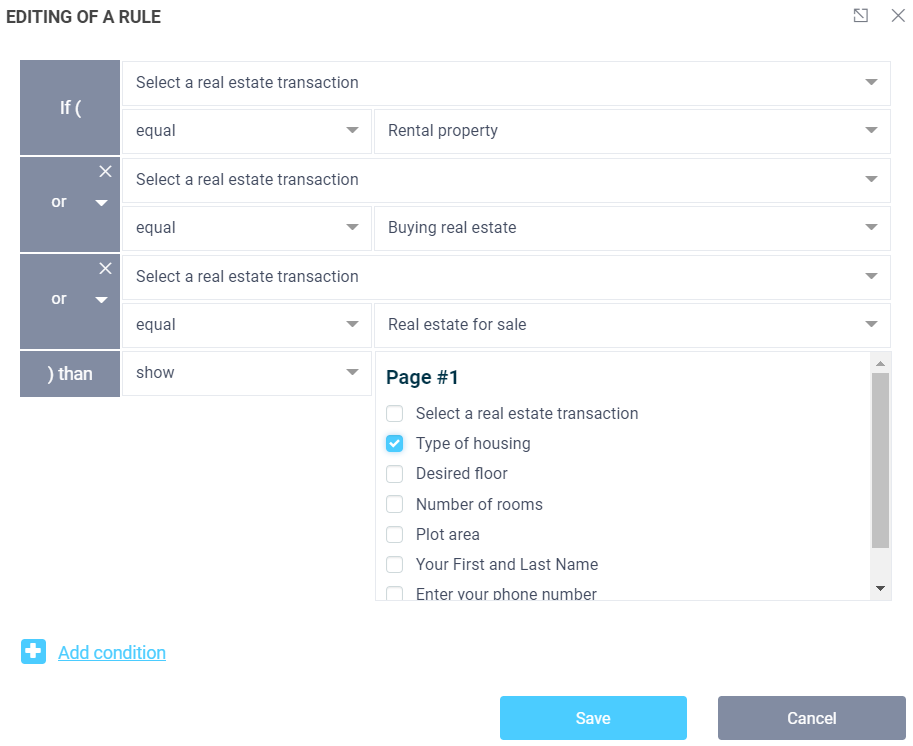
Get the following rule, using a logical OR that when you select the "Real Estate Transaction" switch option, show a selection of "Housing Type" checkbox response options
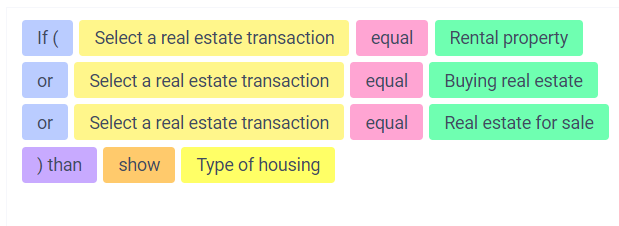
Now let's set the rules for the "Desired Floor" block:
If the user selects one of the house floor options, the next step - "Number of rooms" - should be displayed, according to the diagram. Save the added rule by clicking the "Save" button:
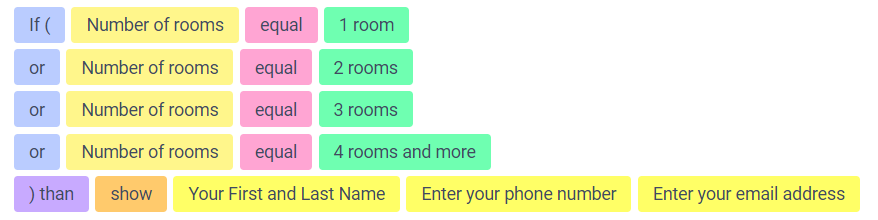
When the user selects the desired option using the checkboxes in the "Number of rooms" block, they should be directed to the block to get contact information. Therefore you should add a display rule for this condition:
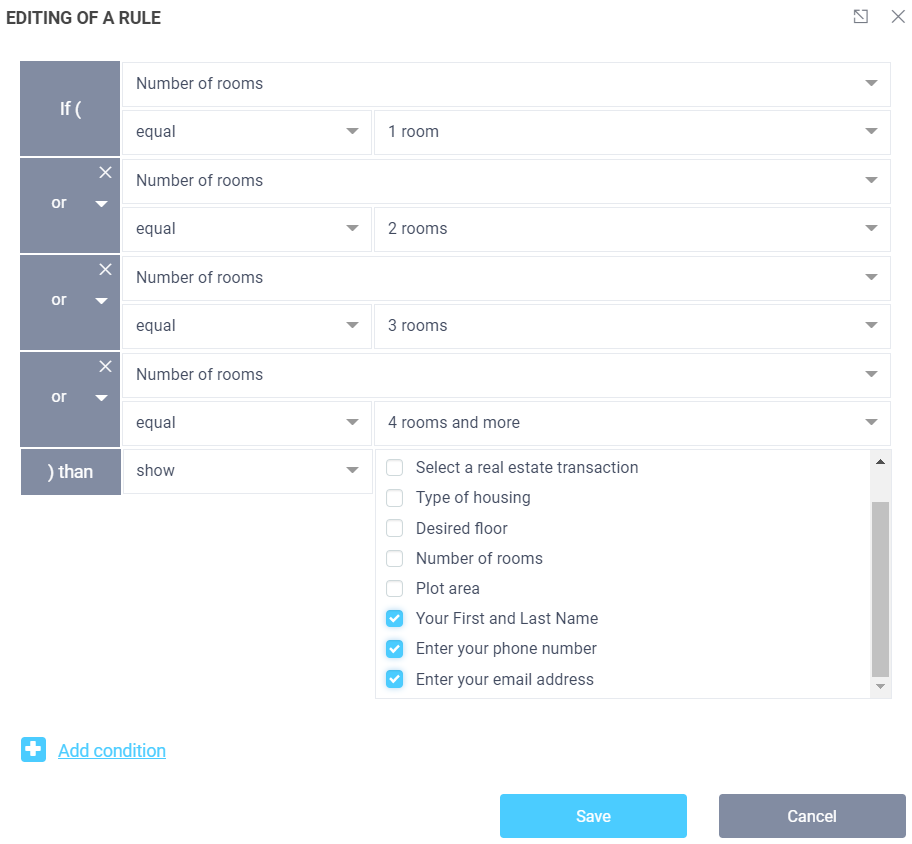
As a result, the added rule will look like this:
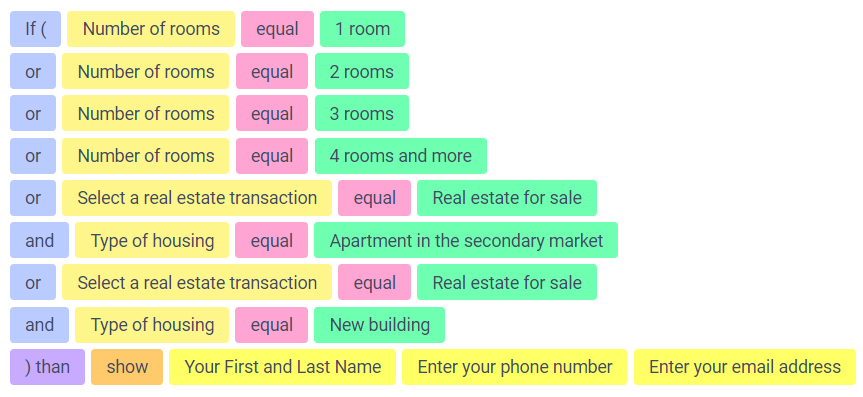
Now according to the scheme let's add more conditions when choosing the answer choices "For sale" from the "Real estate transaction" block and "Secondary market apartment" and "Newly built" from the "Property type" block, to display a block with contact information, so we go into editing the rule:
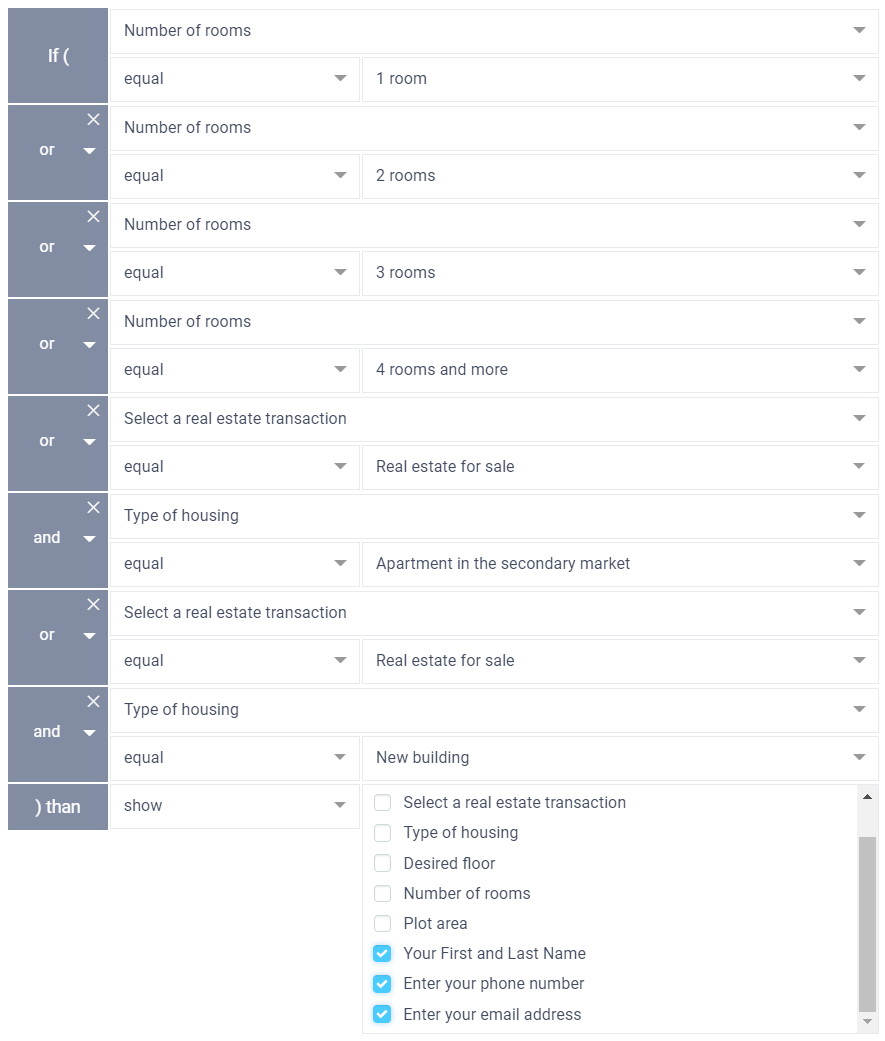
Here we also use the logical "AND" to group different elements (blocks of choices) and the logical "OR" to group combinations of logical "ANDs":
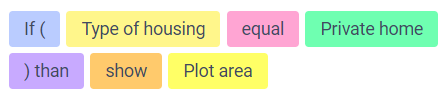
According to the scheme, you still need to create the rules for displaying "Plot Area" when selecting from the "Real Estate Transactions" block answer choices and the "Private House" answer choice from the "Housing Type" block:
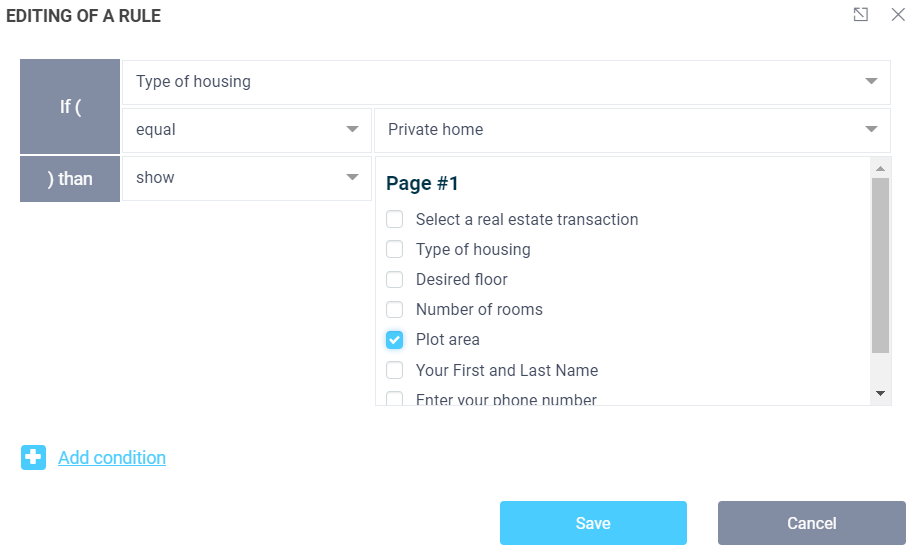
Since we added the "Housing Type" display rule above, hence we are adding a display rule for "Private House":
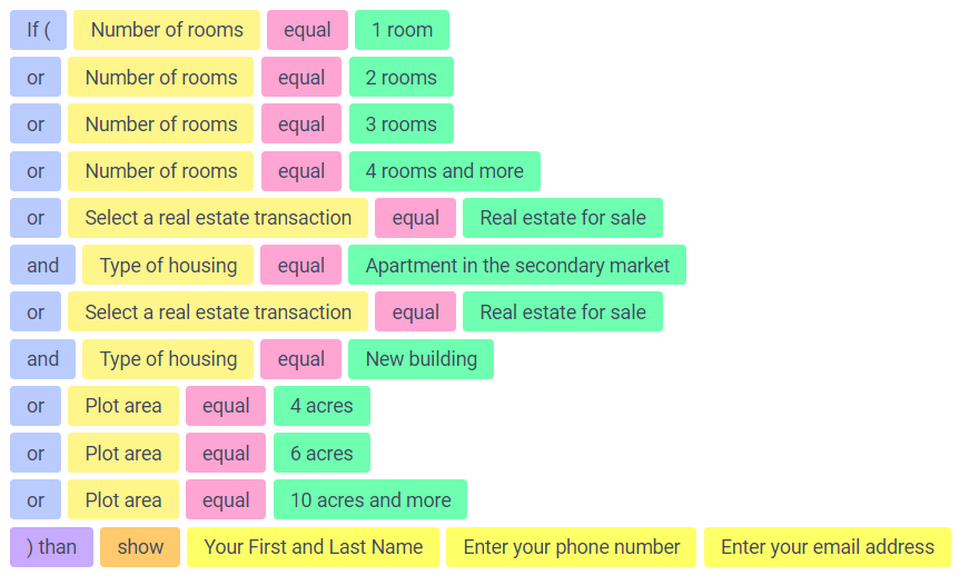
Once you've selected the answer choices from the "Plot Area" block, then add an appropriate condition to get contact information:
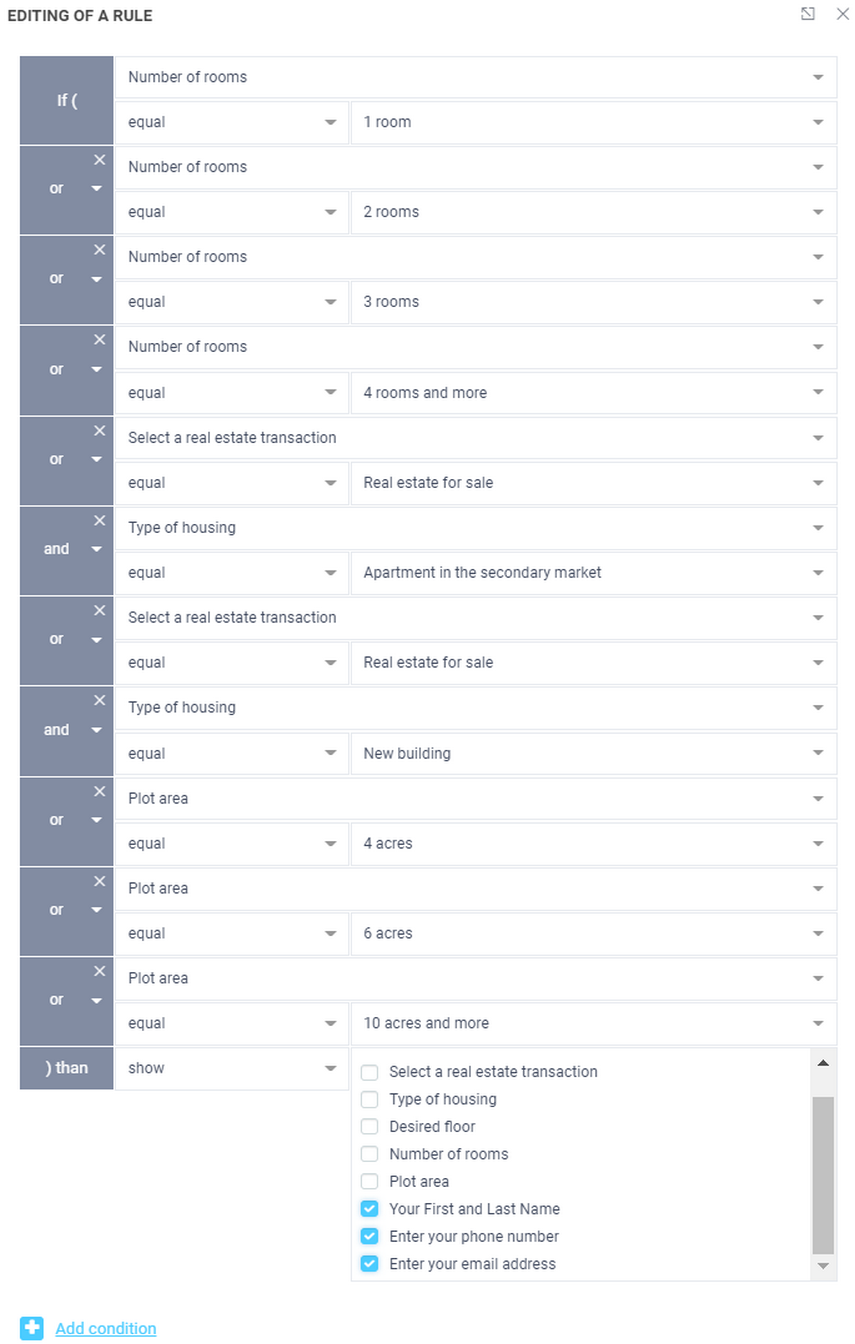
As a result, we'll get the required action and when selecting the "Area of the plot" answer options:
It's worth noting that here we haven't broken the rules for displaying some fields, they don't overlap with other rules. That is, if we made 3 rules and showed blocks with contact information, we wouldn't get the data with the contact information of the user who filled out the form.
Important.
When creating rules for form fields, you should understand that if the condition in the rule is met, the specified action is triggered, for example, the field is shown, but if the condition is not triggered, the opposite action occurs and the field is hidden. So, you don't need to create multiple rules to display the field and a separate rule to hide it.
Also very often users make the mistake of putting the same fields in different rules in the action. This is wrong! Because if one rule works and the action is executed, then the second rule will not work and the opposite action happens. This leads you to think the rules don't work.
To avoid this, you should group these conditions into a single rule with a logical OR and set the action for only one field. This way you achieve a unique action on the field, and it will be either displayed or hidden.