Creation of online testing with calculation of the sum of points and withdrawal of different results.
Hi!
The question often arises how to organize an online survey or testing, where the user will receive the result by submitting the form, depending on which answers he has chosen. Each answer has a certain grade/score. The user, having scored a certain number of points, depending on the gradation, will receive the corresponding result.
In this article we want to tell you how to create an online test with the calculation of the sum of points and the output of the results, in depending on the number of points scored. To do this, we will create an improvised form of testing, where we will consider the following questions:
- Creating and filling out the test form;
- Setting up logical rules for form branching;
- Setting up the scoring formula;
- Configuring the output of test results.
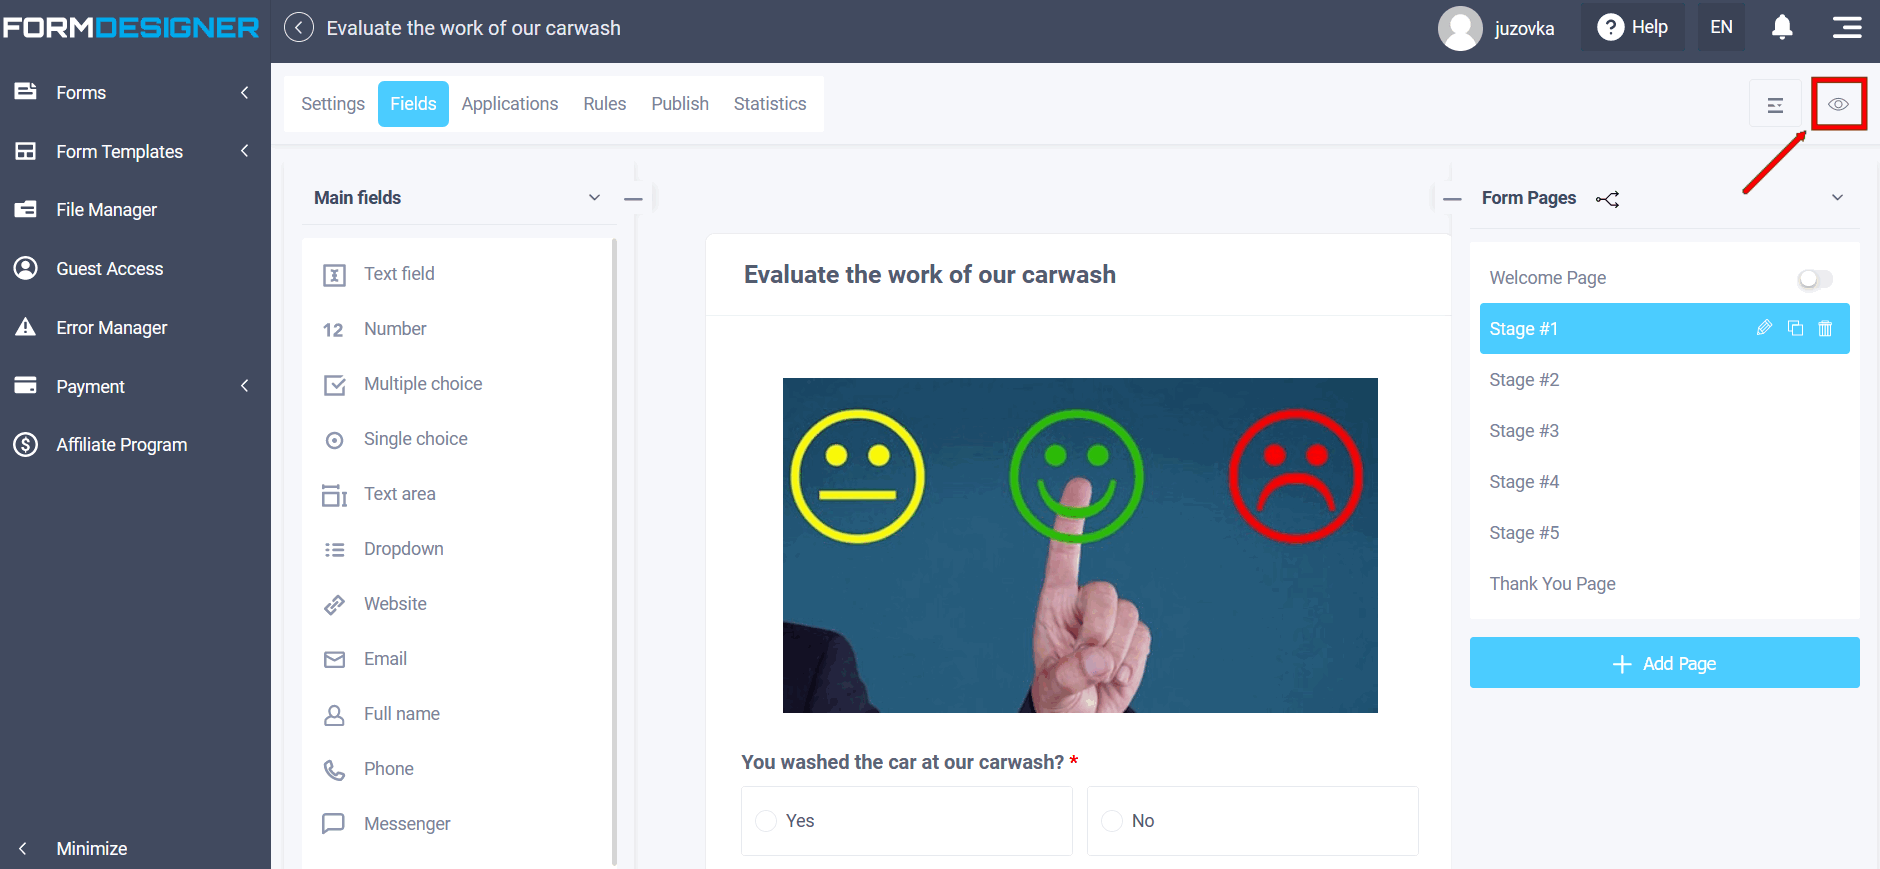
As an example, we will develop a form to assess the quality of the car wash. To do this, we will create a multi-page form where, using logical rules, we will set up a step-by-step output of questions, transition between pages, counting the sum of points and output of test results.
Creating an online testing form
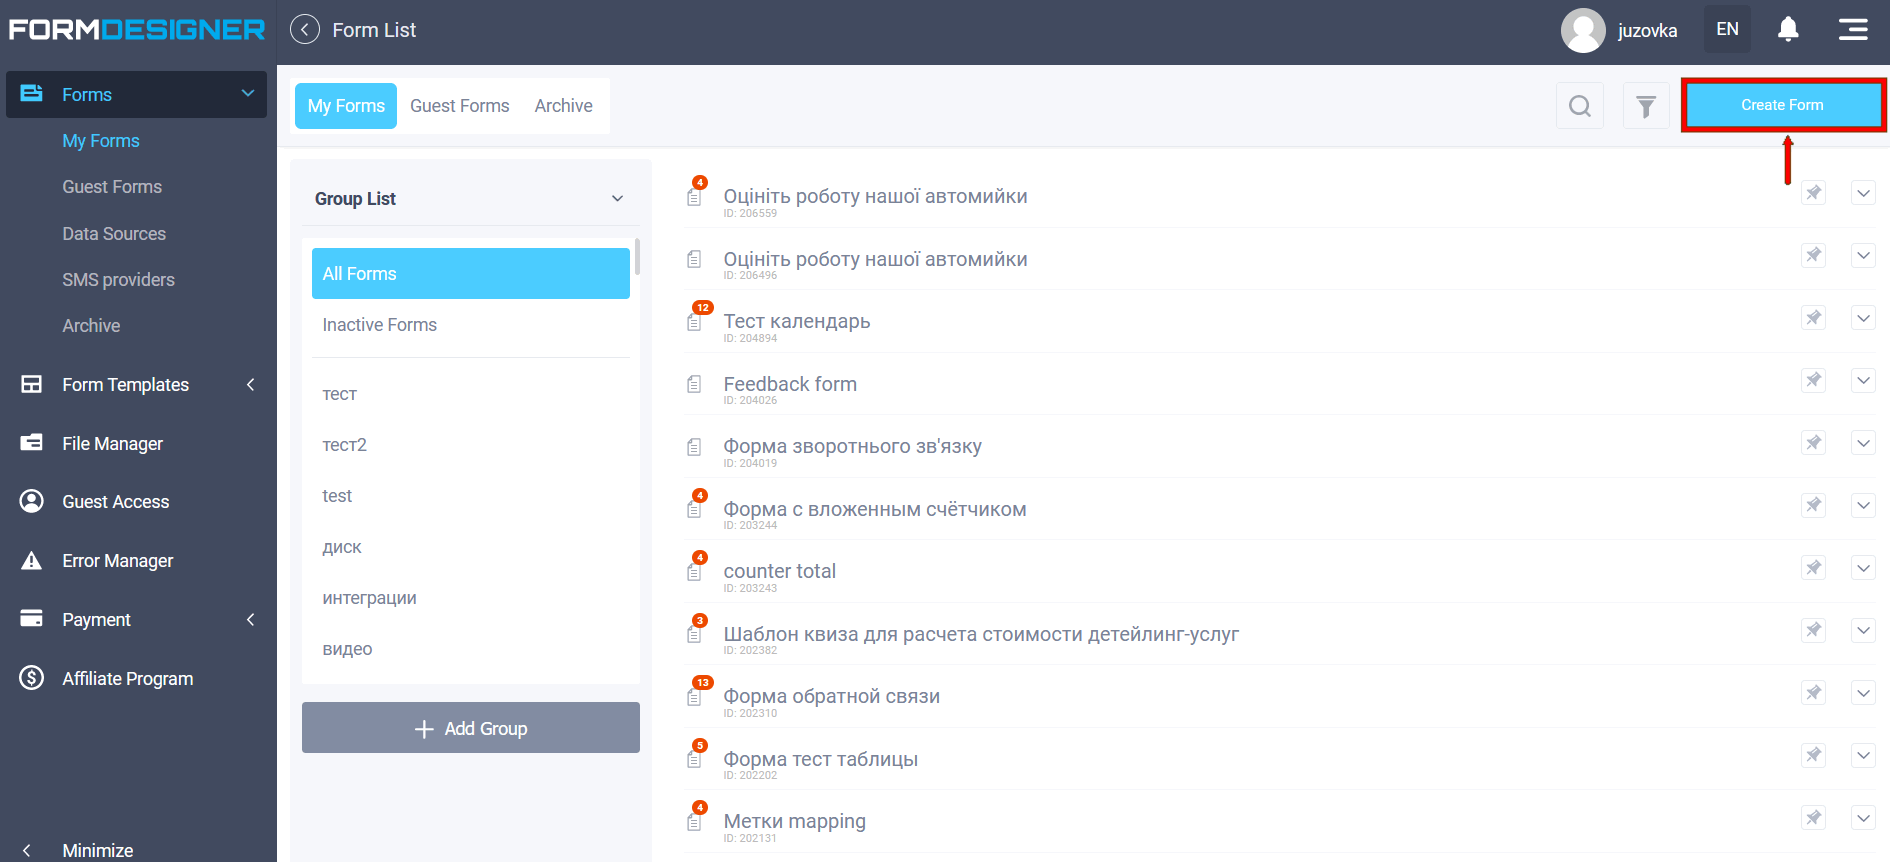
First create a form, to do this, click create form in your personal account:
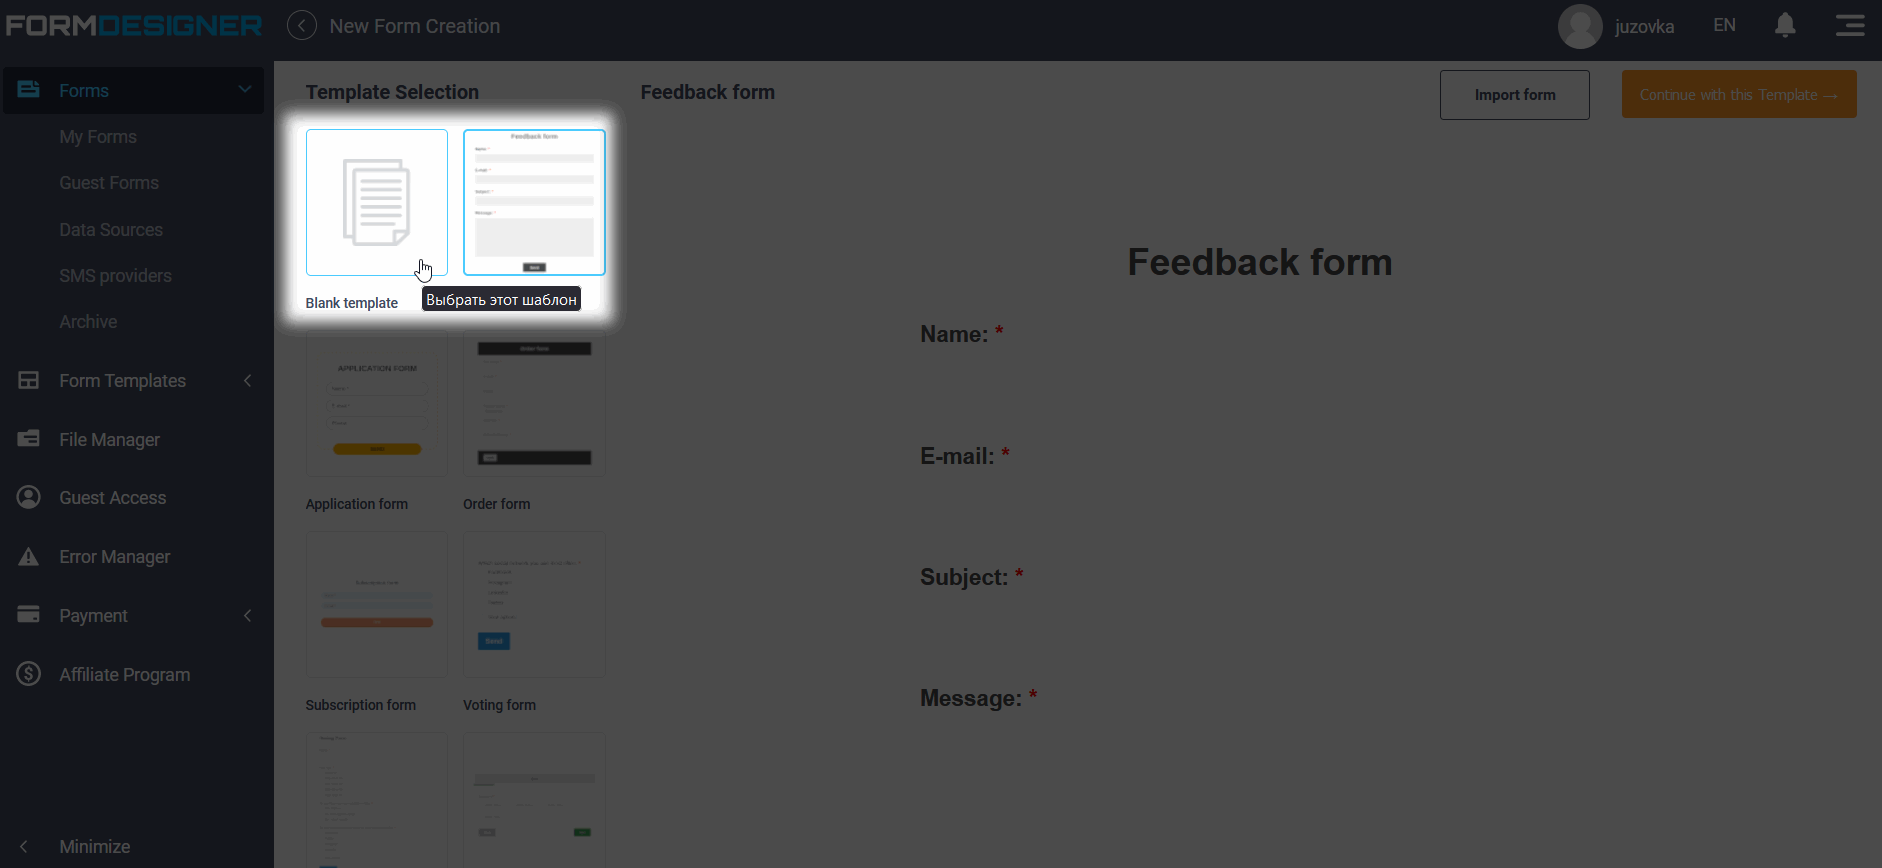
Select “Blank Template” on the left:
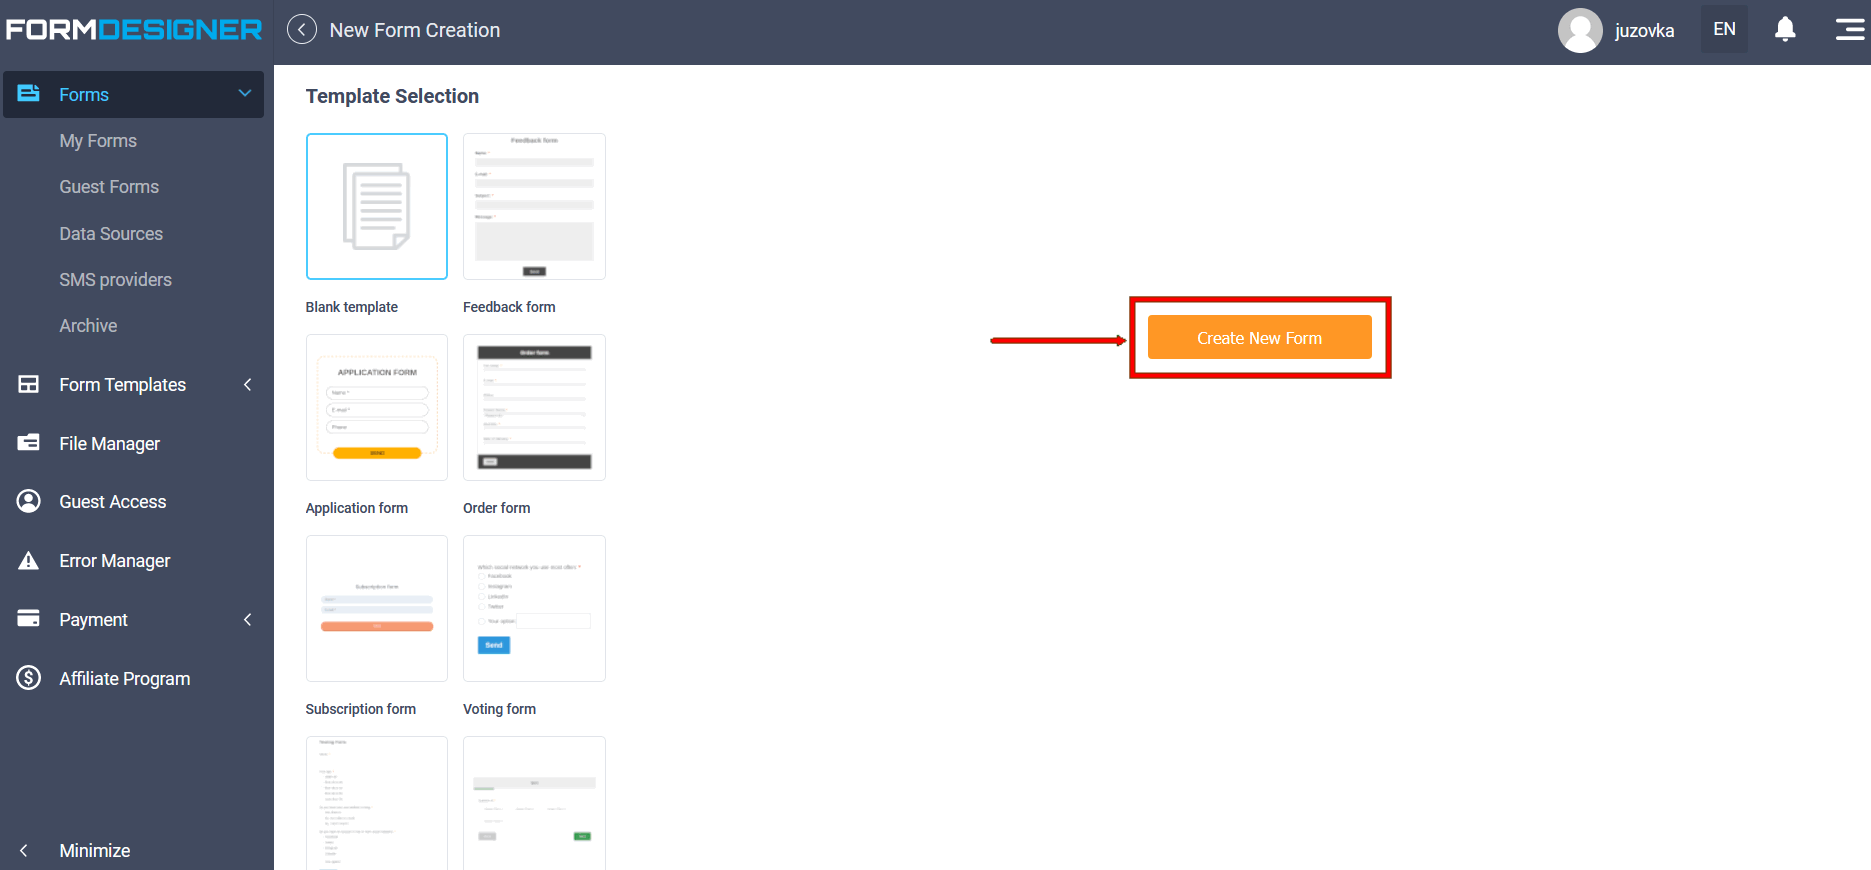
Click the "Create New form" button:
Enter the name of the form and click “Save”:
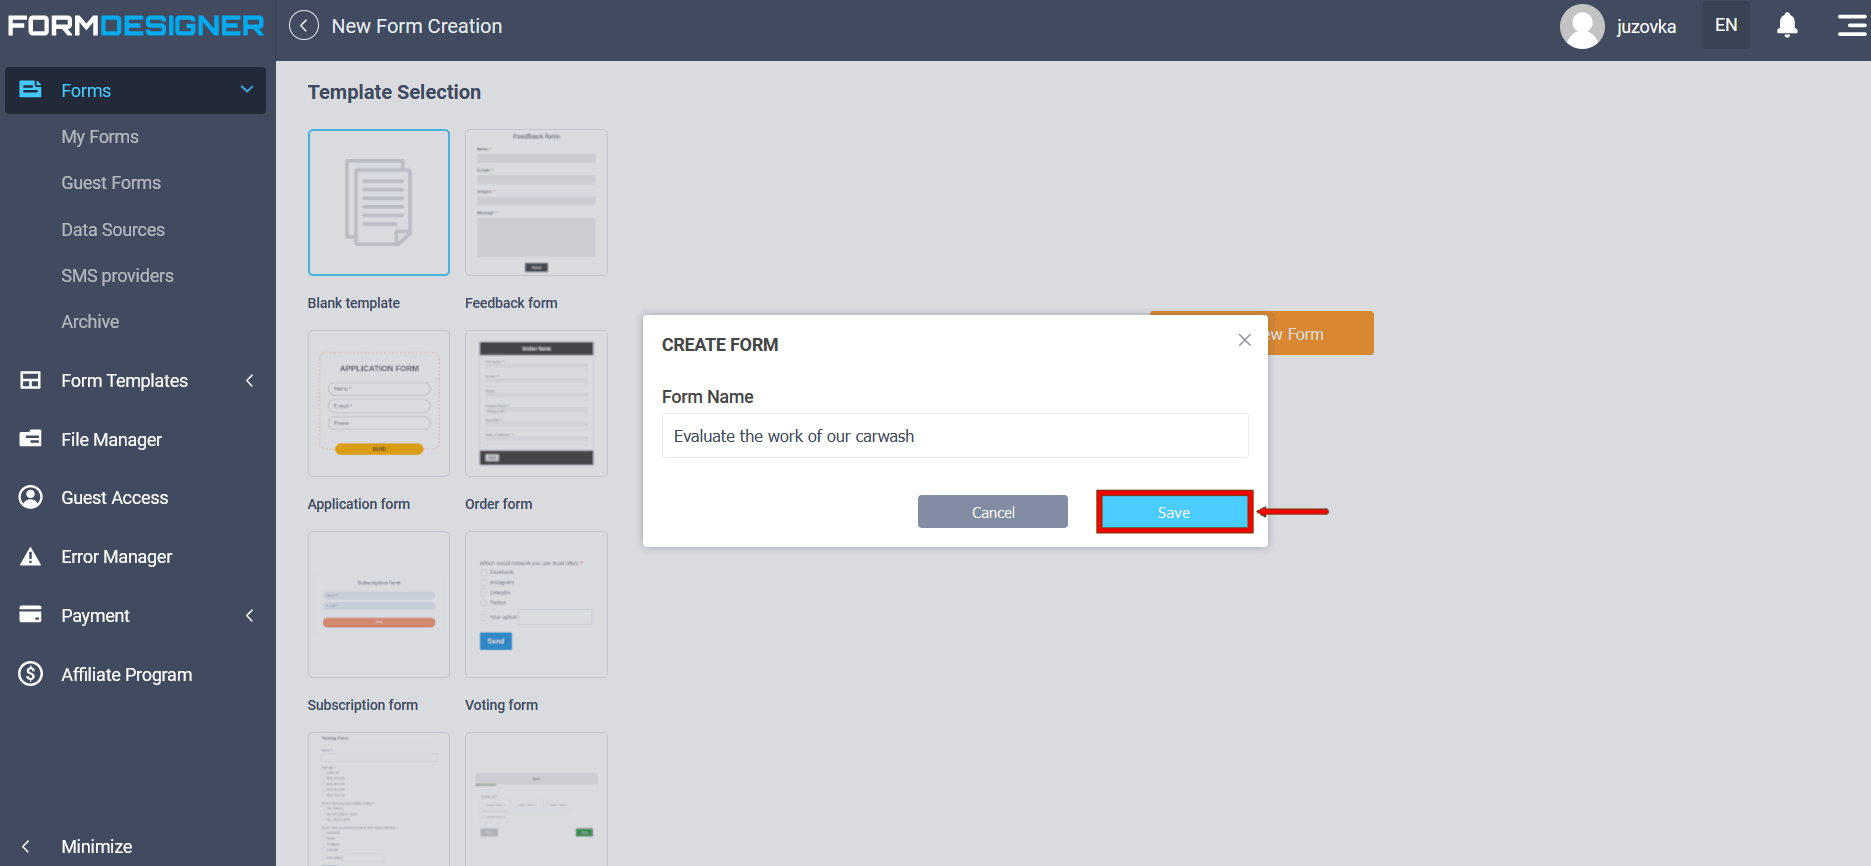
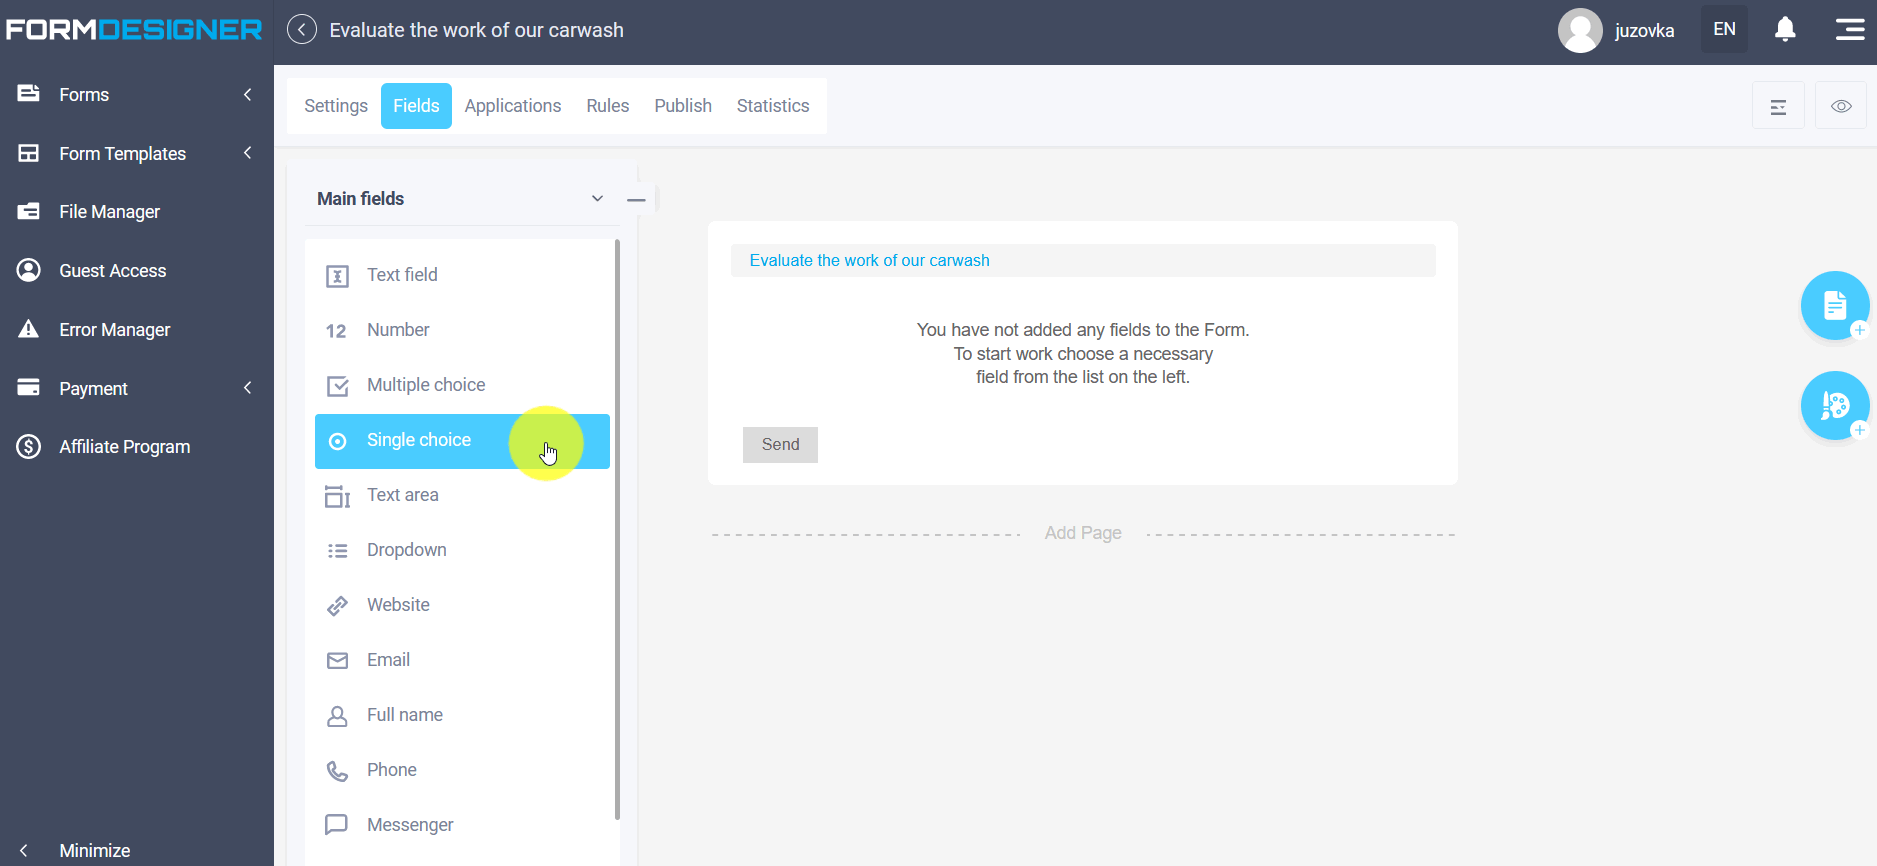
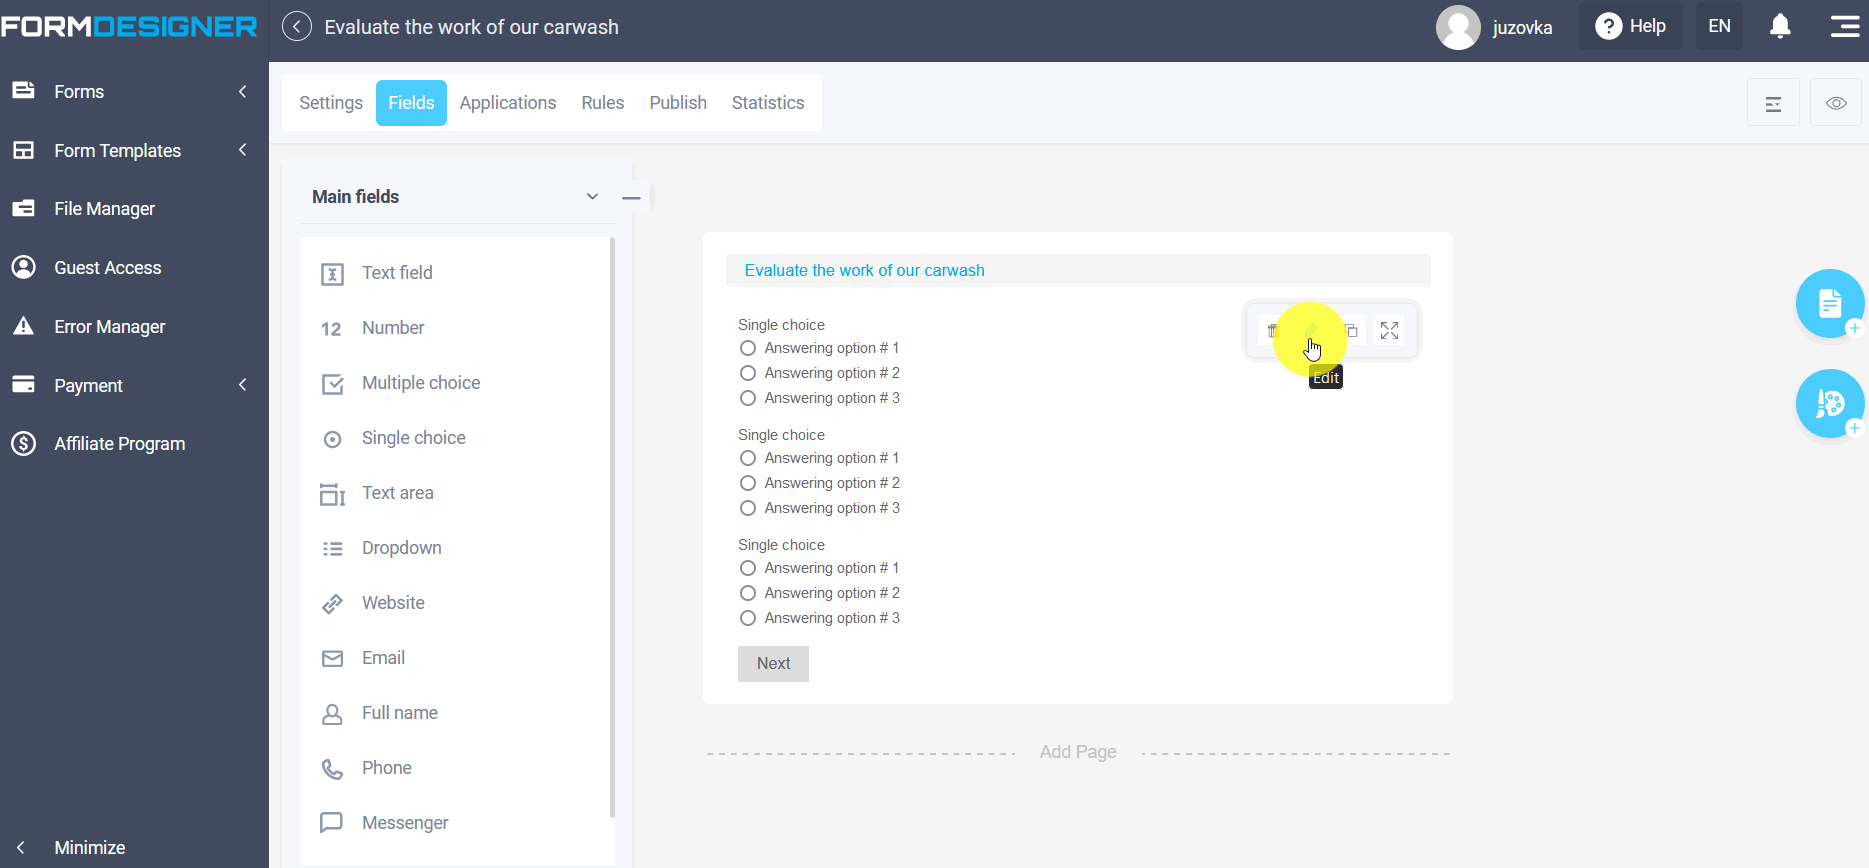
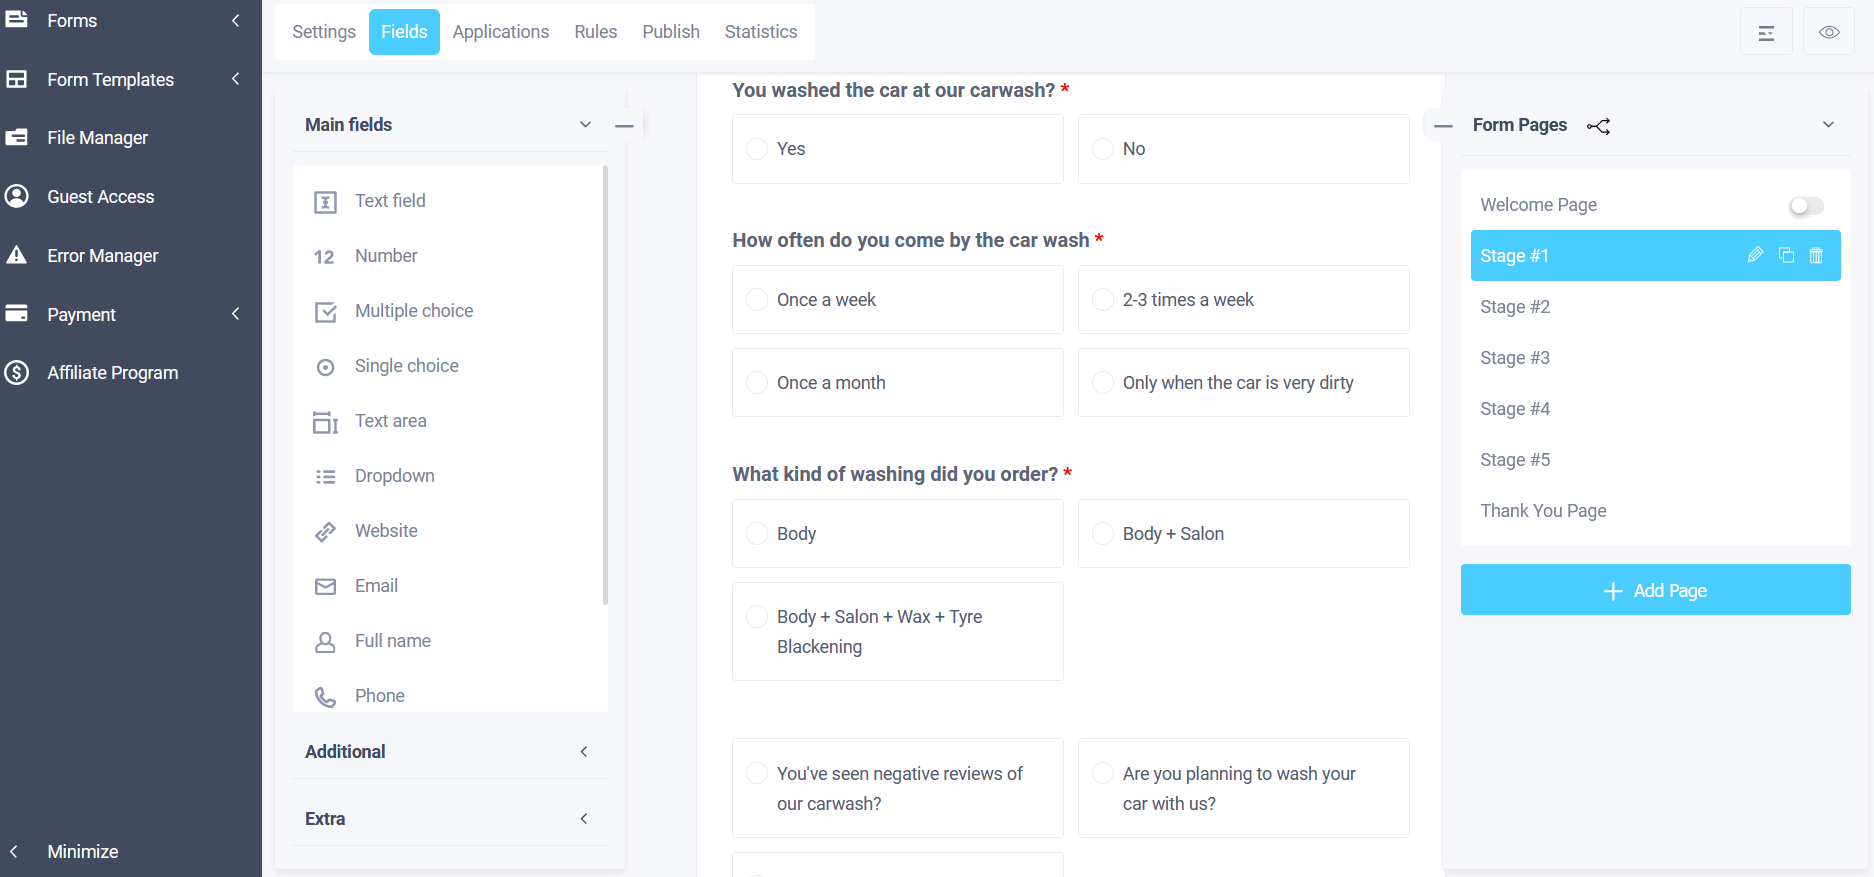
Let's call our form “Evaluate the work of our carwash”. We will make a form of several pages, with several switches and checkboxes, where when choosing a certain answer, the necessary element will be displayed, according to the rules of logic. Let's add “Single choice” to the first page by dragging an element from the main fields or simply clicking on this element:
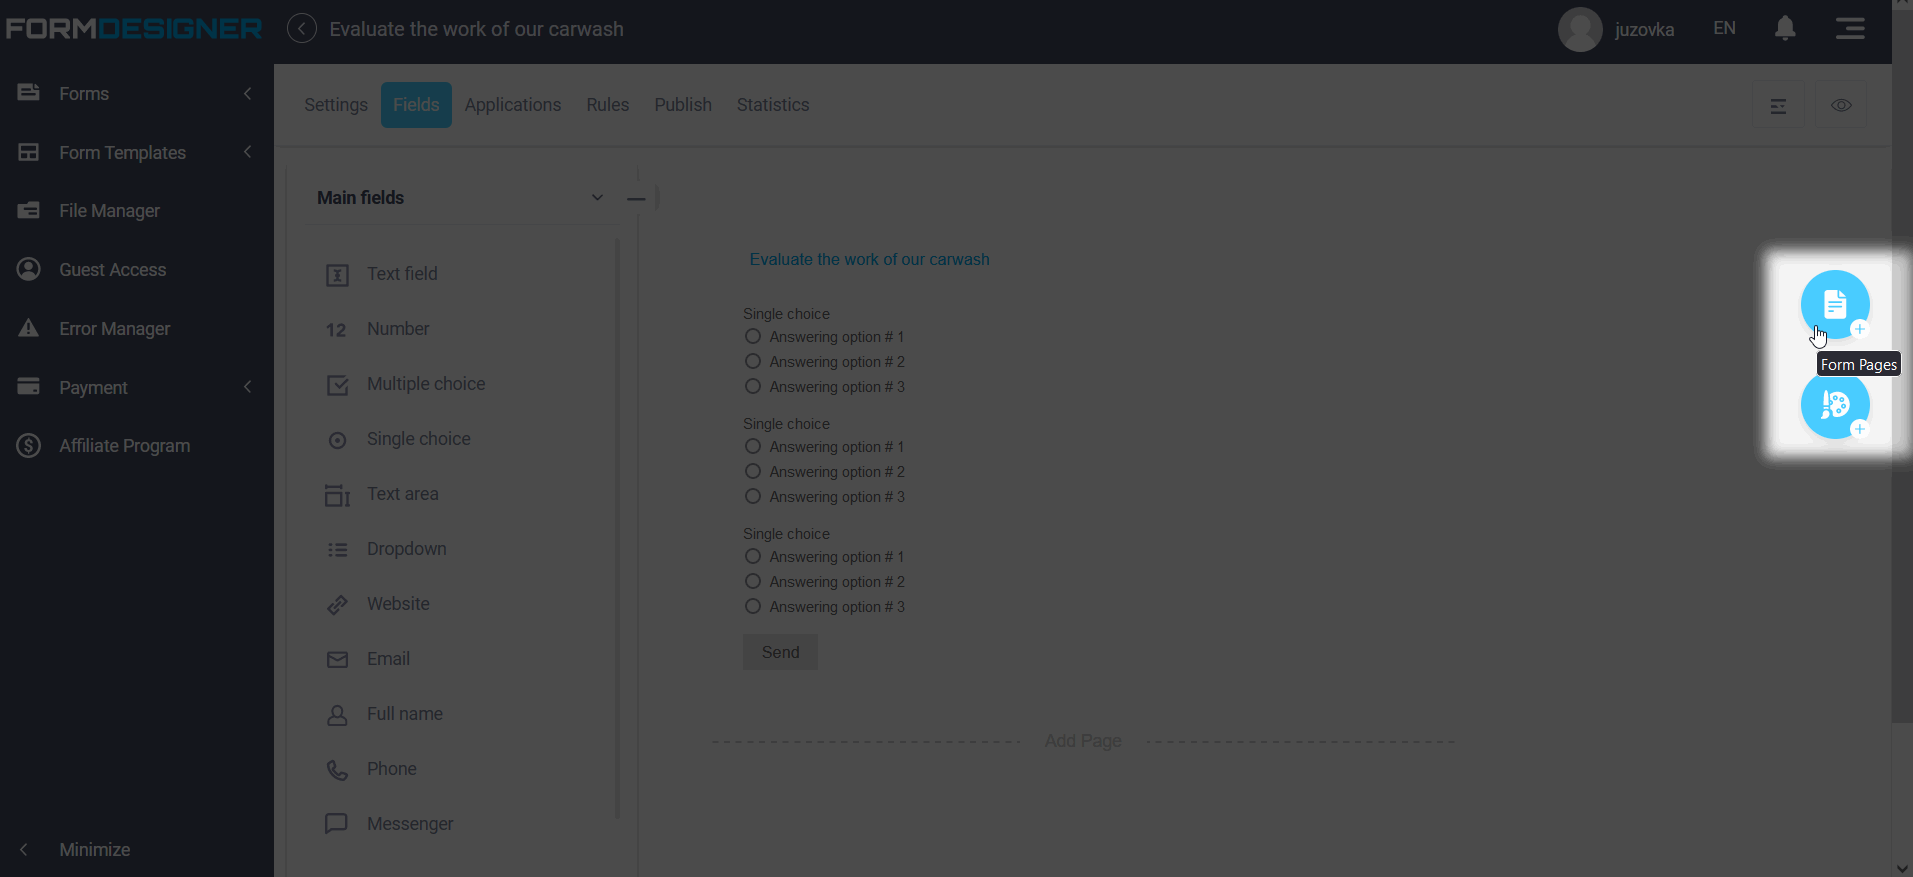
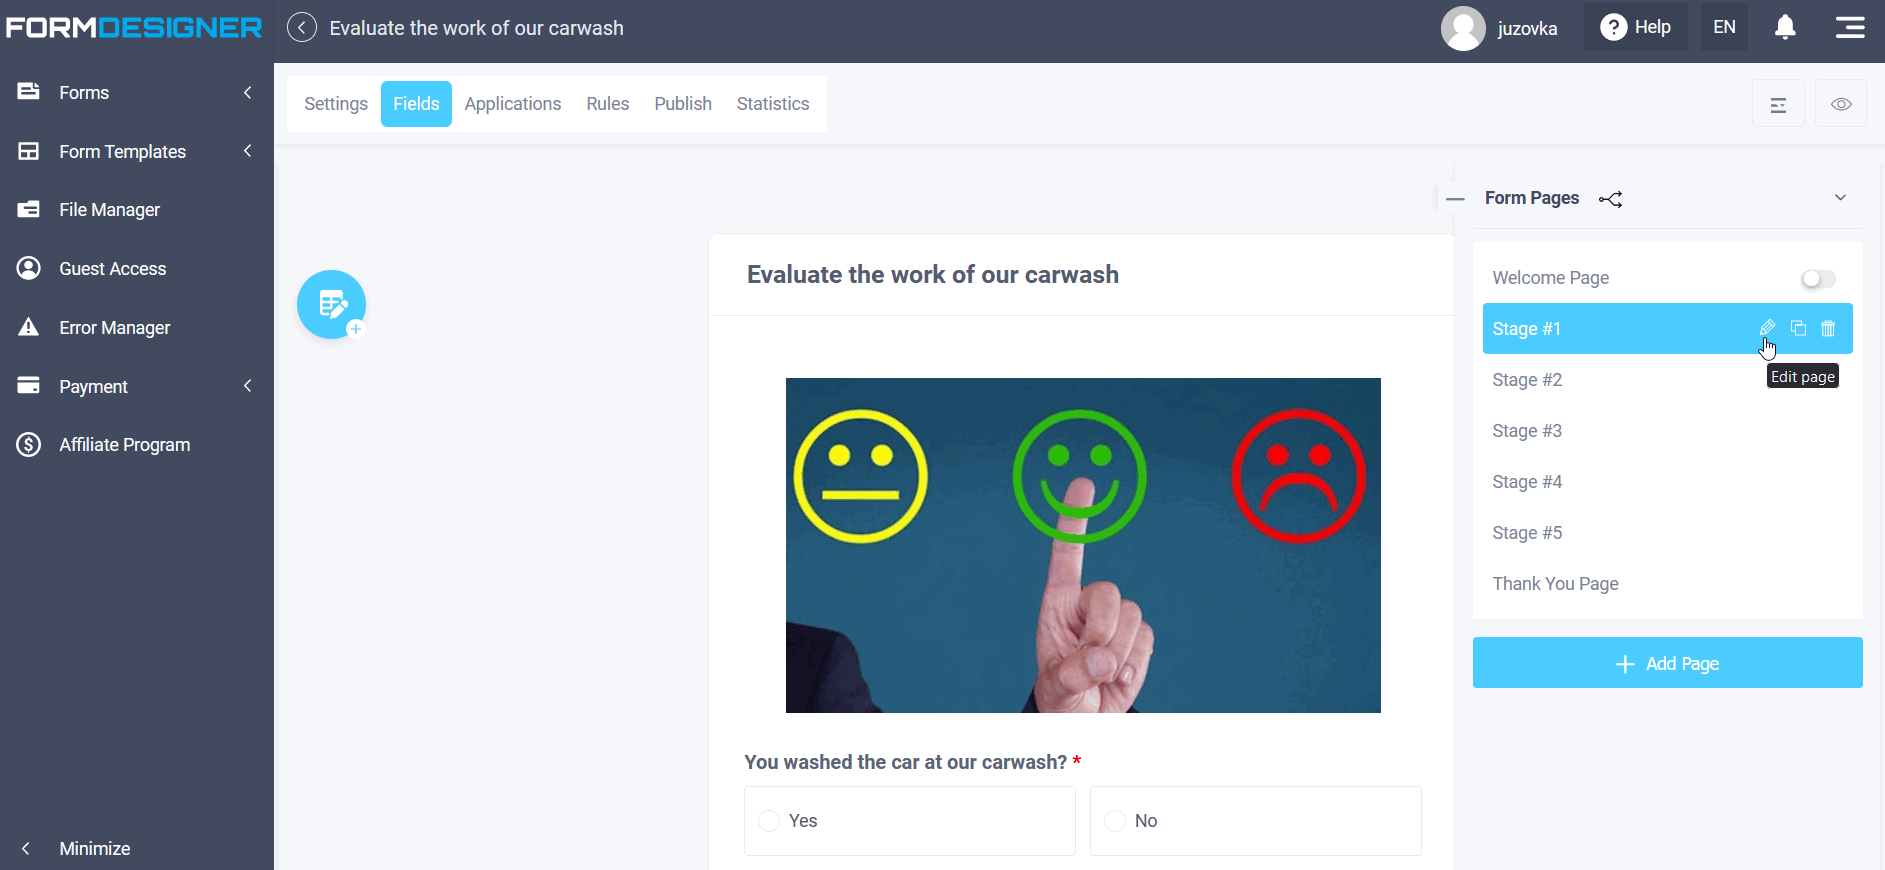
We will also make a form of several pages. Click the "Form Pages" icon on the right:
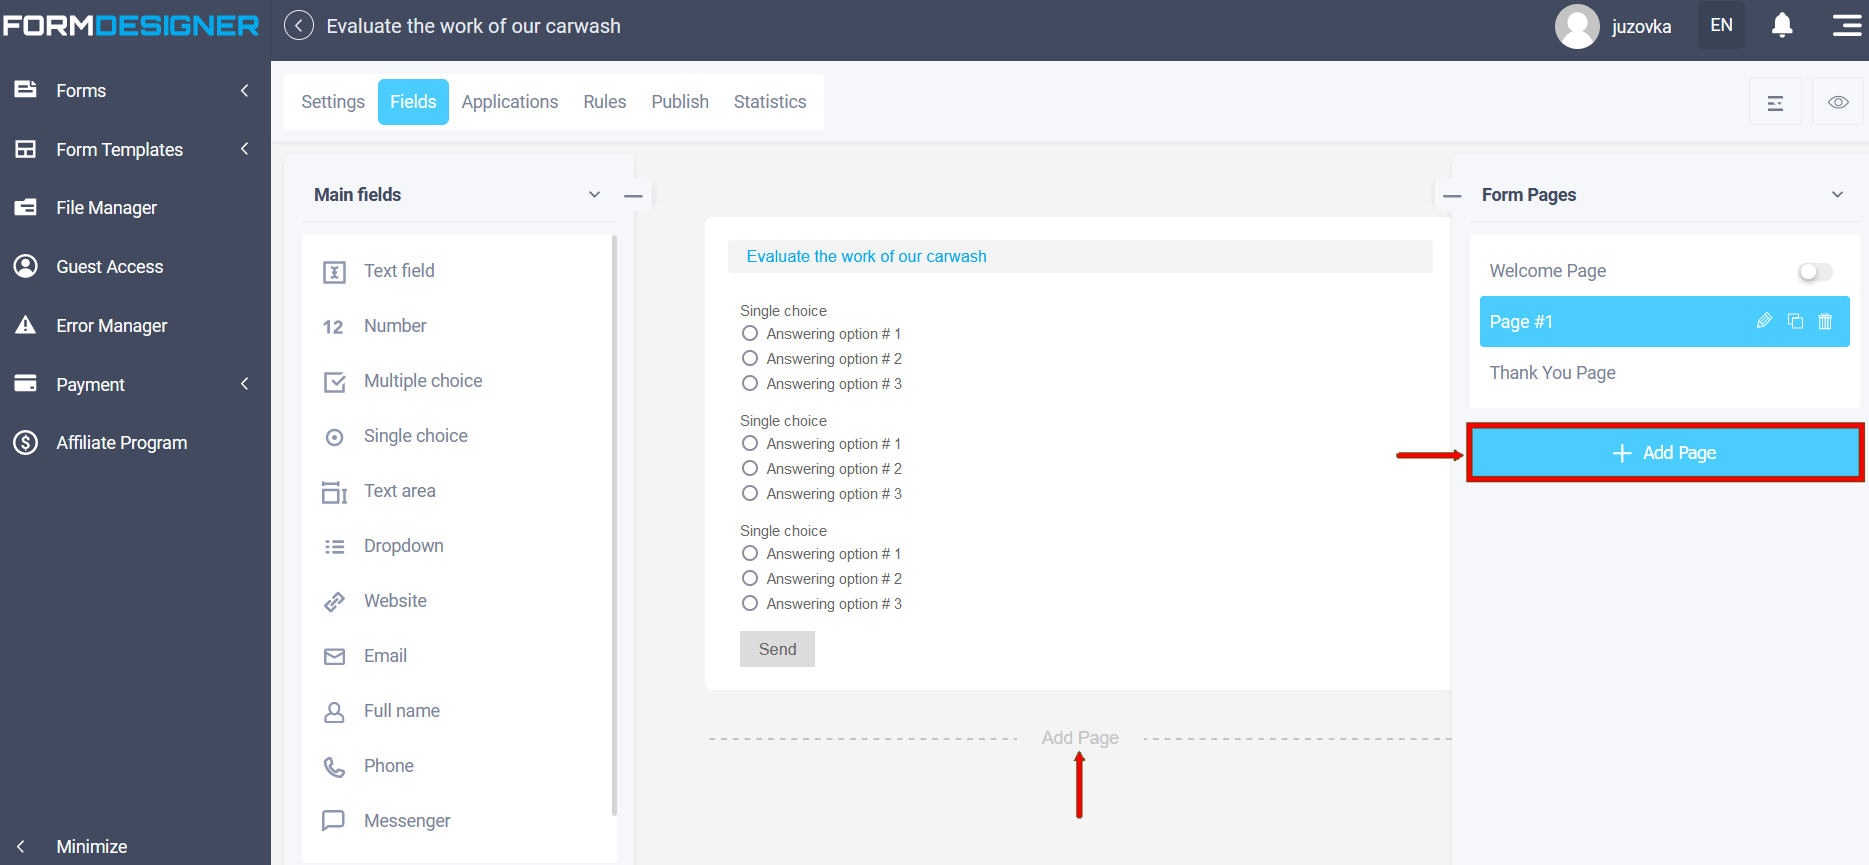
A list of form pages will open, where you need to click the “Add page” button:
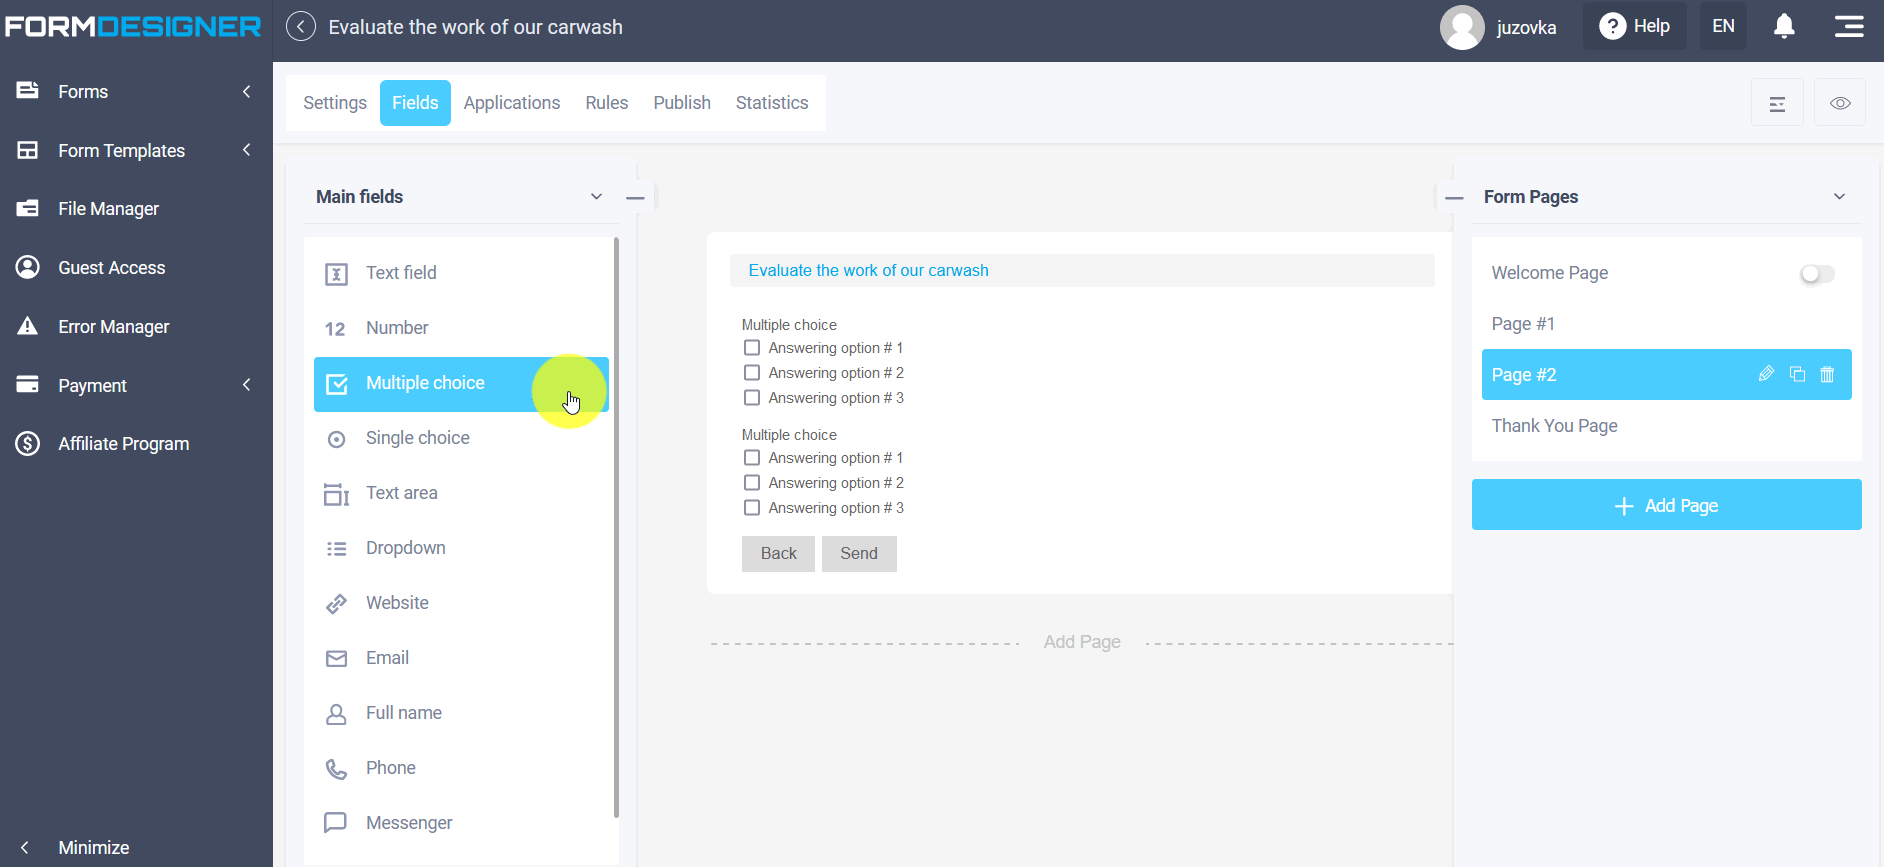
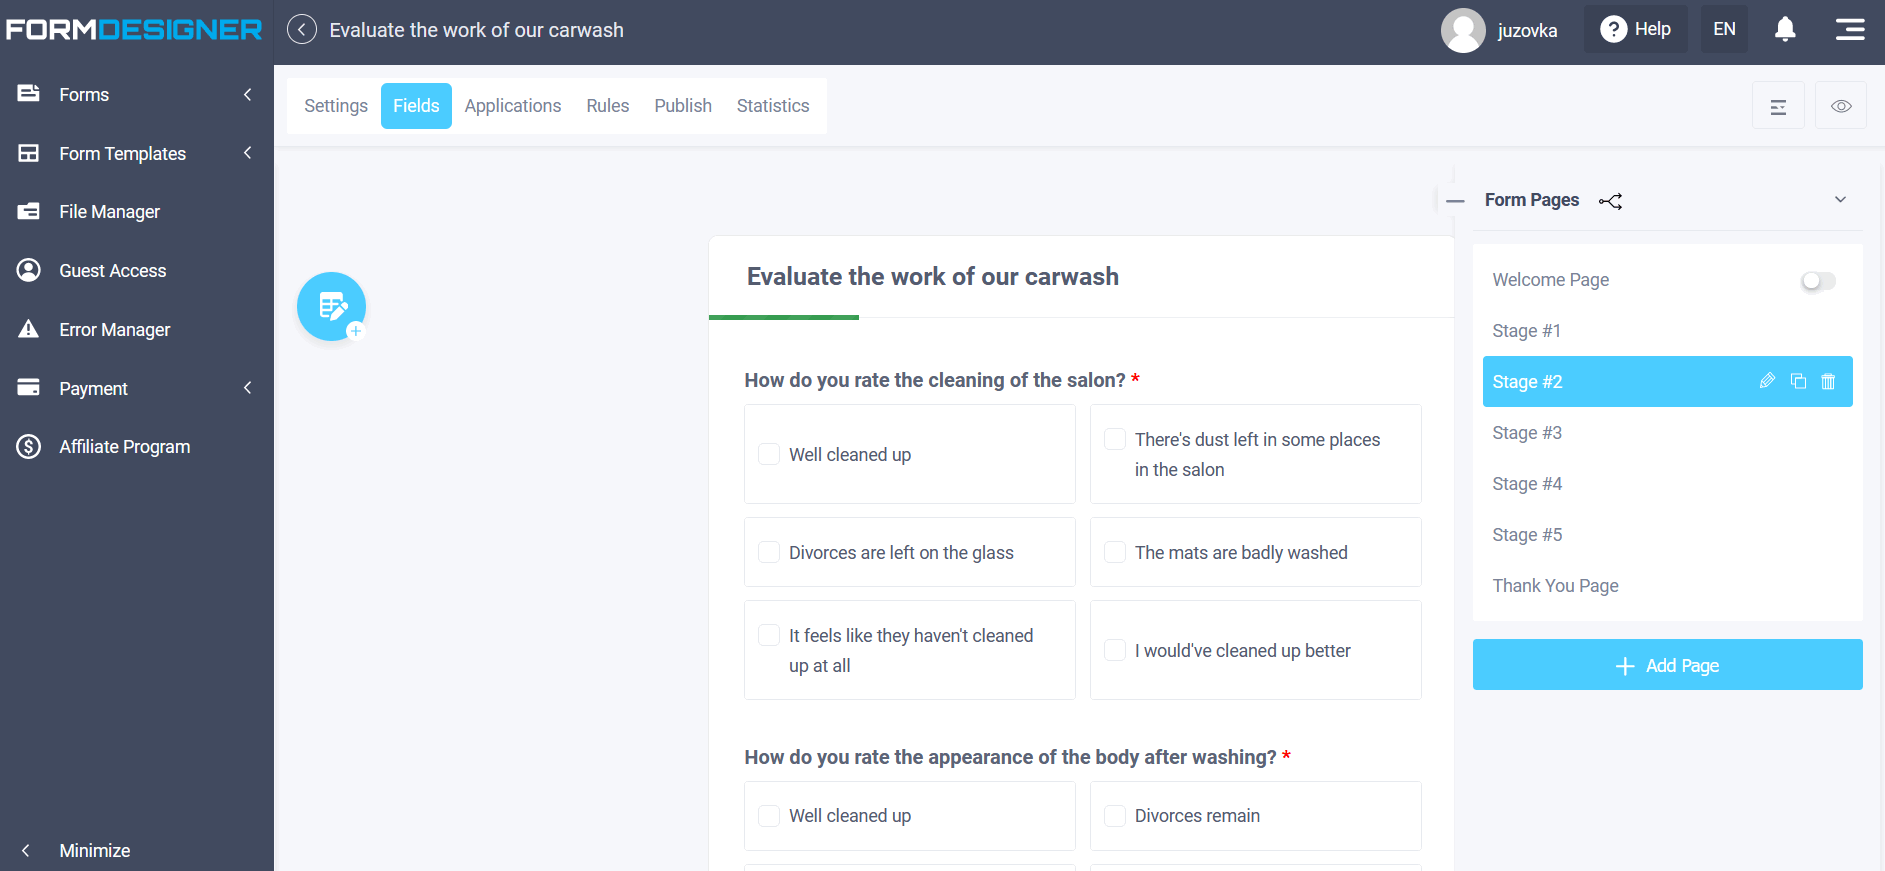
Similarly, on the added page, we will add the necessary elements in the form of checkboxes (multiple choice) for our testing:
To customize the item names and answer options, click edit:
On the fourth page, add "Email" input field and "Full name", which we will place in section, for single line output:
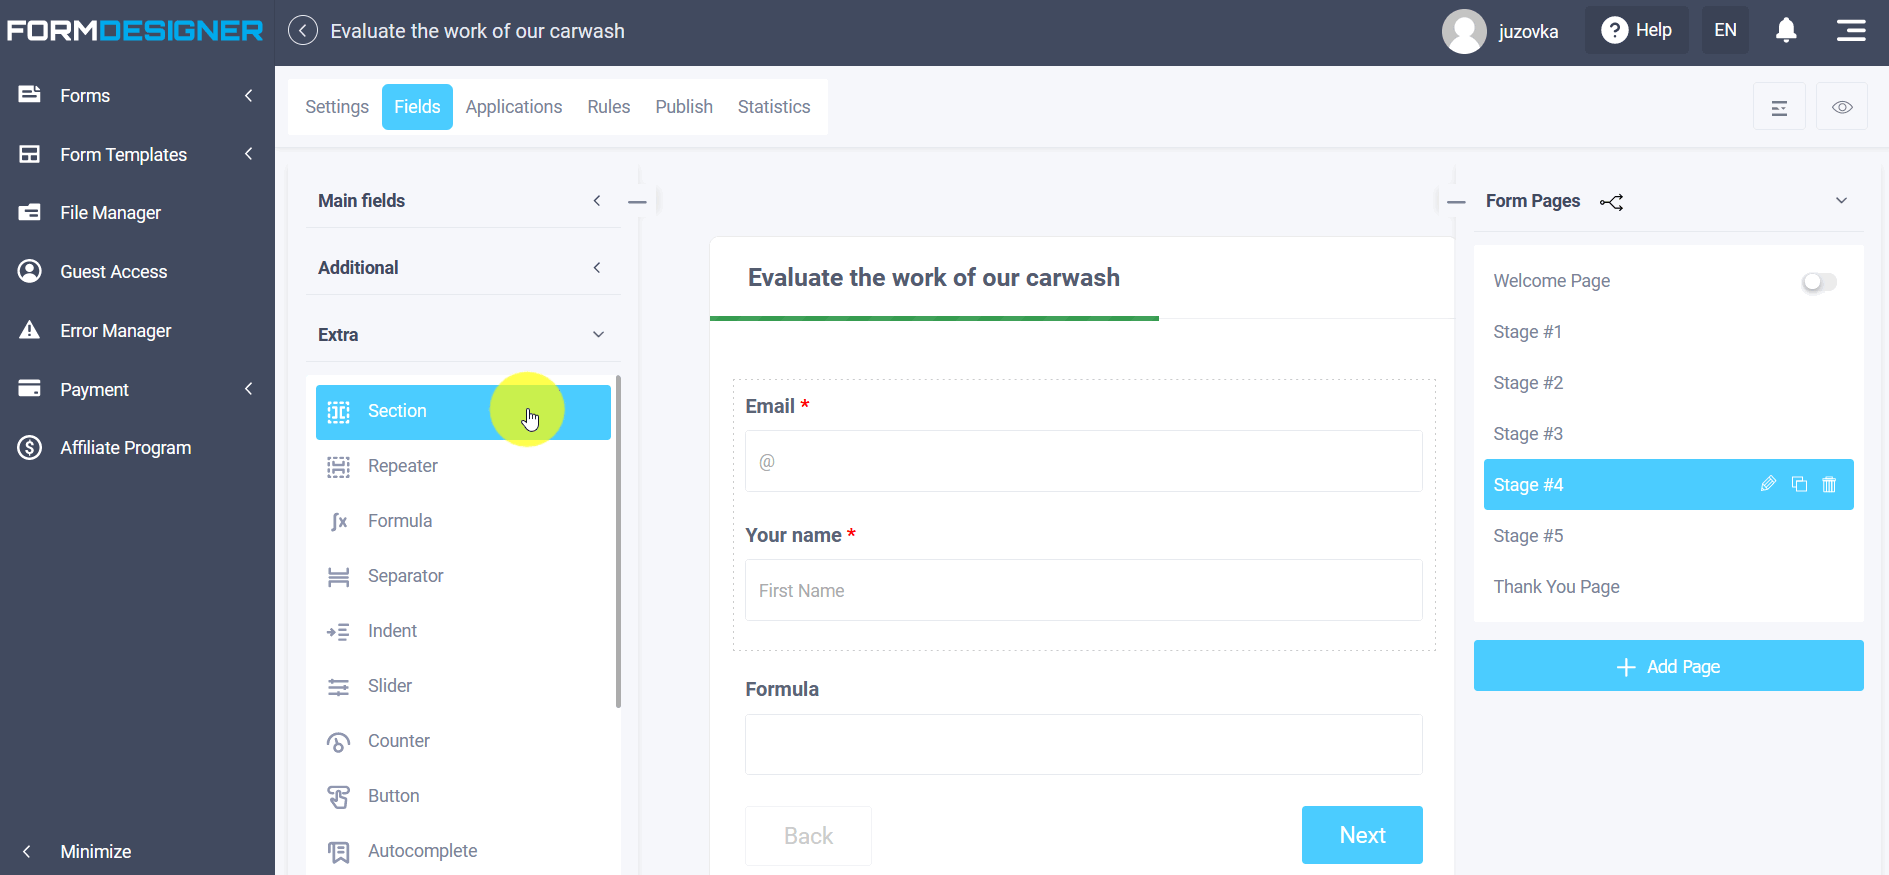
Also on this page we will add the element “Formula” from extra fields.
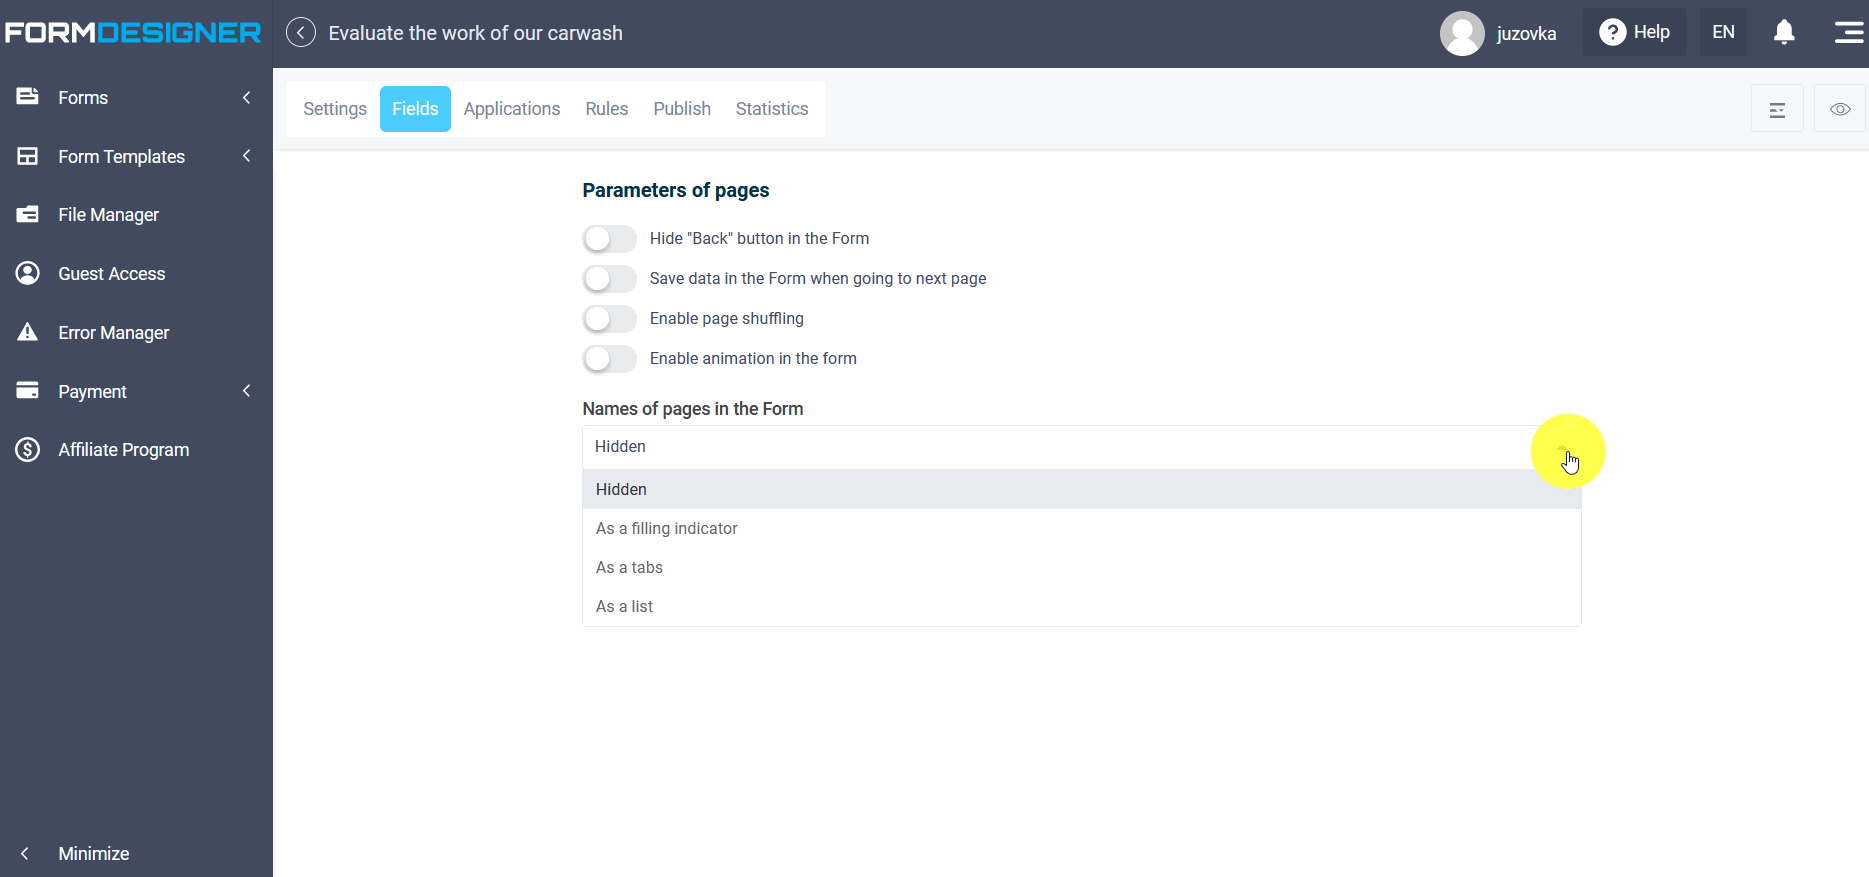
In the list of pages of the form, you can specify the name of the pages:
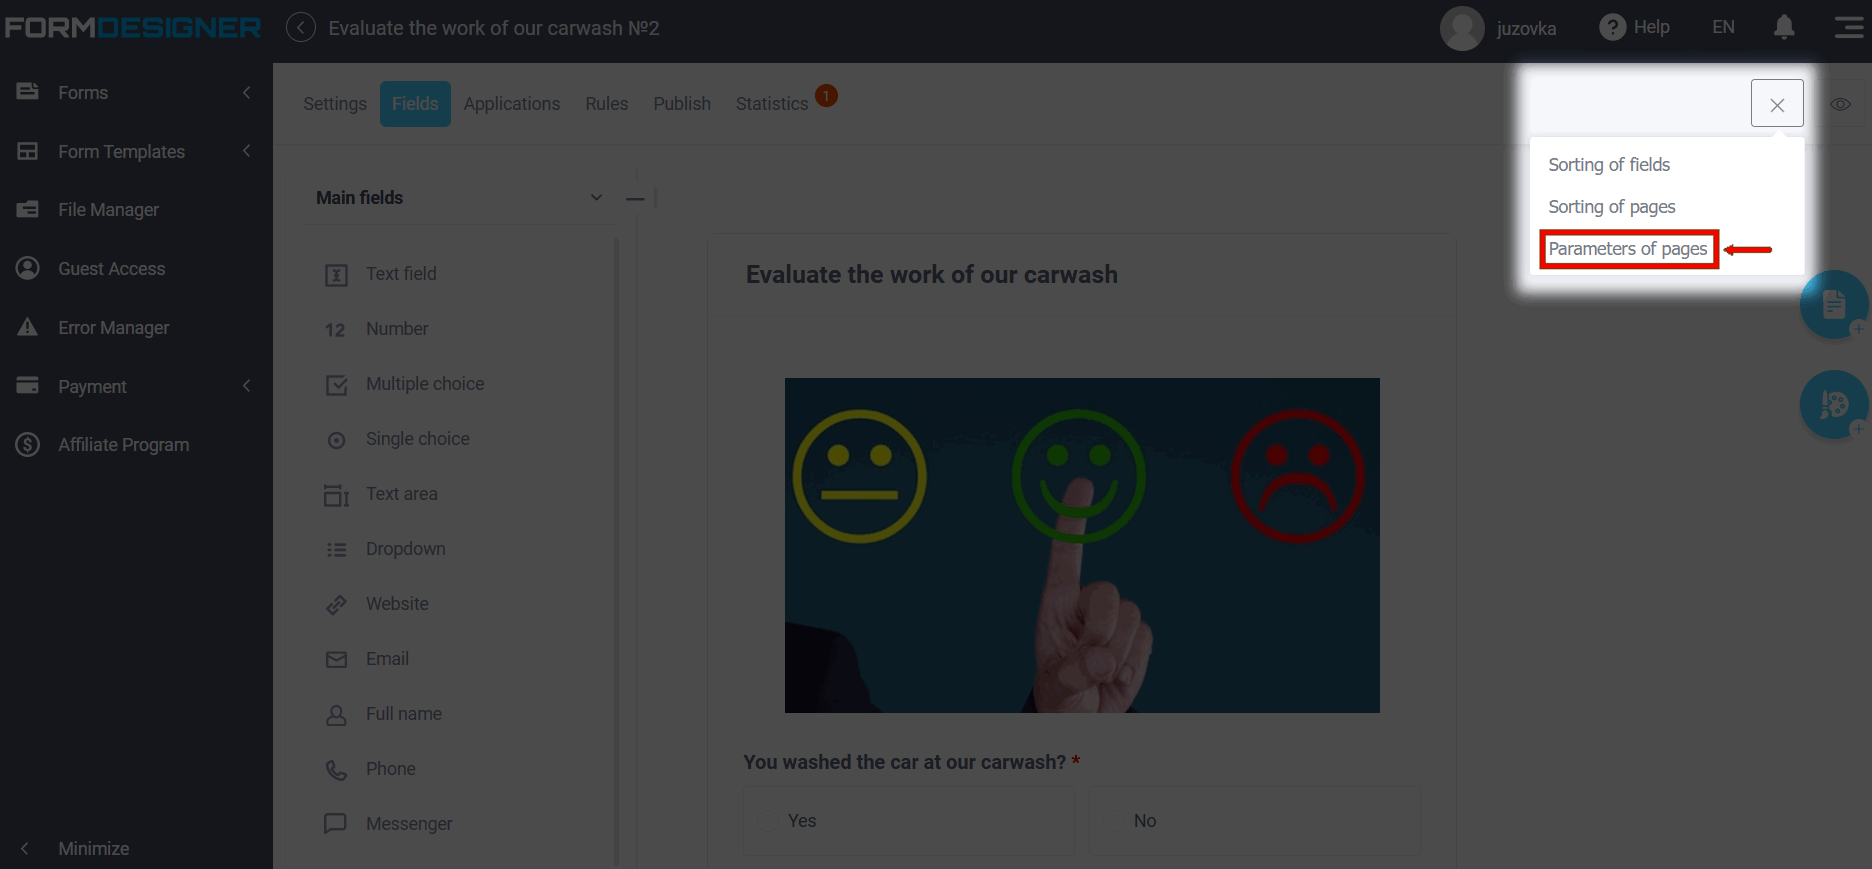
In the settings “Parameters of pages" you can customize the display of pages: in the form of tabs and as a fill indicator, or simply hide.
Setting up logical branching
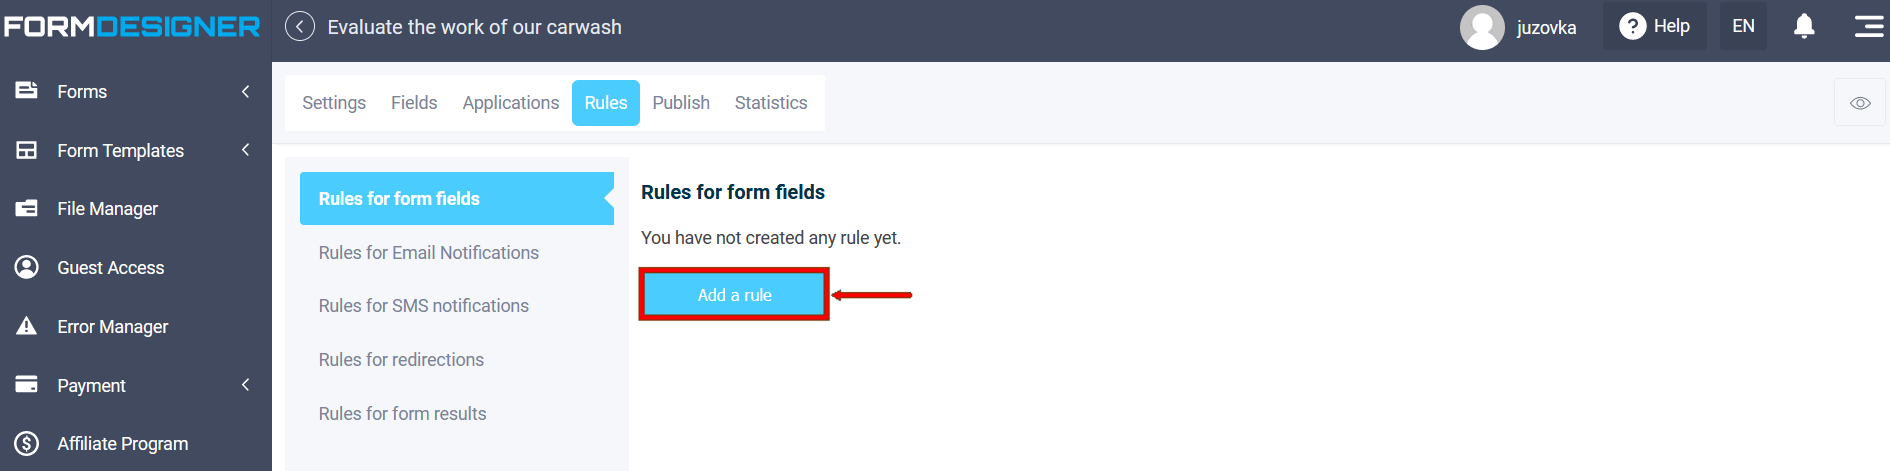
Next, go to the section “Logic" to add the necessary rules for the form fields. To do this, click add rule:
Let's add a rule for elements on the first page:
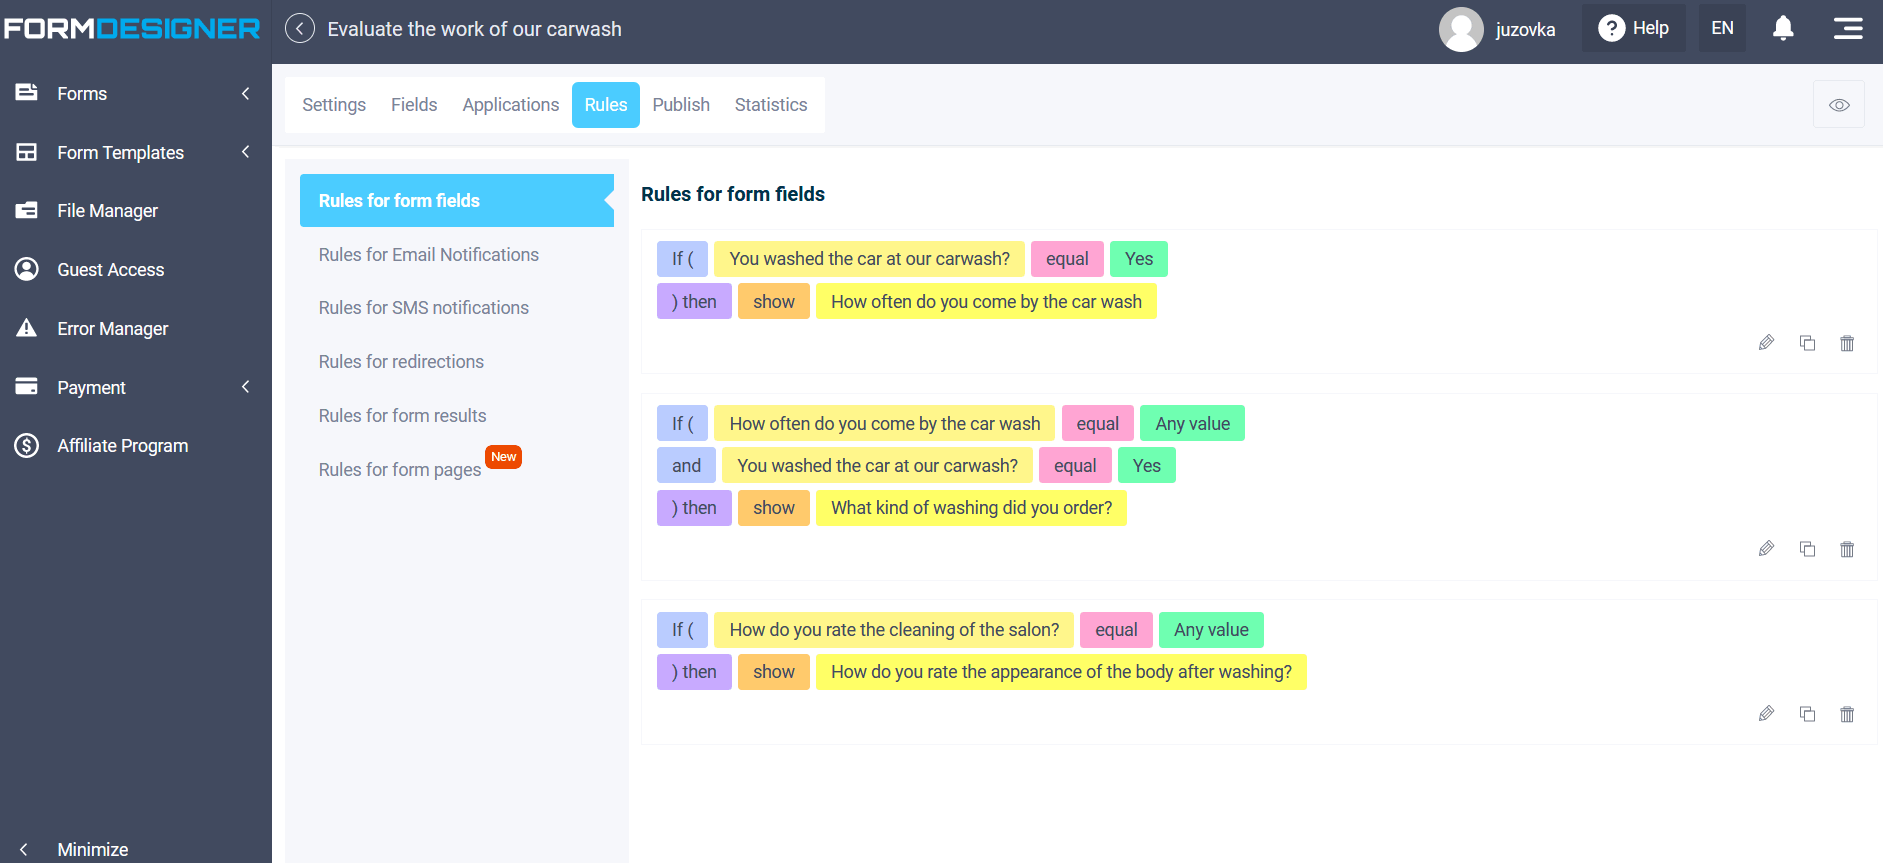
Let's choose the condition: if “You washed the car with us” and the answer is “Yes”, then show the element “How often do you come by the car wash":
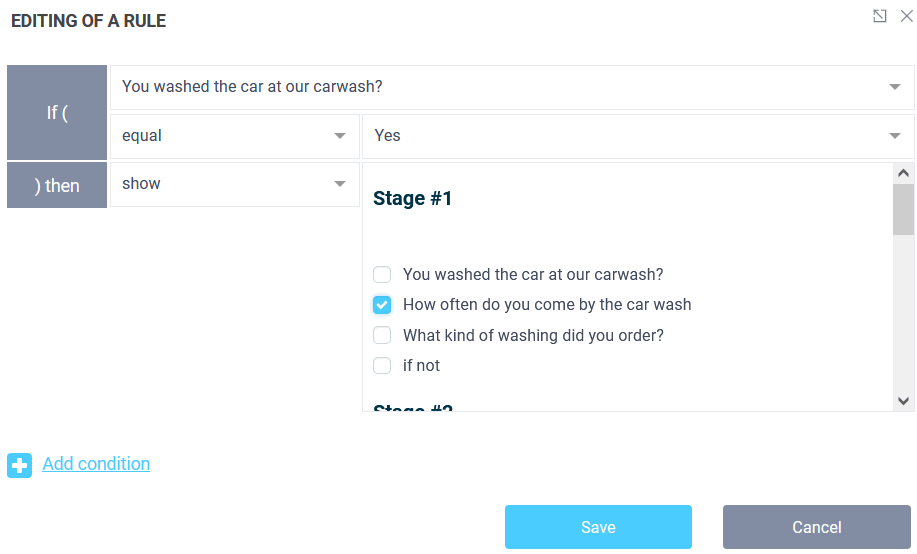
That is, testing will begin on the first page with the first question, and the rest will appear after filling in. Now let's add a rule for the second question “How often do you come by the car wash”, which went along the “Yes” answer branch from the first question.
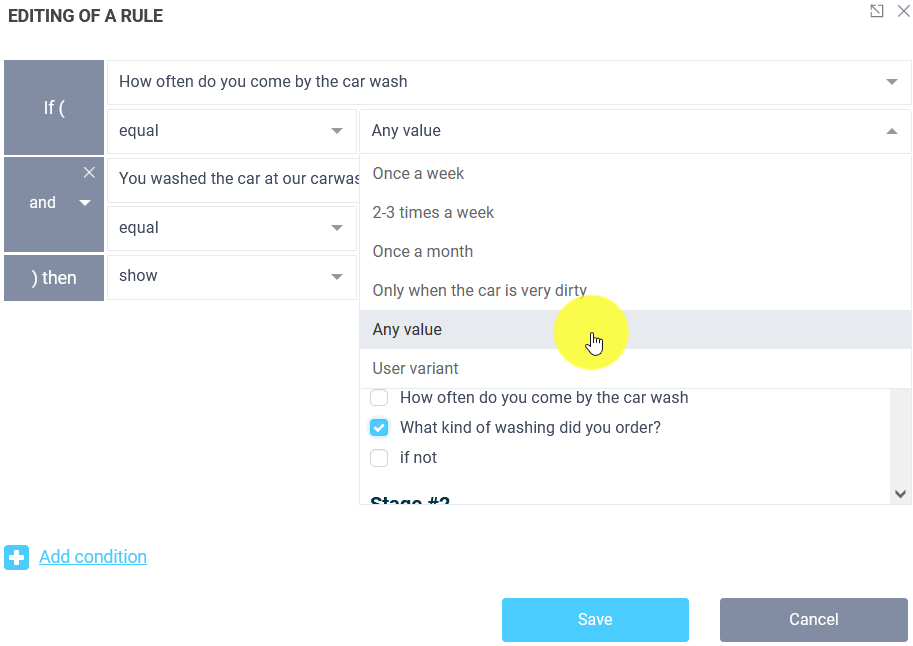
Let's choose the condition that if “How often do you come by the car wash”, the first answer is “Once a week”, then show ”What kind of washing did your order". But since we have several answer options, and when choosing them, we should still go to the question “What kind of washing did your order”, then we should choose "Any value" (or list all the answer options through the logical "OR"):
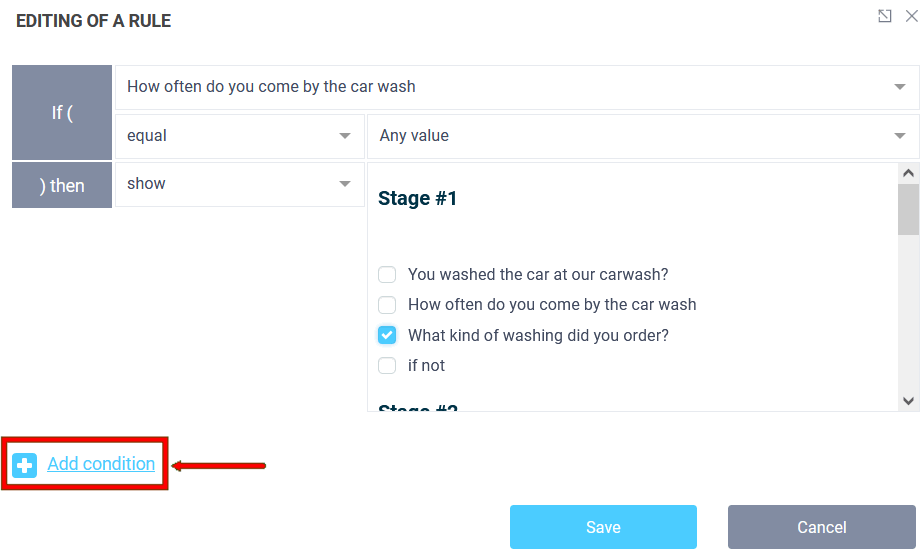
In this rule, we will add a variant of the answer "Yes" from the first question, for a stricter condition. To do this, click the “Add condition” icon:
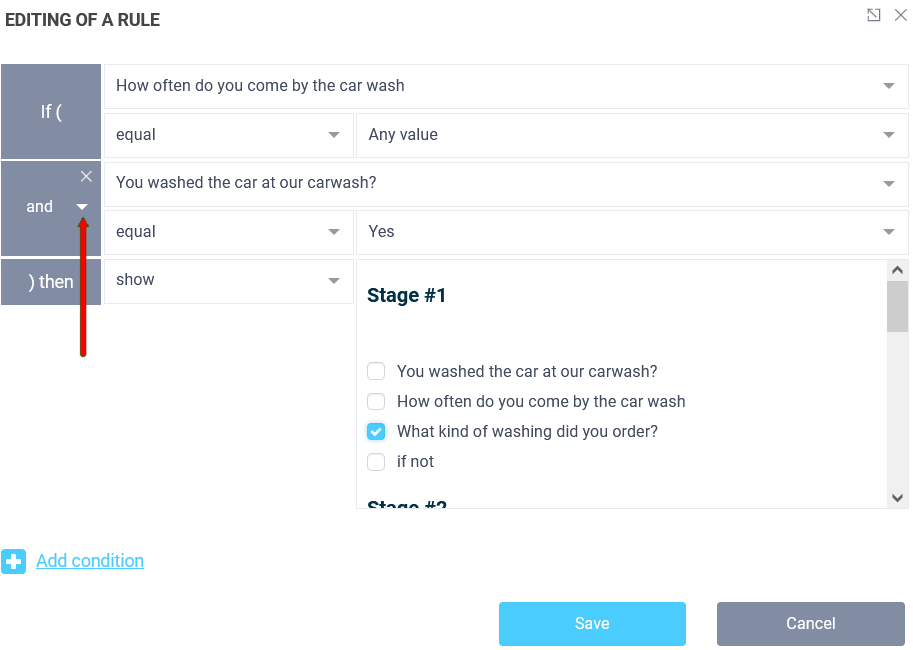
As a result, after adding two rules for the first page, the user, having chosen the answer “Yes” to the first question, will go to the second question, where, when choosing any answer option, the next question will open to the user.
For the second page, similarly, we will add a logical rule for the question “How do you rate the cleaning of the salon”.
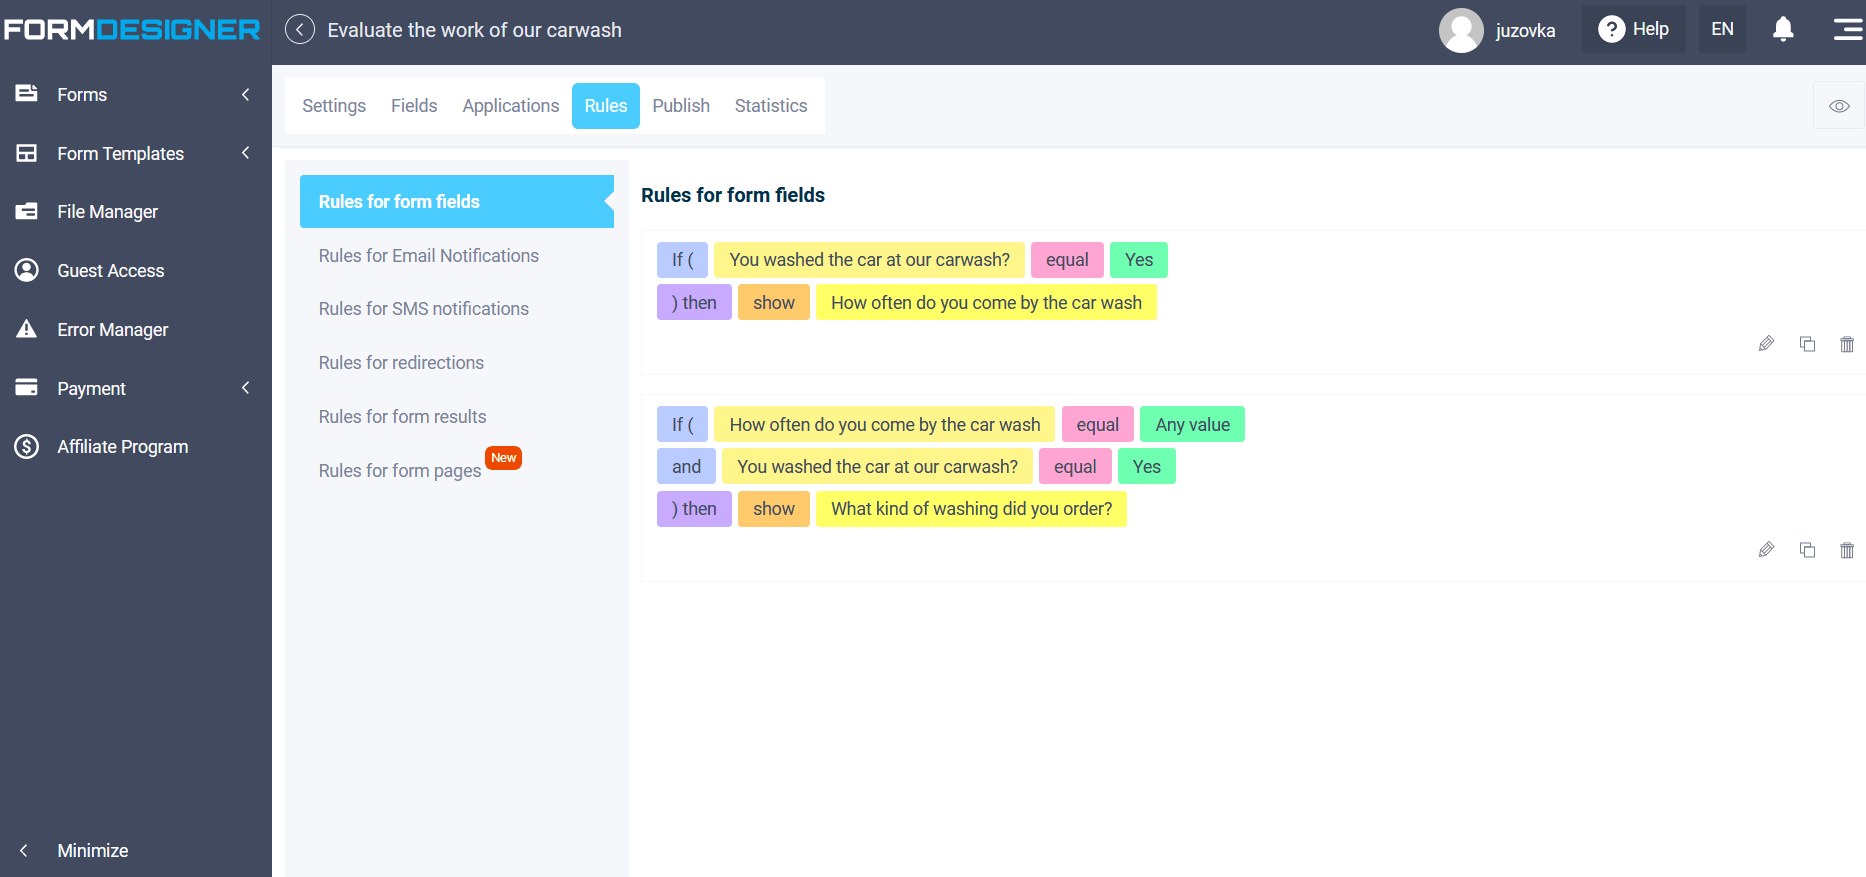
As a result, for two pages, the set of rules will look like this:
On the third page, 3 questions were added, consisting of switches with the answer options “Yes” or “No".

Here we will not make logical branches, i.e. when choosing one of these answers, the user will be shown just the next question on this page.
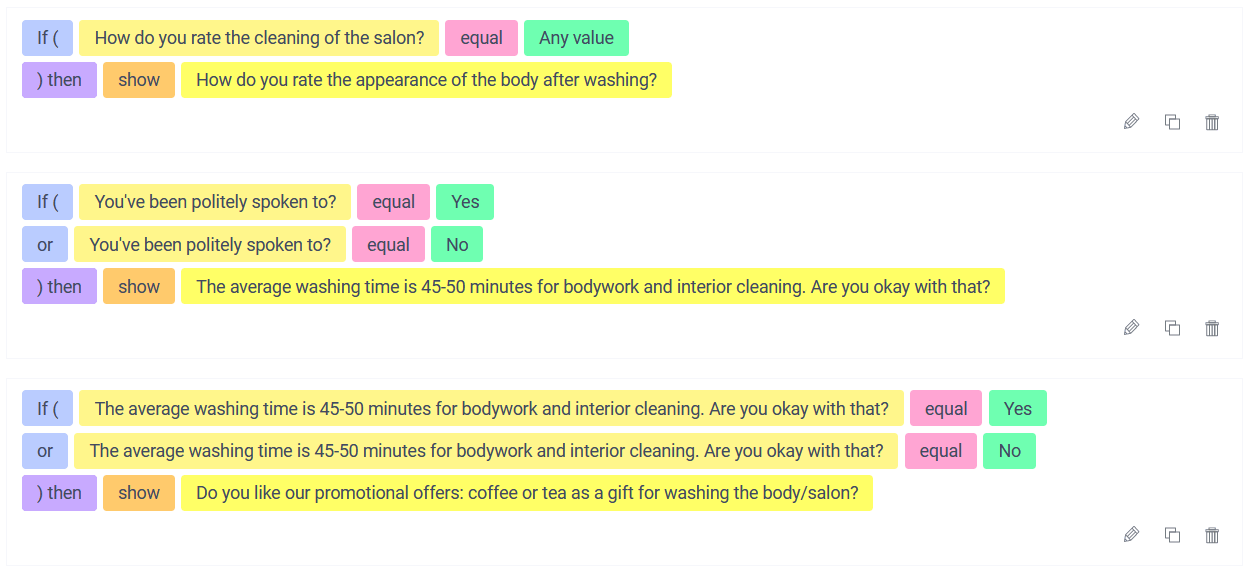
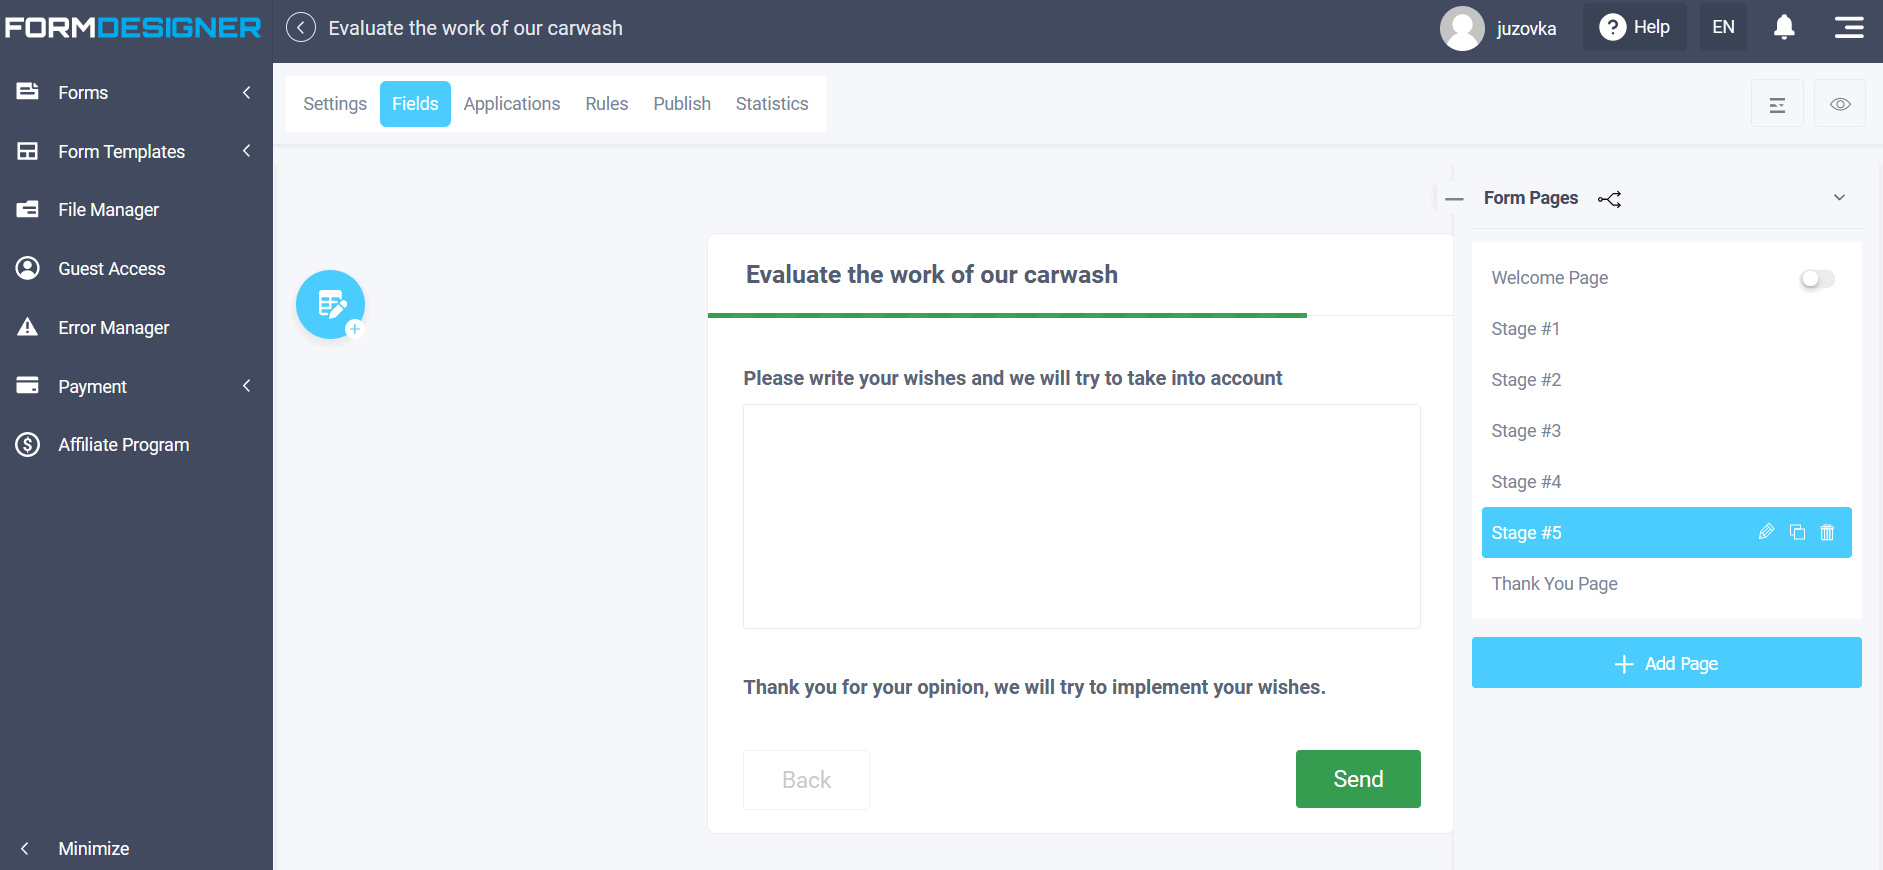
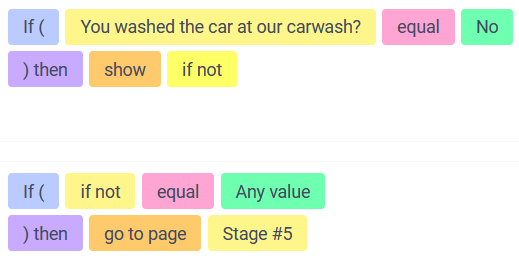
On the fifth page we have placed the elements "Text area", where the user can leave wishes and suggestions, and "Text" with words of gratitude. On the logic tab, add logical rules for the first question “Did you wash our car” from the first page, when you selected “no”, then show the “If not" element.

And one more rule, where the user, when choosing any answer option in the question “If not”, will immediately go to the fifth page of the form with the opportunity to leave their wishes and suggestions:
Setting up the formula for calculating the sum of points
On the fourth page we have placed the element “Formula”, which we will use to calculate the result. Now let's go to the settings of the “Formula” element, which we added to the fourth page of the form. The “Formula” element will be used to calculate points, depending on the selected answer options in the given questions. To do this, click the edit item icon:
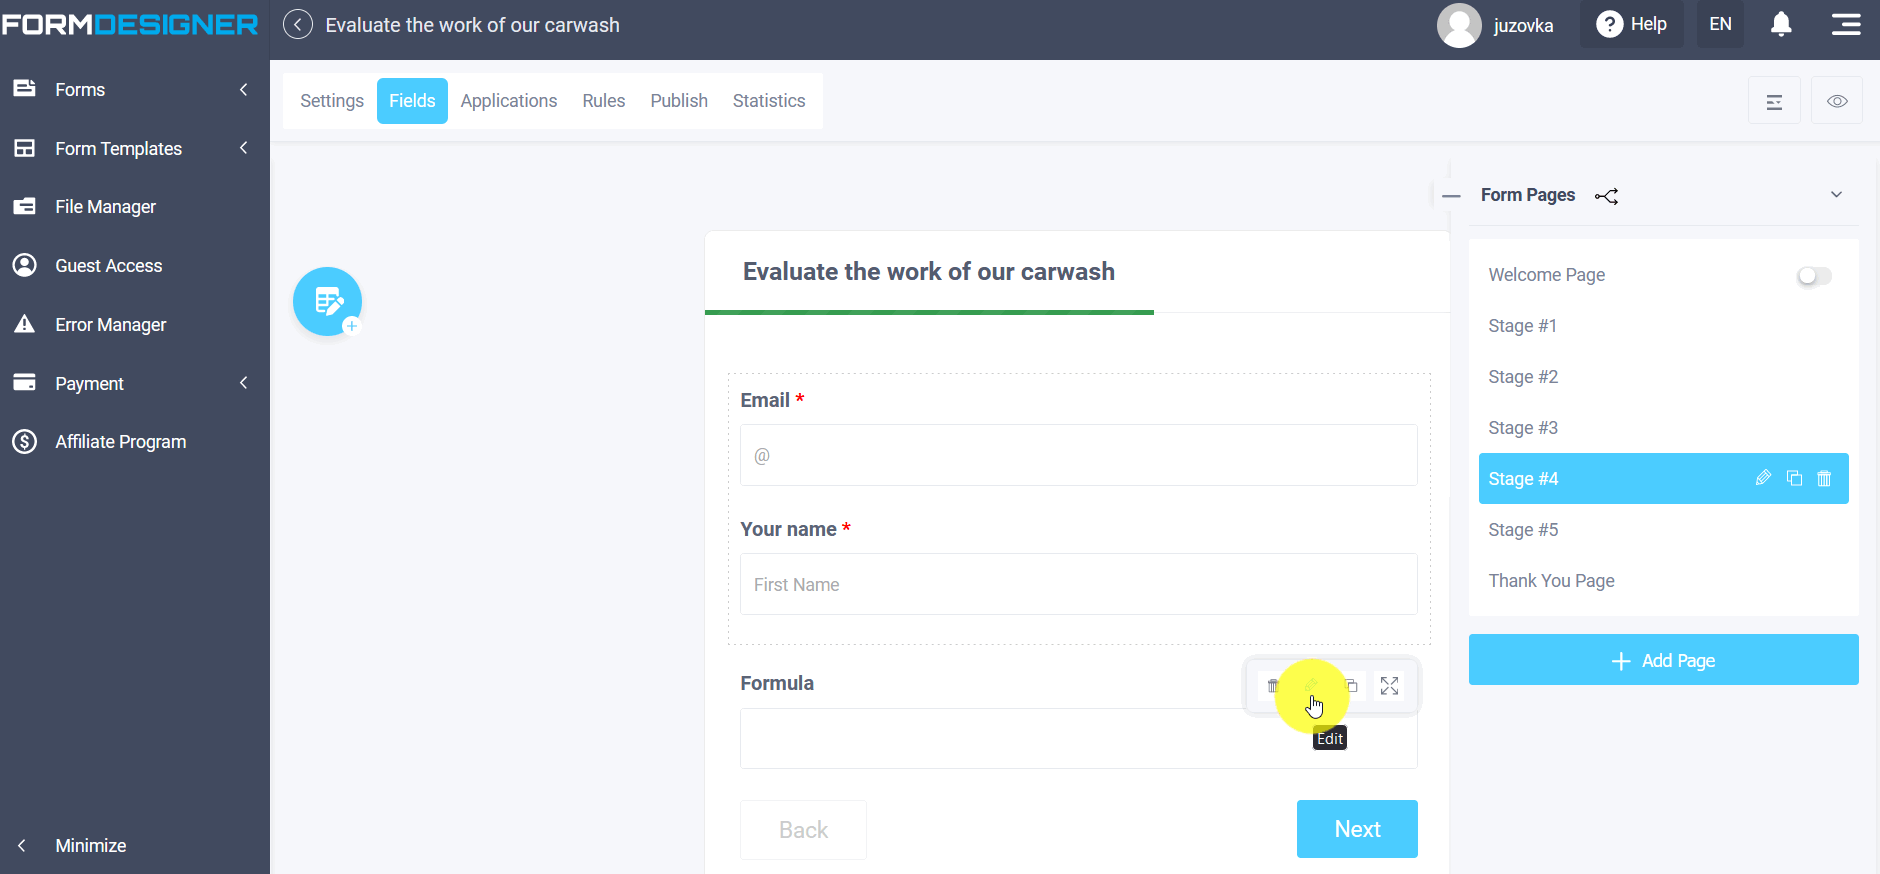
In order for the tested user not to have access to the “Formula” field, which we will use for calculation, it is necessary to hide this element (you can hide it at the very end of the form setup when you check the correctness of the calculation).
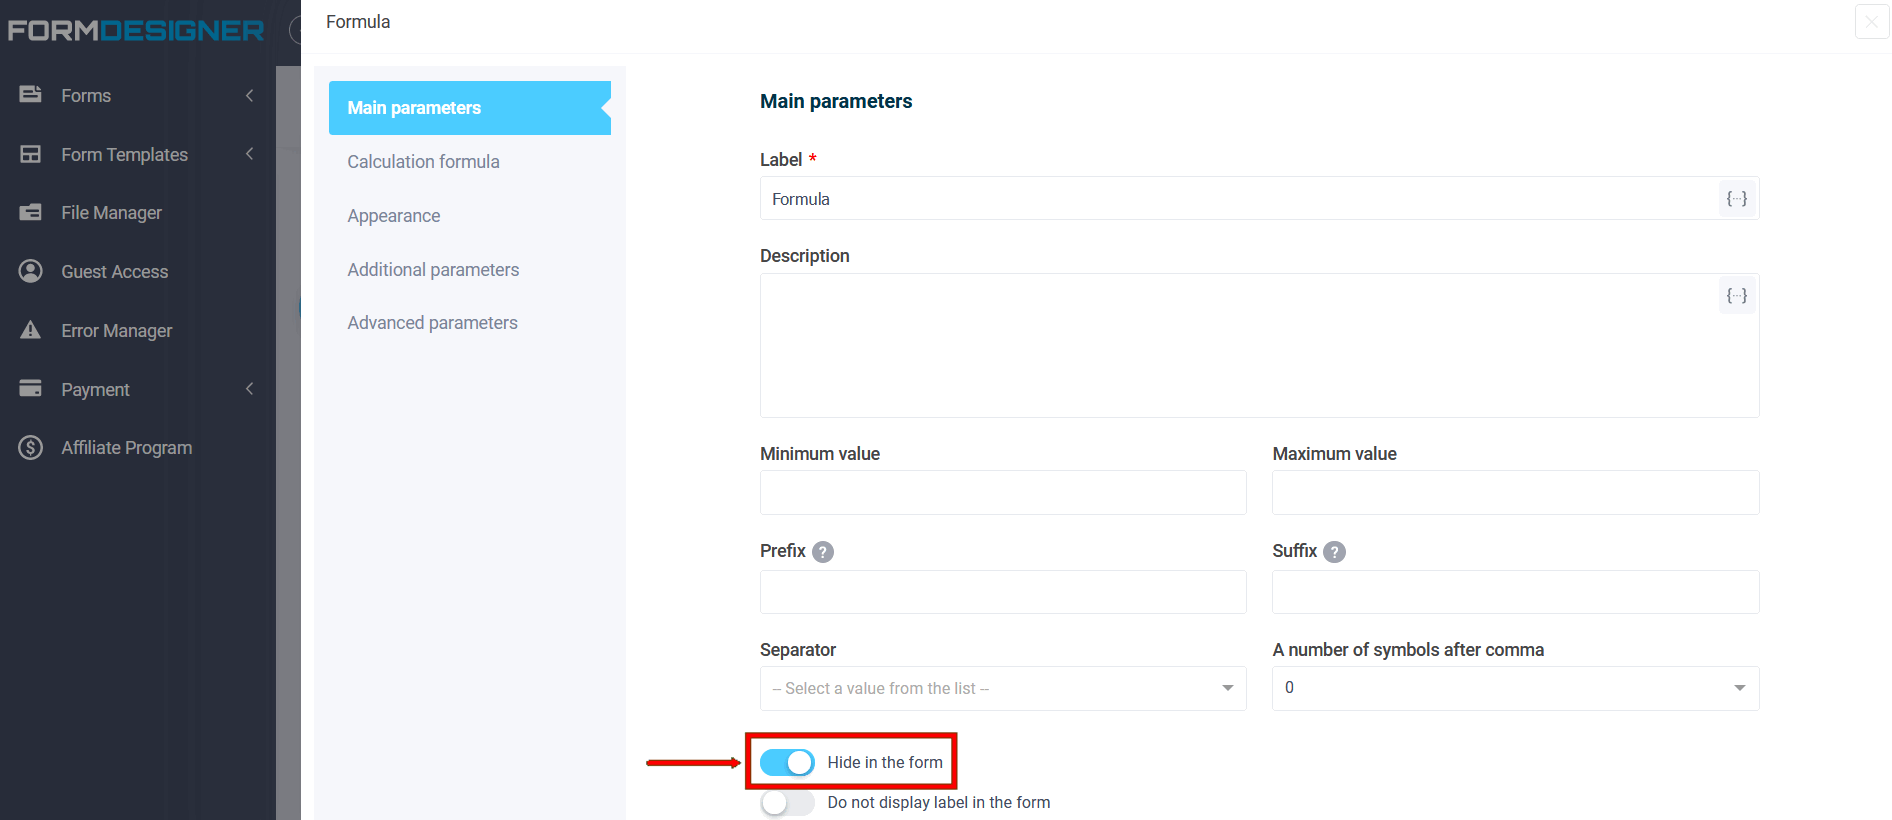
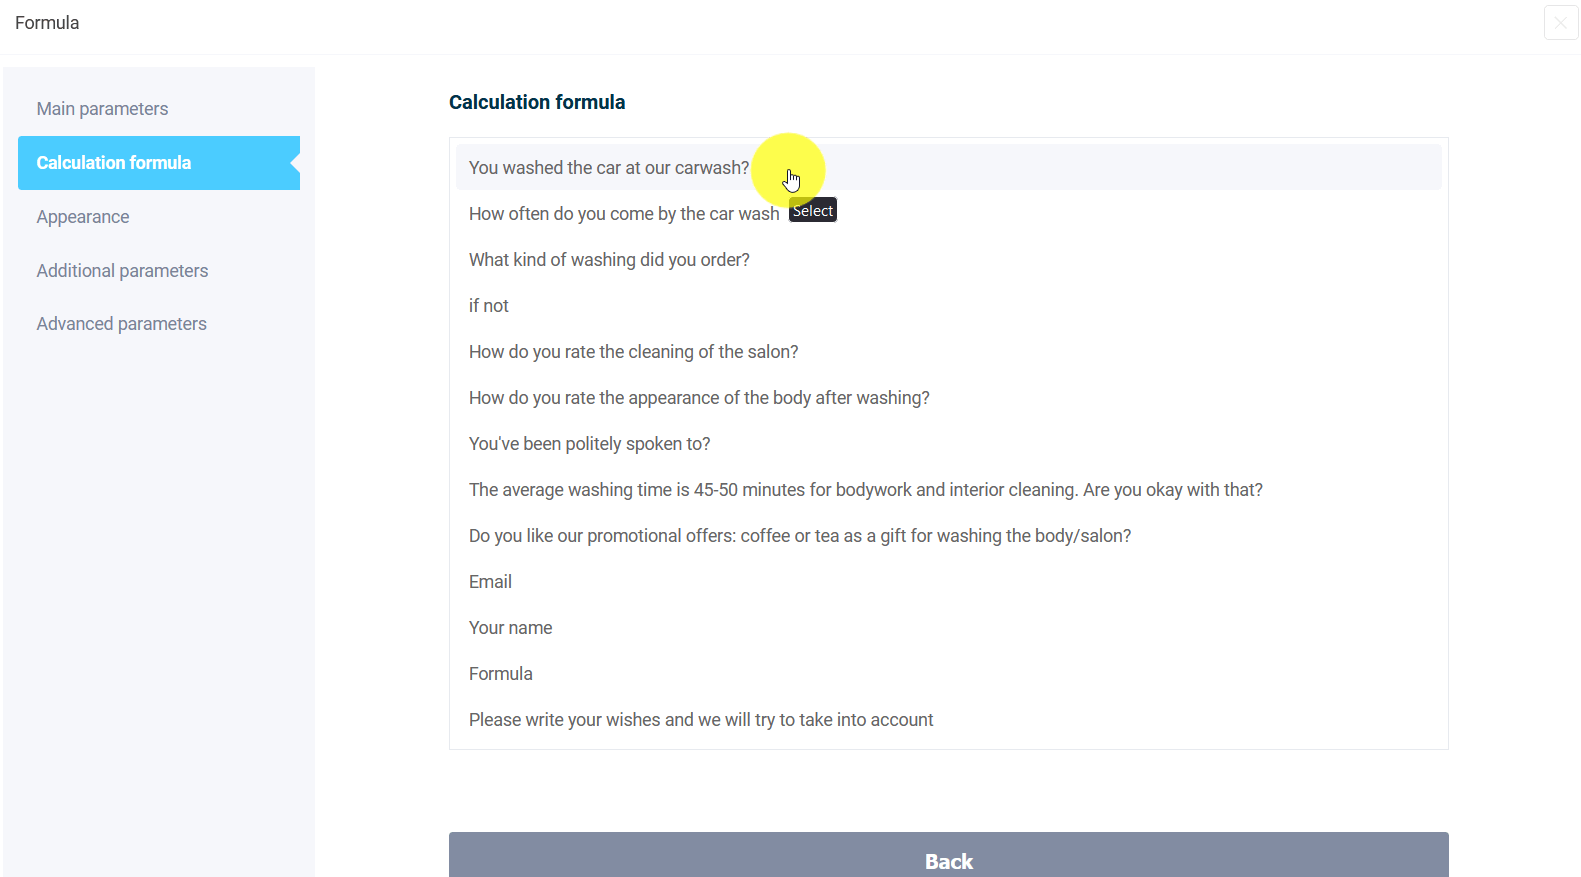
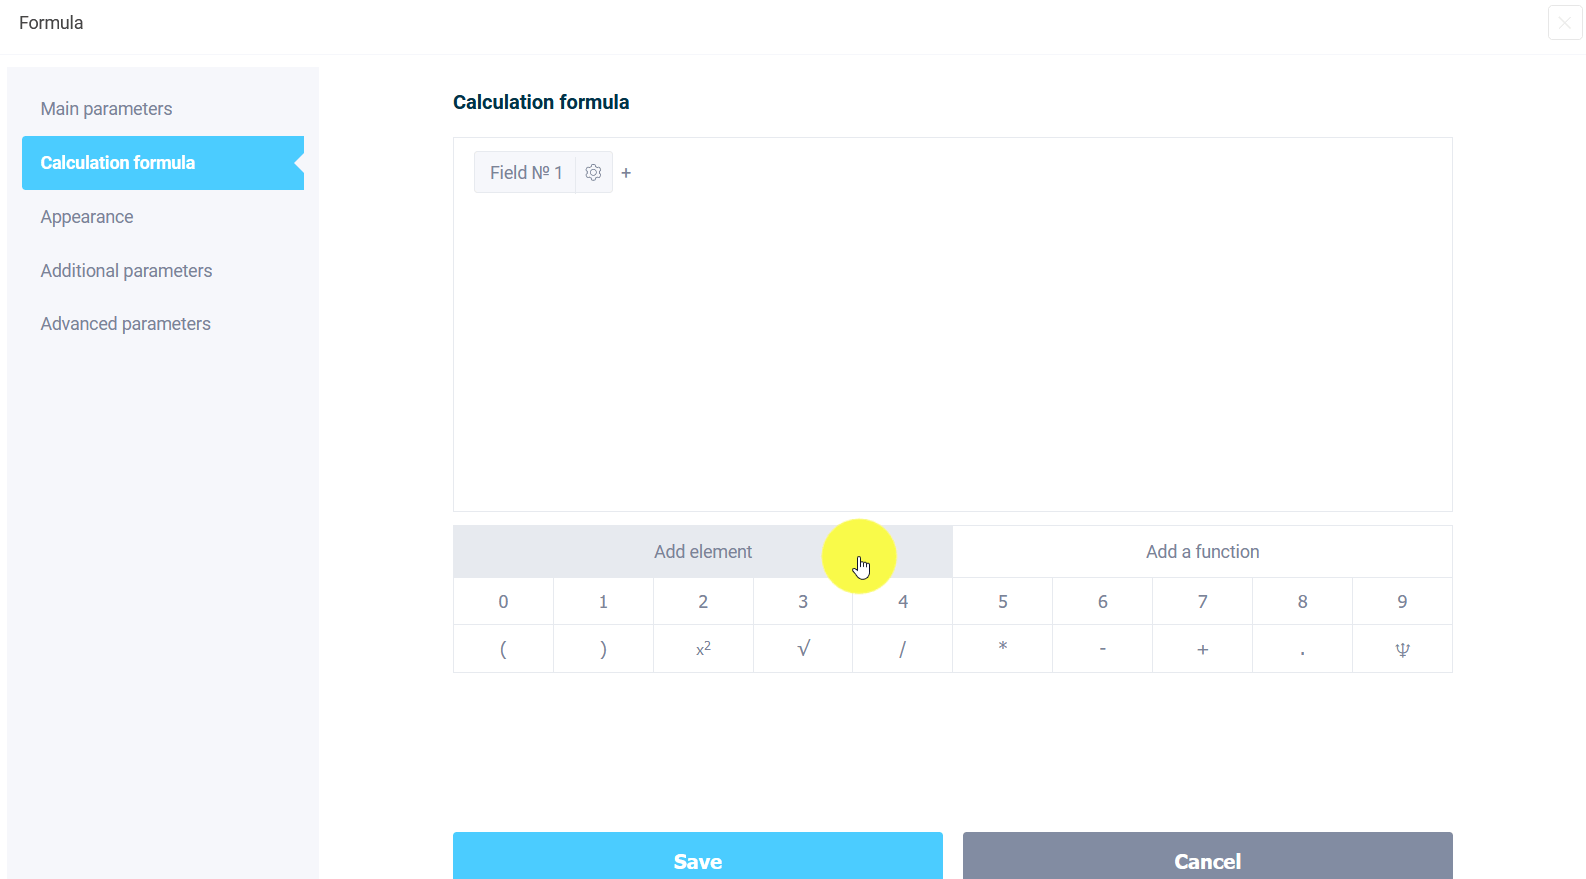
Now let's move on to the setup of the calculation formula itself. To do this, open the “Calculation Formula” item and the formula editor will open in front of you. Click “Add element" at the bottom:
Select the first item from the list “You washed the car at our carwash”:
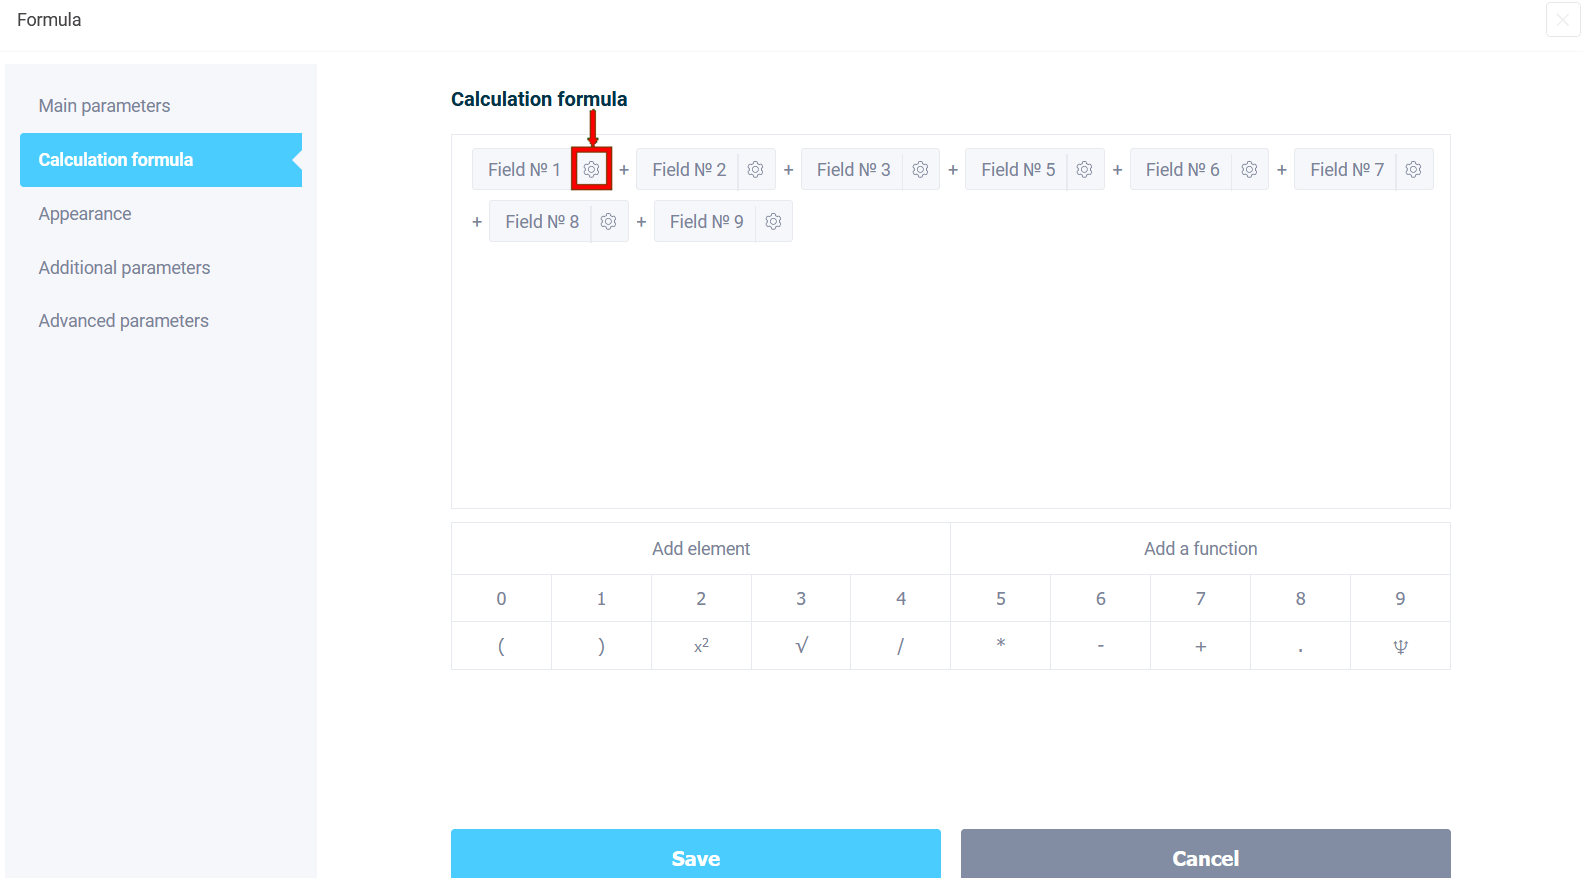
The first element that participates in scoring will appear in the formula editor. We will sum all the values, so we will add up all the elements involved in the calculation in the same way:
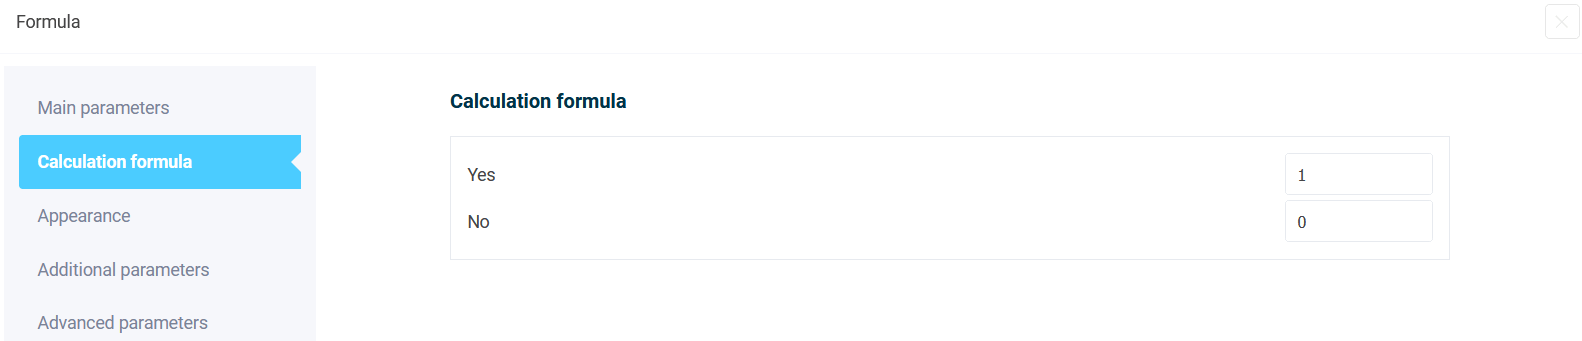
After you have added all the elements, click the gear to the right of the element:
In the first question we have the answers “Yes” or “No”, we assign points 1 and 0:
Next, we assign points for the answers in other elements involved in the calculation formula:

Configuring the output of test results
After adding the necessary points to the elements of the calculation formula, go to the “Logic” section, where we will add logical rules for the results. After calculating the points in the formula and deciding that the range of values will correspond to three results:
- Unsatisfactory — range 0 - 15 points;
- Satisfactory — range of 16 - 24 points;
- Positive — range of 25 and above points.
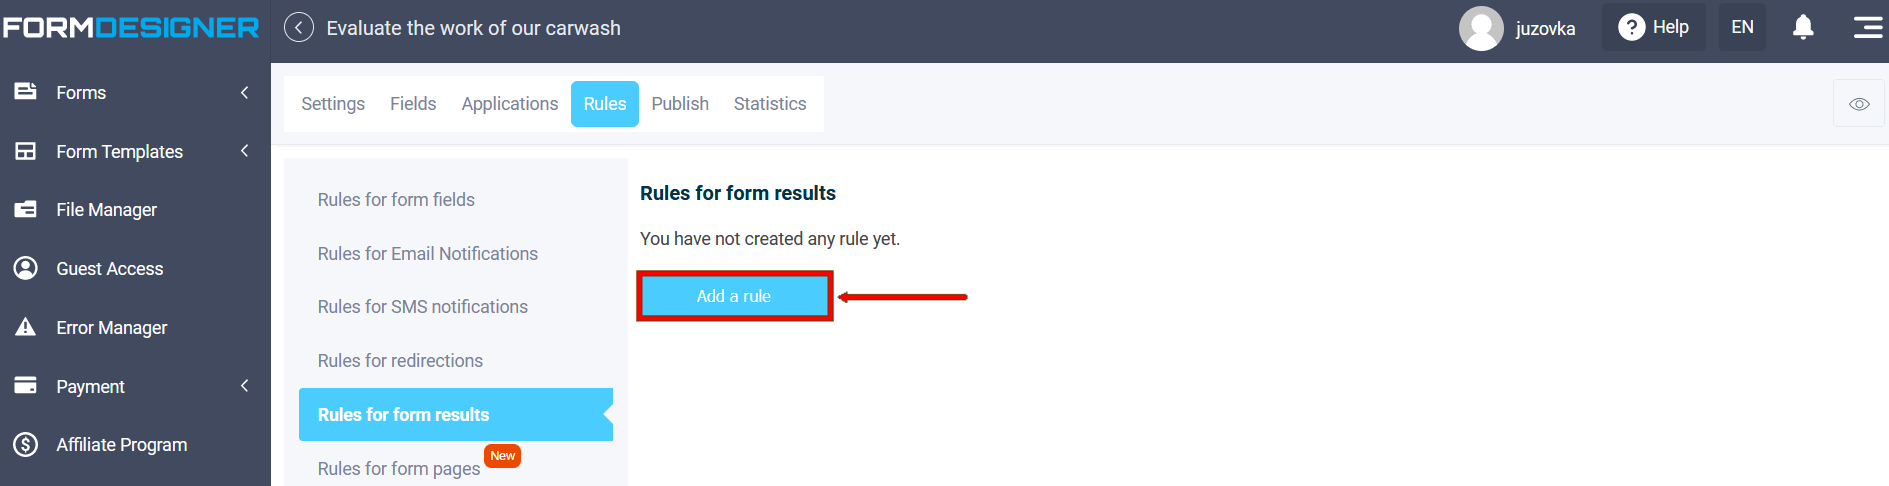
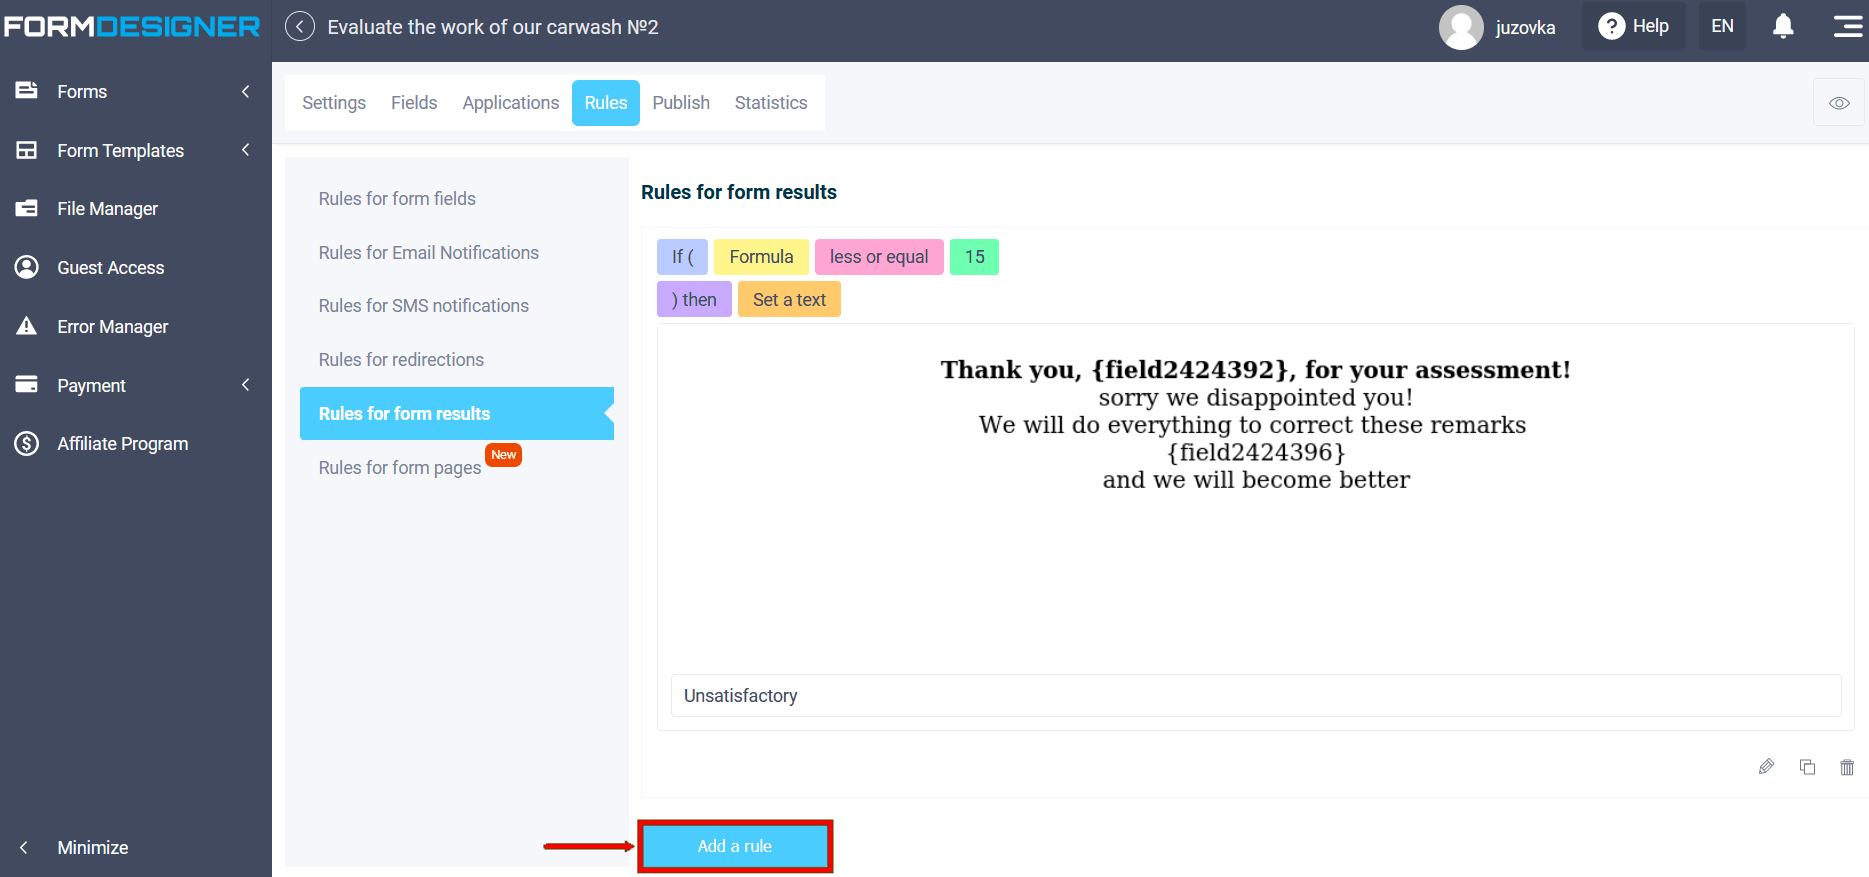
Now we implement the output using the logic of the rules for the results of the form. Go to the "Logic" tab, select the "Rules for form results" section and click the "Add Rule" button:
In the condition, select if the value of the “Formula” element is less or equal to 15:
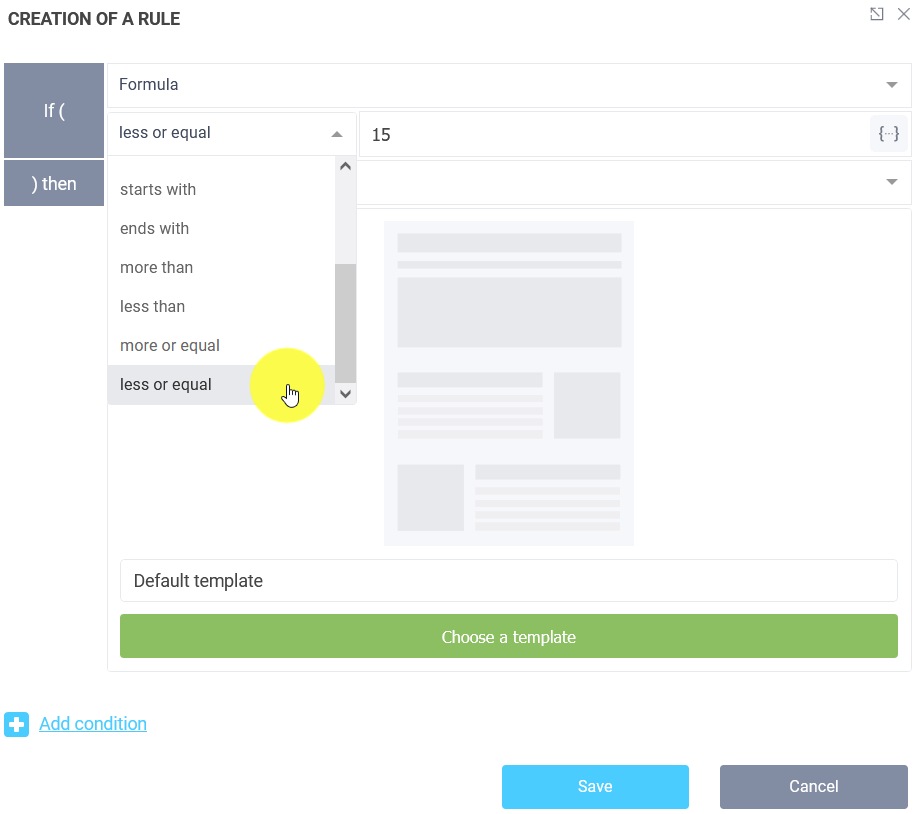
Then set the text. We get a range of 0-15.
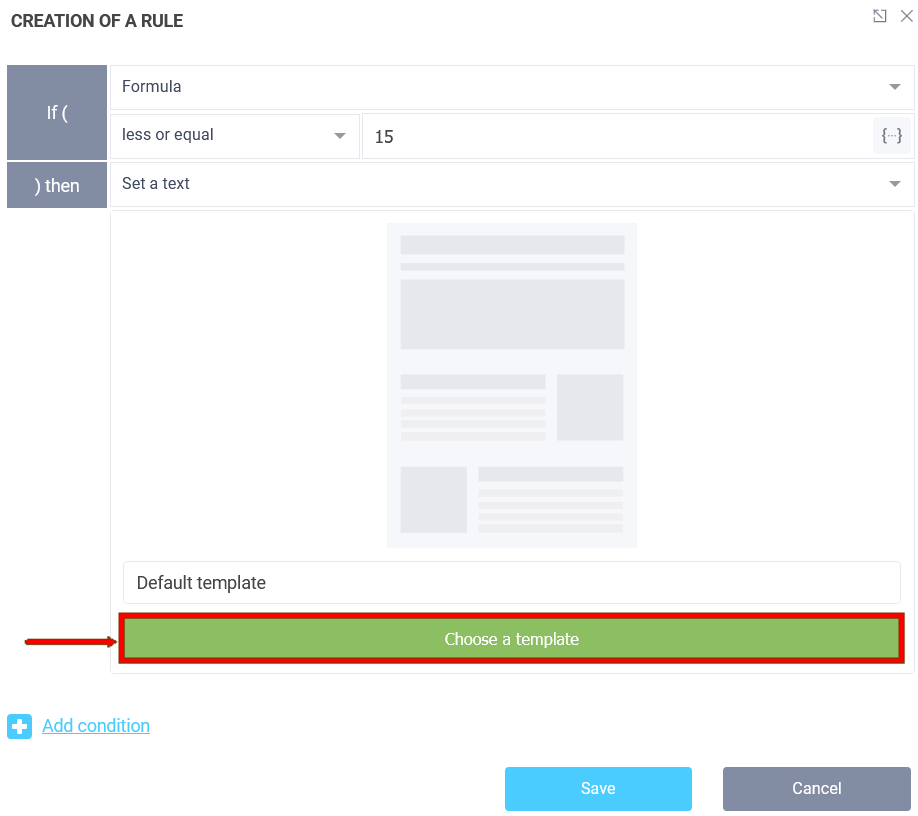
Next, we need to create a template of texts for 3 results. To do this, click "Choose a template":
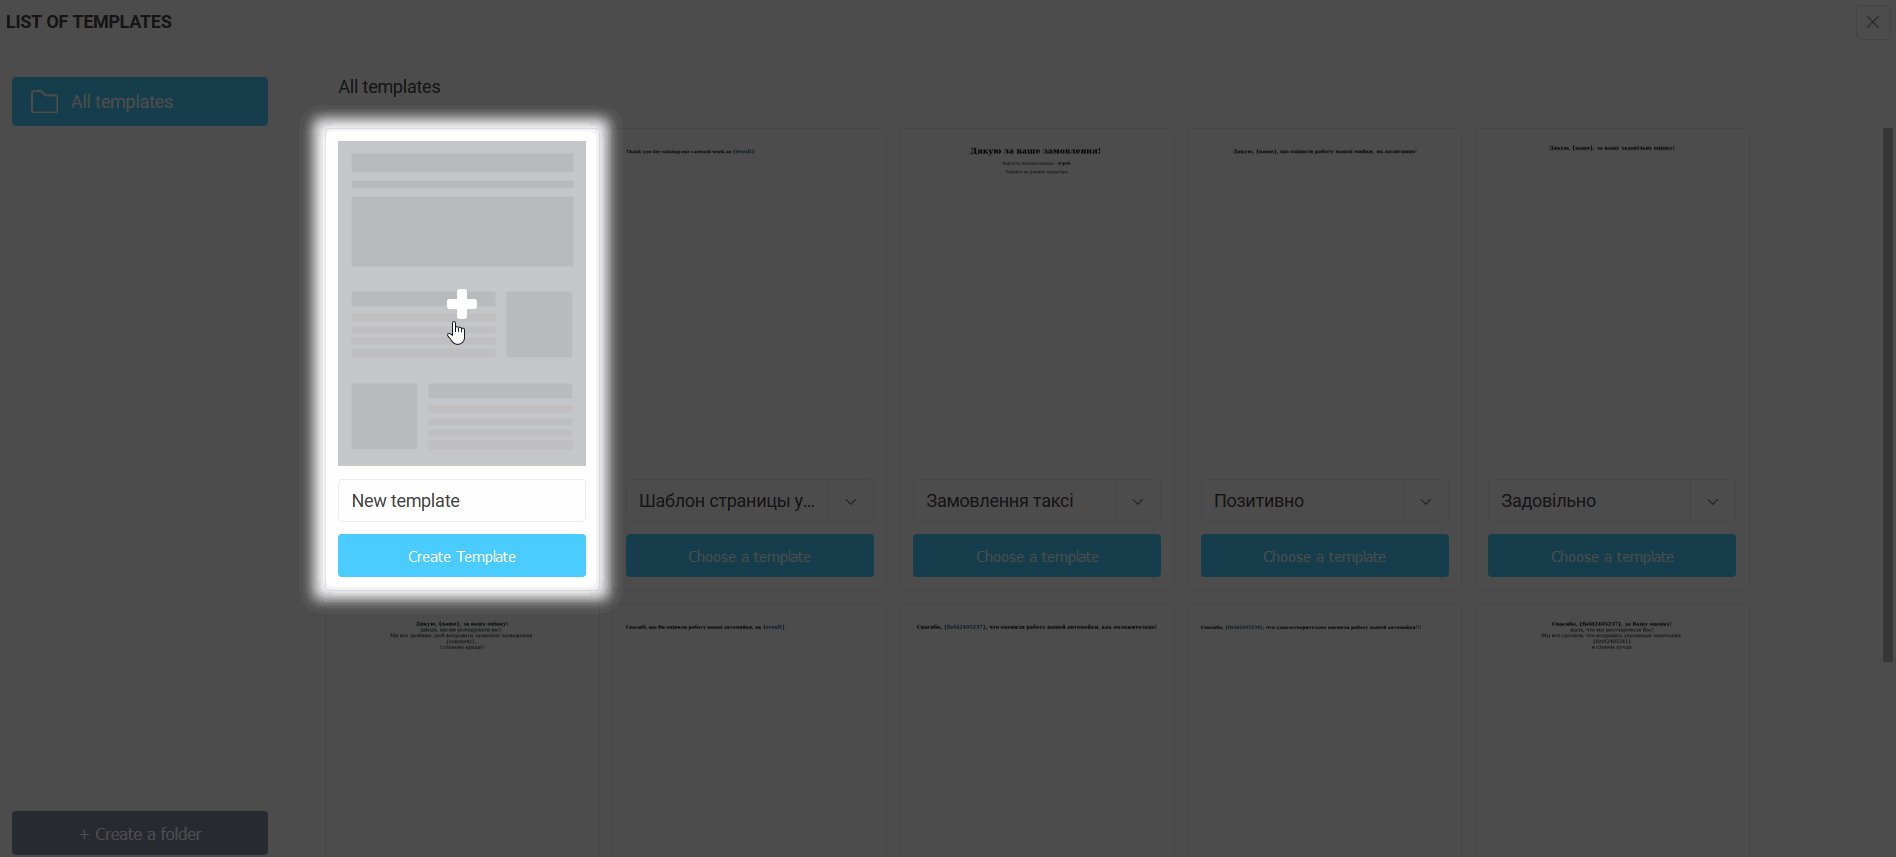
The list of templates opens, click create template:
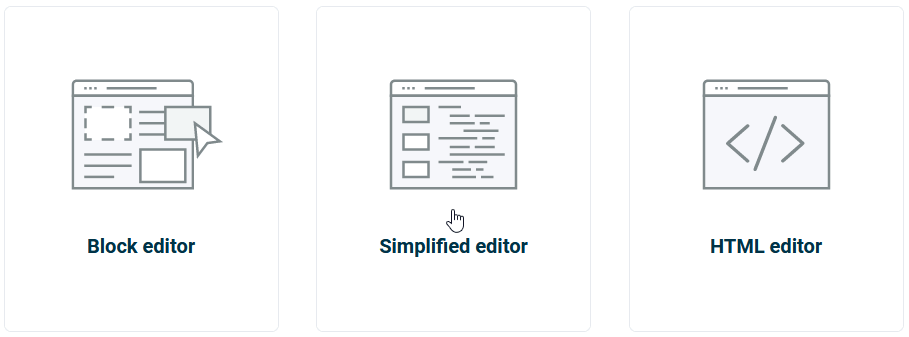
The template editor selection opens, for example, select "Simplified editor":
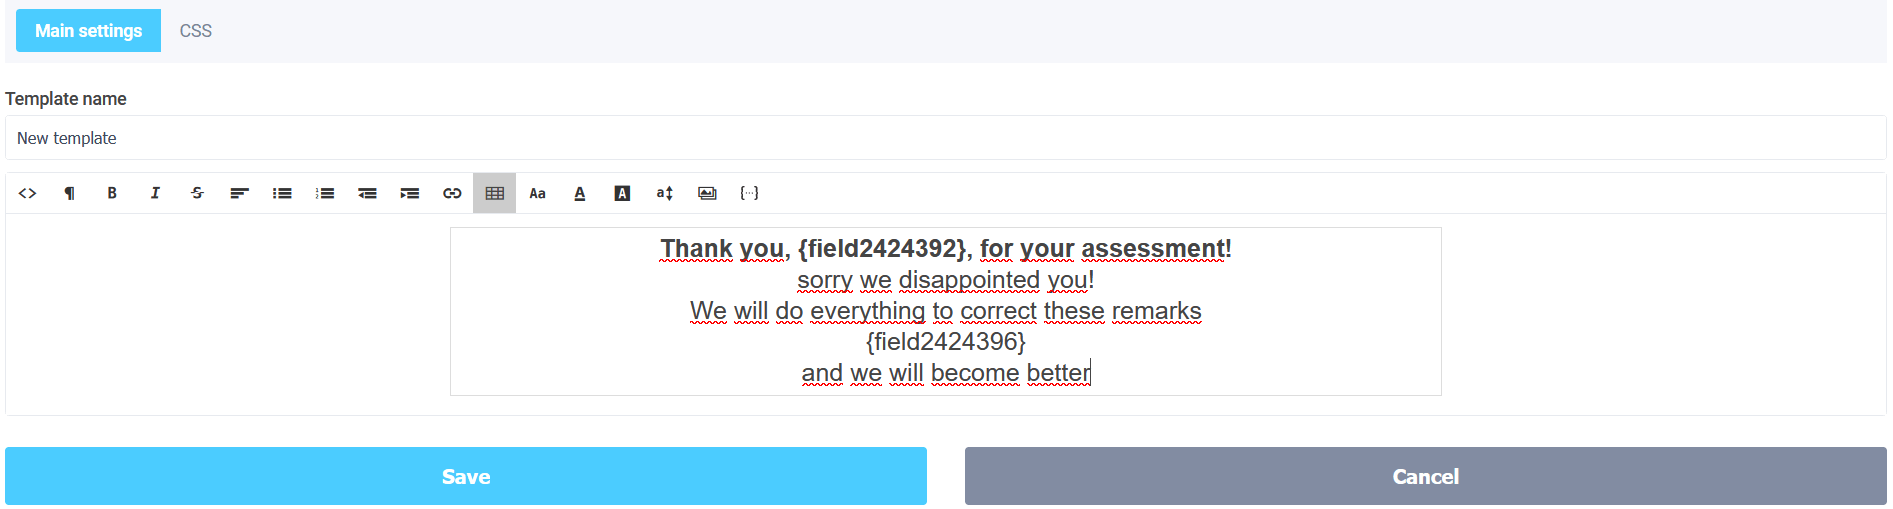
We will indicate the necessary text for "Unsatisfactory". Used macros for inserting the name of the interviewee and his comment. We forget to save the template settings:
Here we can rename the template so as not to get confused, as well as copy, etc.:

Immediately in the list of templates we will collect 2 more templates for ratings "Satisfactory" and "Positive", respectively, given names:
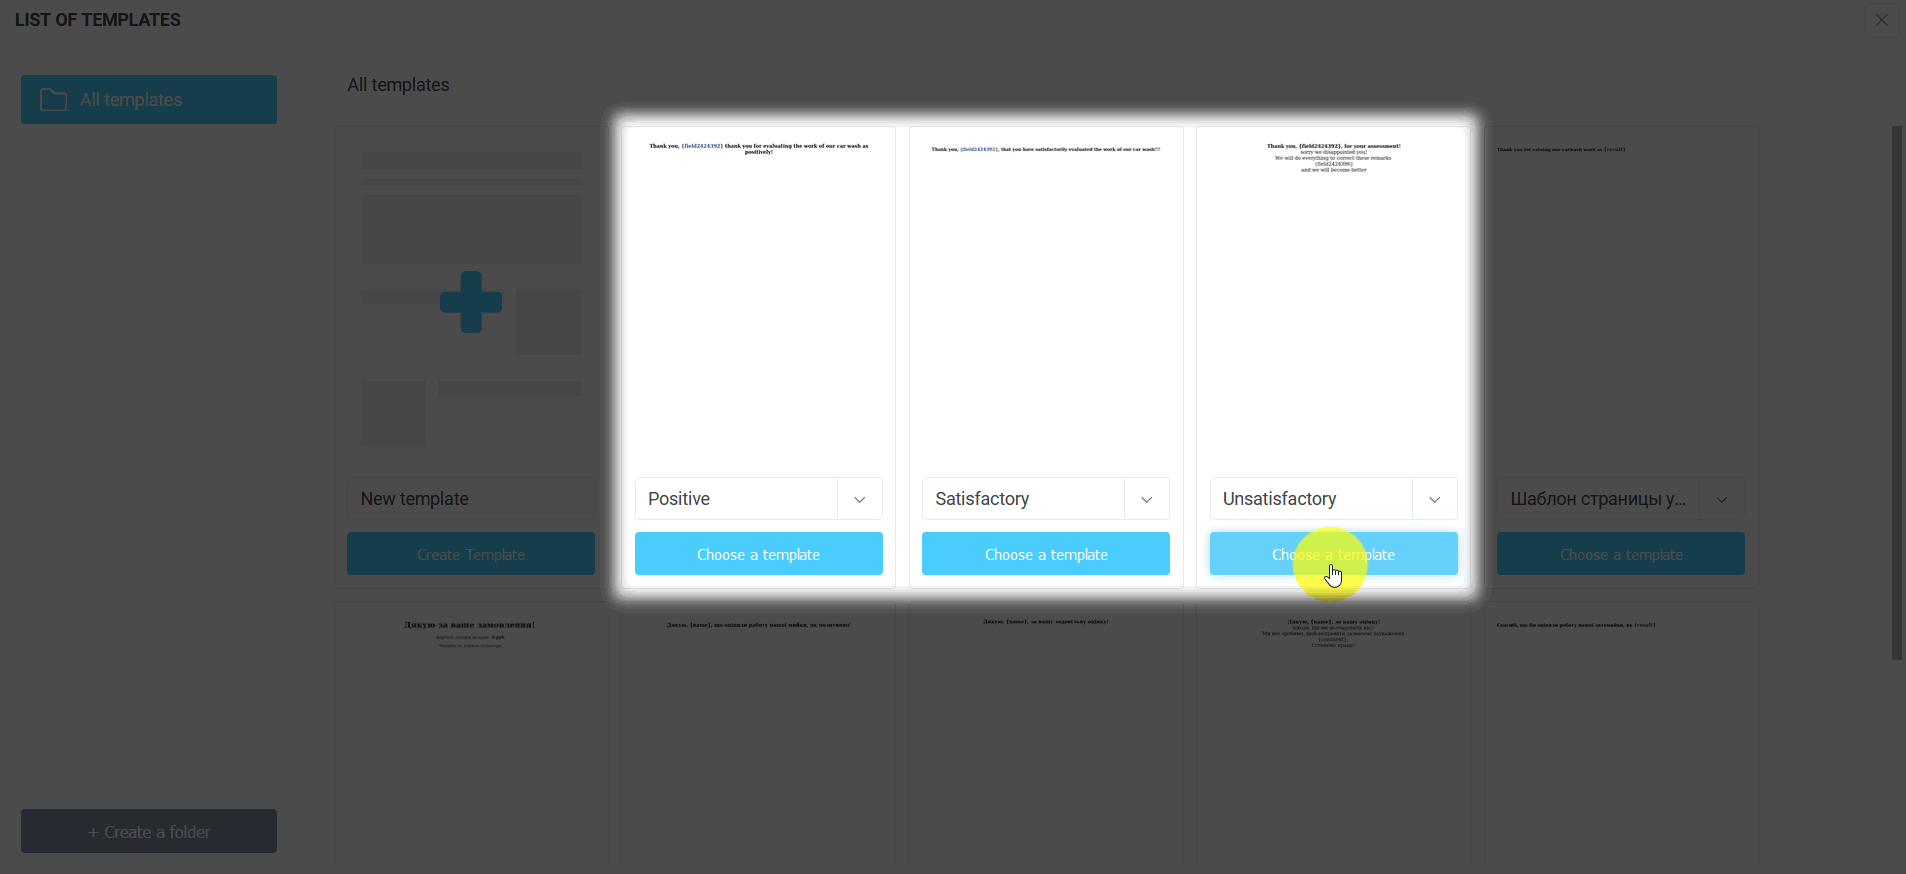
Select the template "Unsatisfactory", which will be used in the logic:

After you have selected the text template, click the "Save" button.
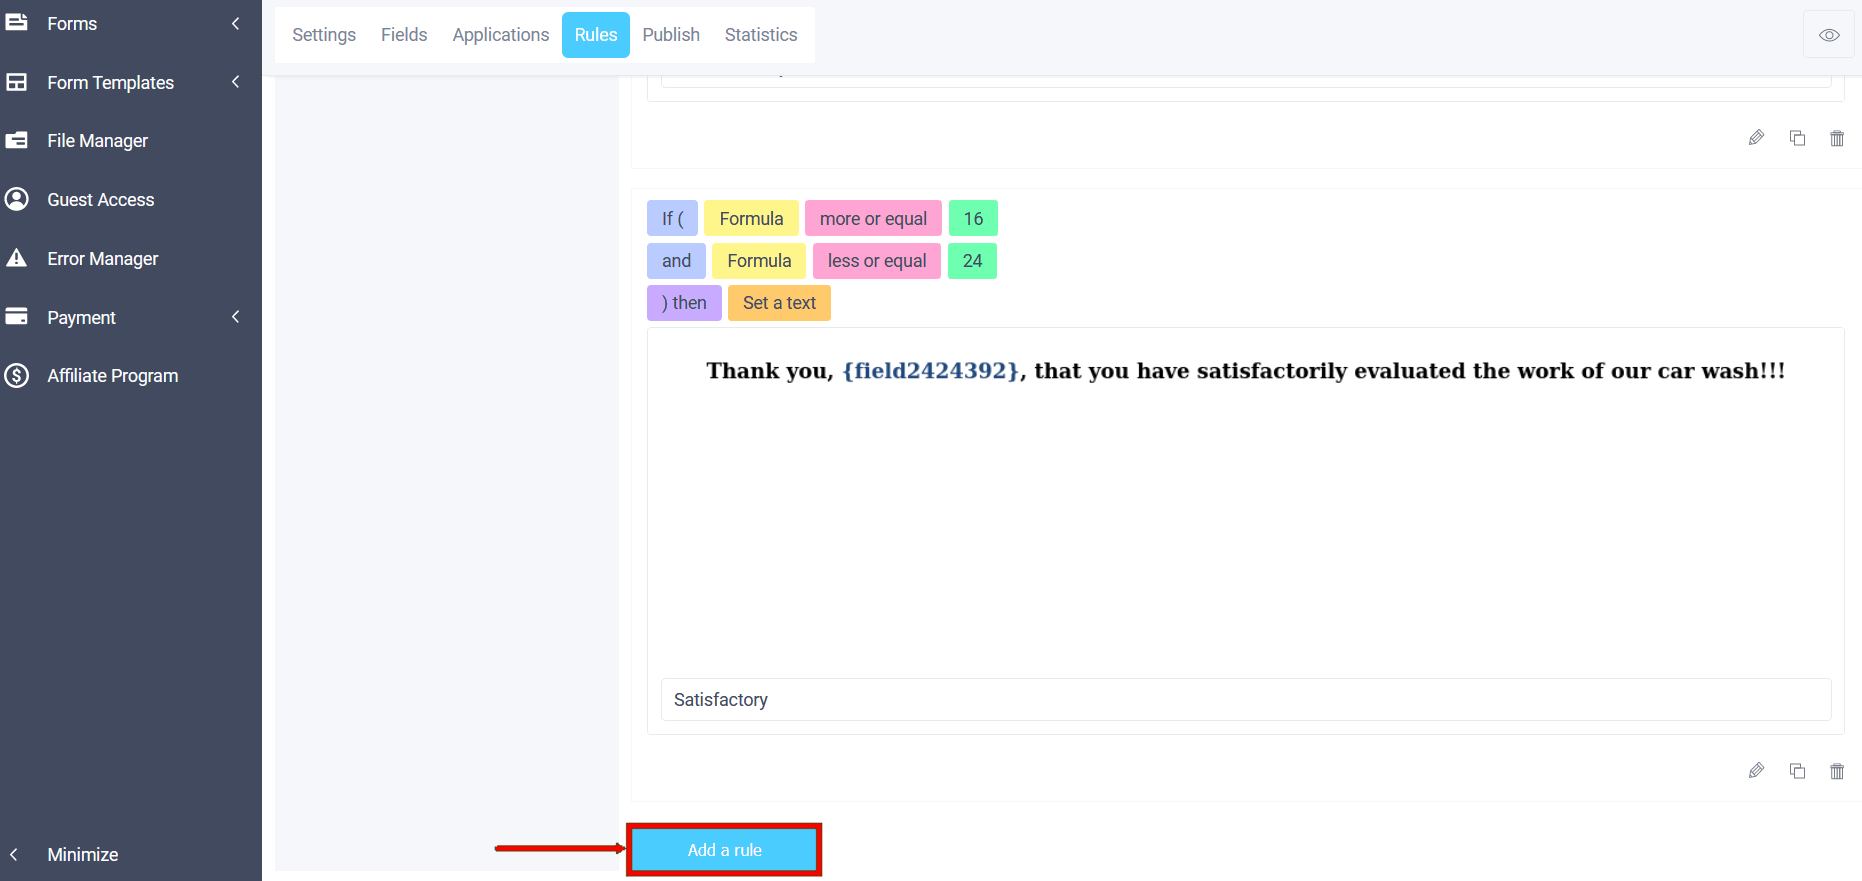
Add the second rule for the result "Satisfactory" by clicking the "Add rule" button:
We need to get a response range of 16-24. To do this, you need to make a condition using the logical And:

In the rule, we make the formula greater than or equal to 16 by adding a condition through the logical "And", the formula is less or equal to 24, then set the text:
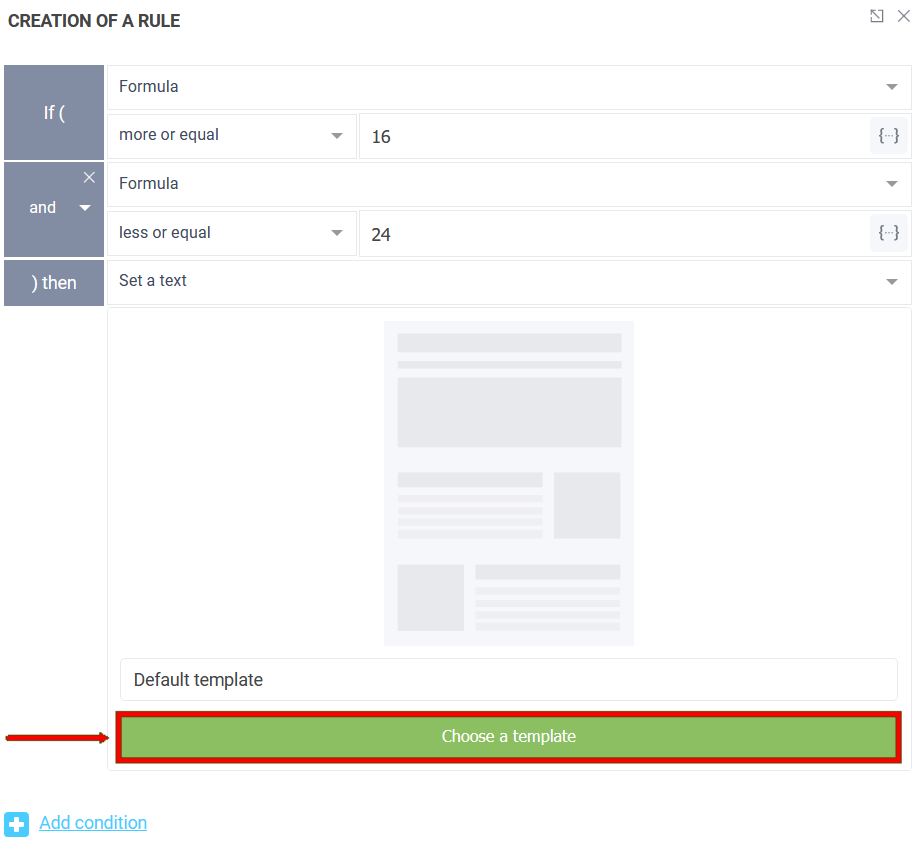
Similarly, we select a text template for the "Satisfactory" range by clicking the "Select template" button. Do not forget to click the "Save" button.
In the same way, we add a rule for the range of points "Positive":
Specify in the rule that if the formula is more or equal to 25, then set the text. And choose a template for the "Positive" range:
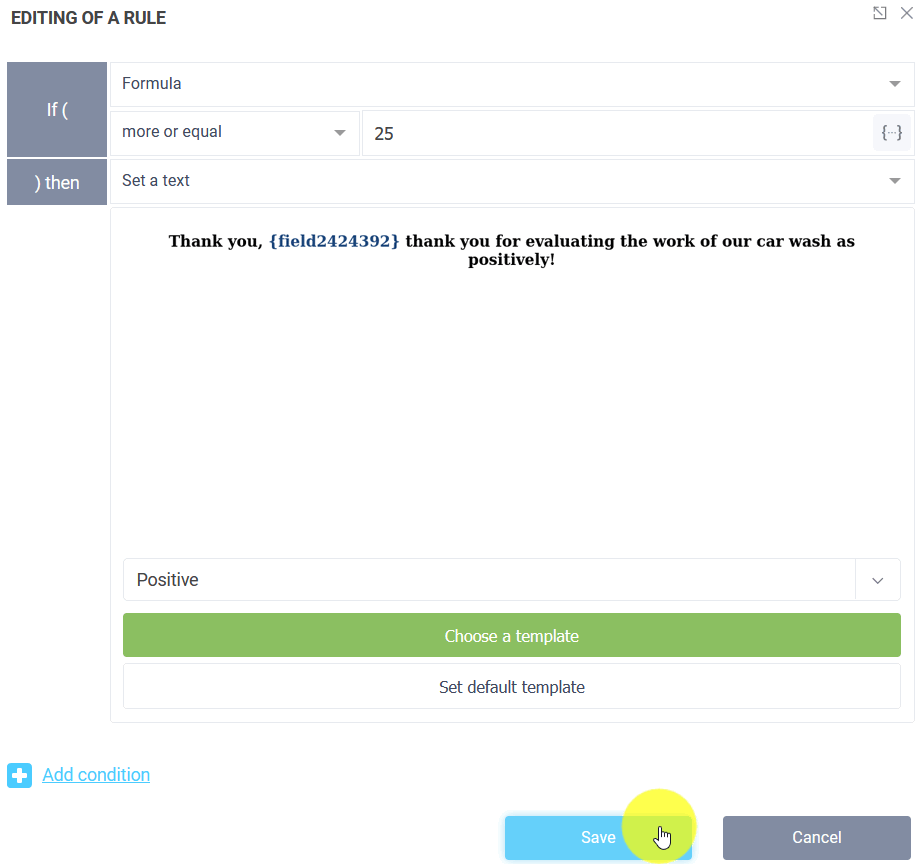
Do not forget to click the "Save" button.
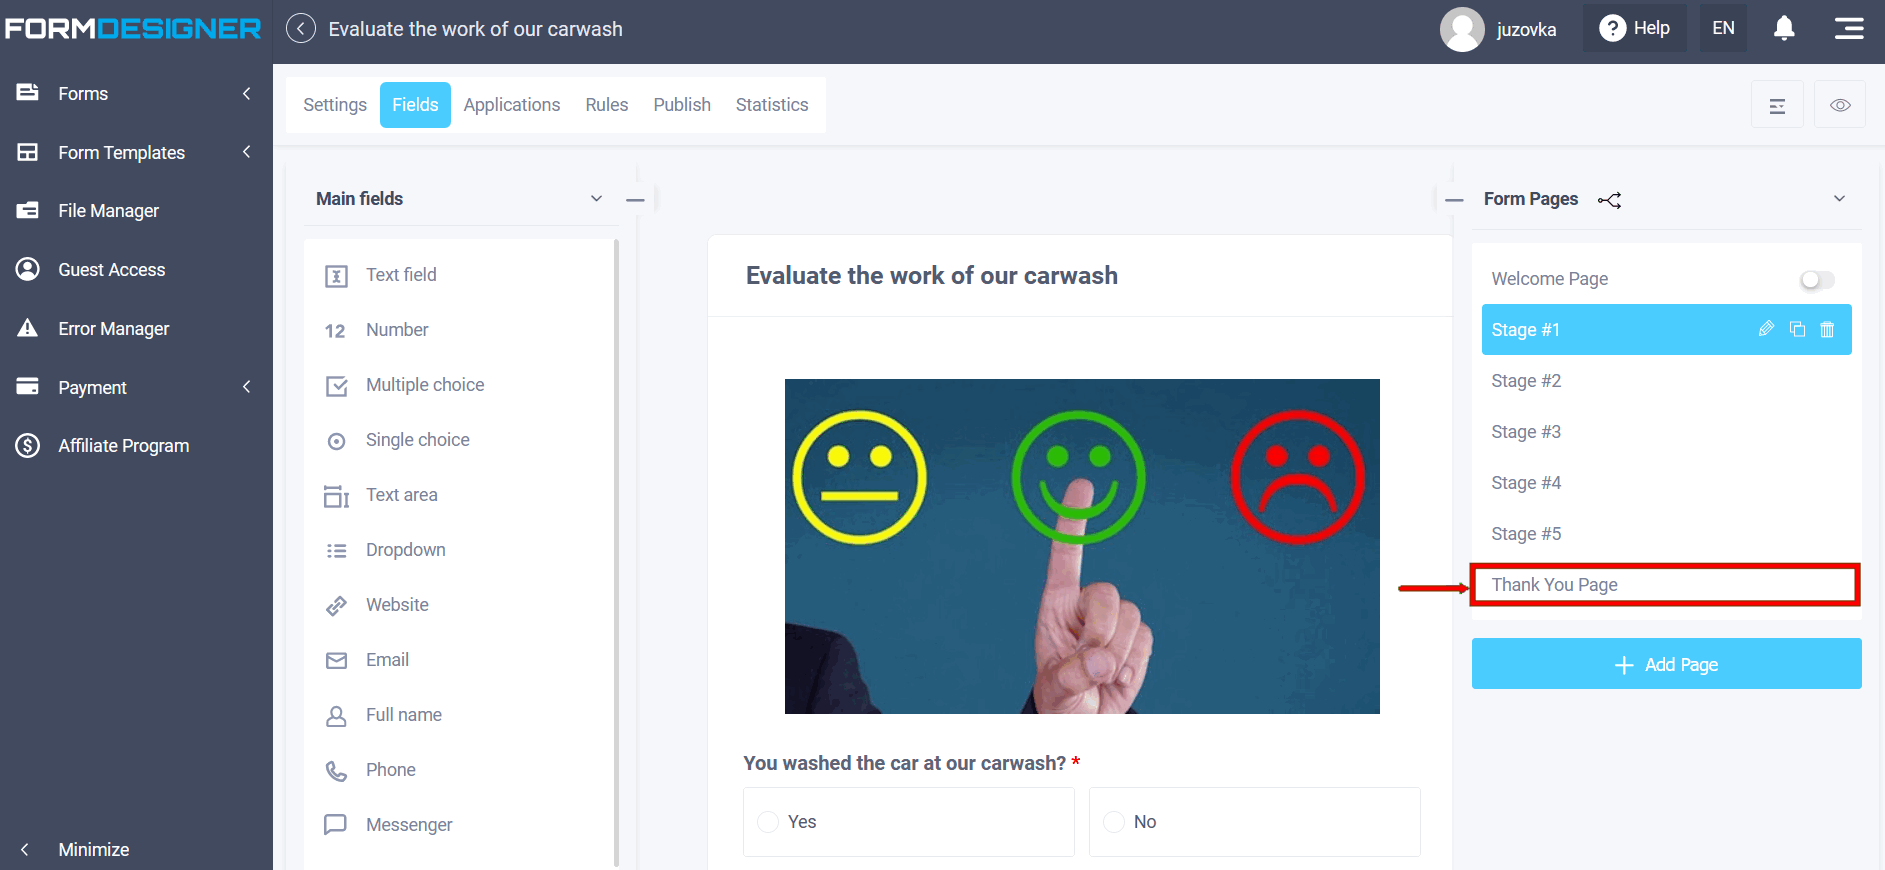
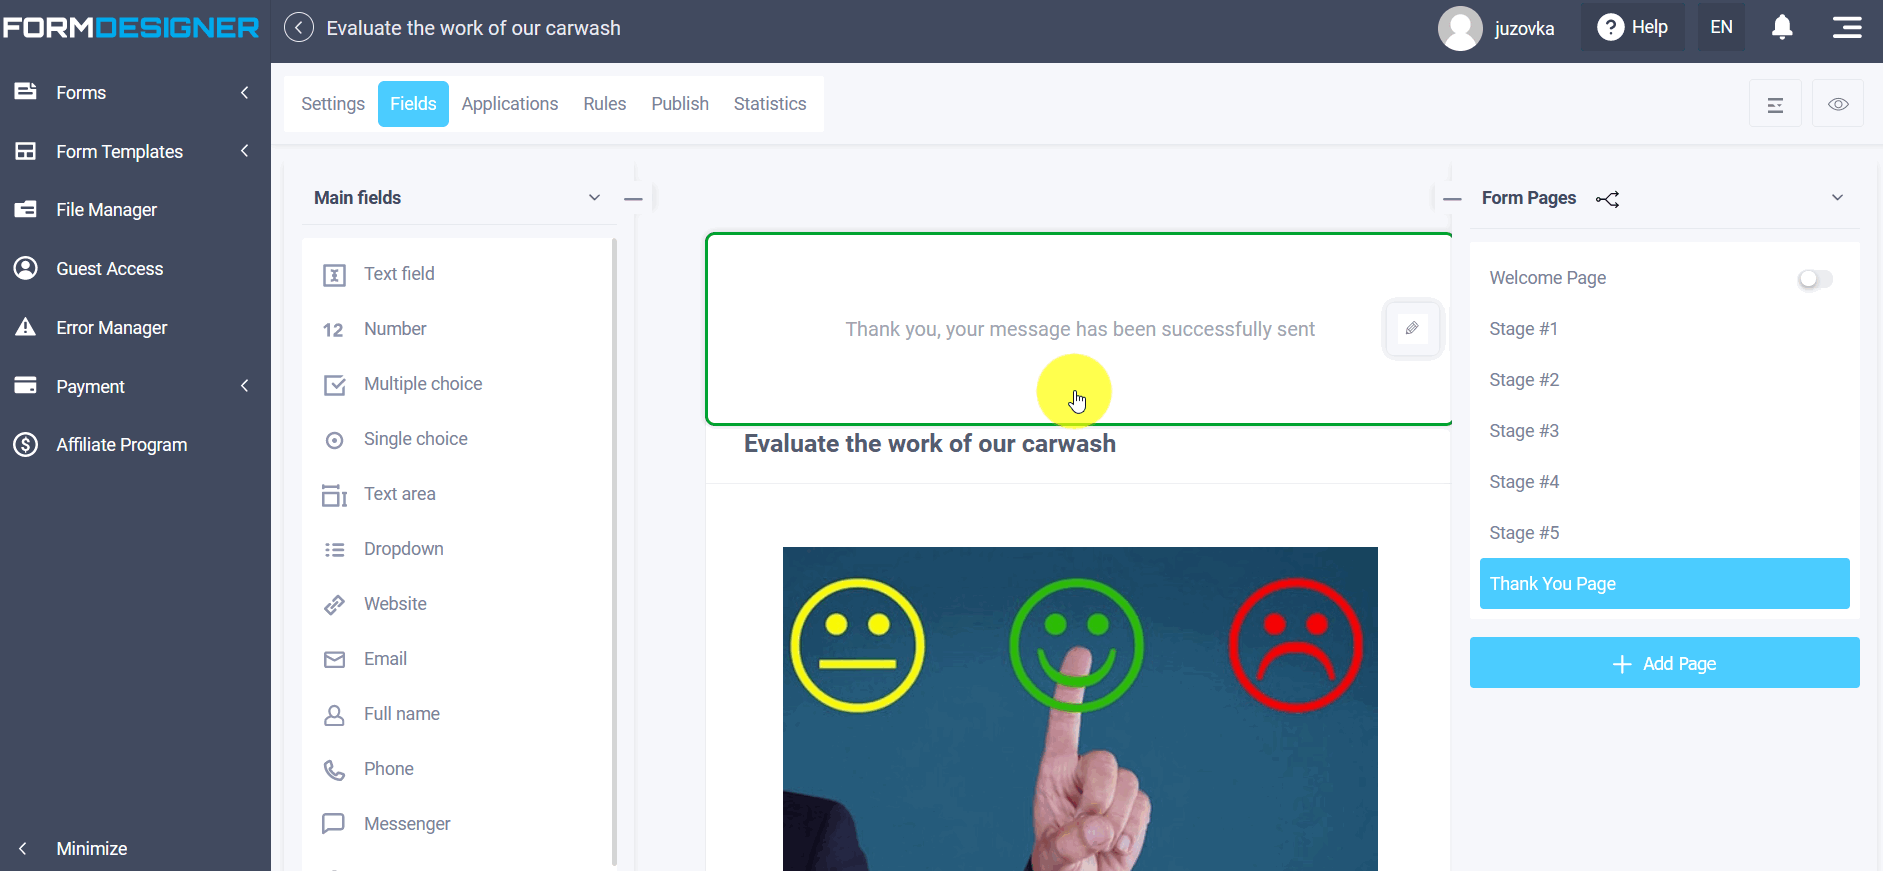
Now let's configure the template output on the gratitude page. Go to the elements tab and open the icon on the right of the "Form Pages":

In the pages of the form, select "Thank you page":
Click on the message about successful sending:
Select in the “Action on successful filling out of the form” - show the text on a separate page:
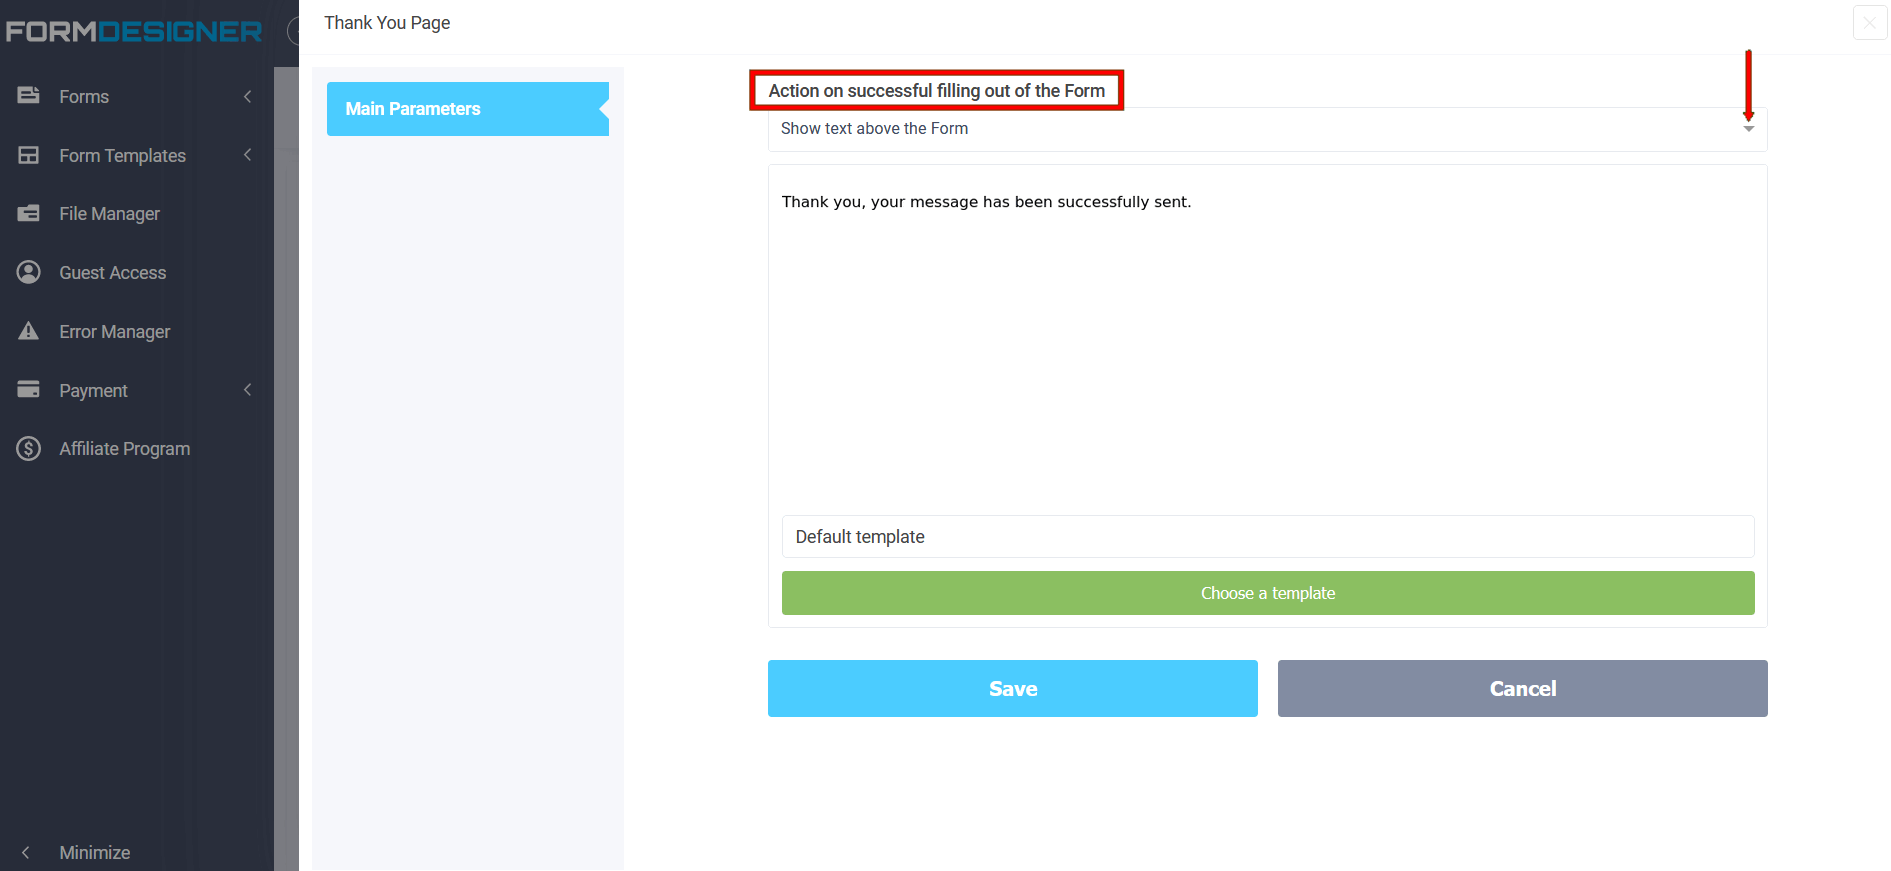
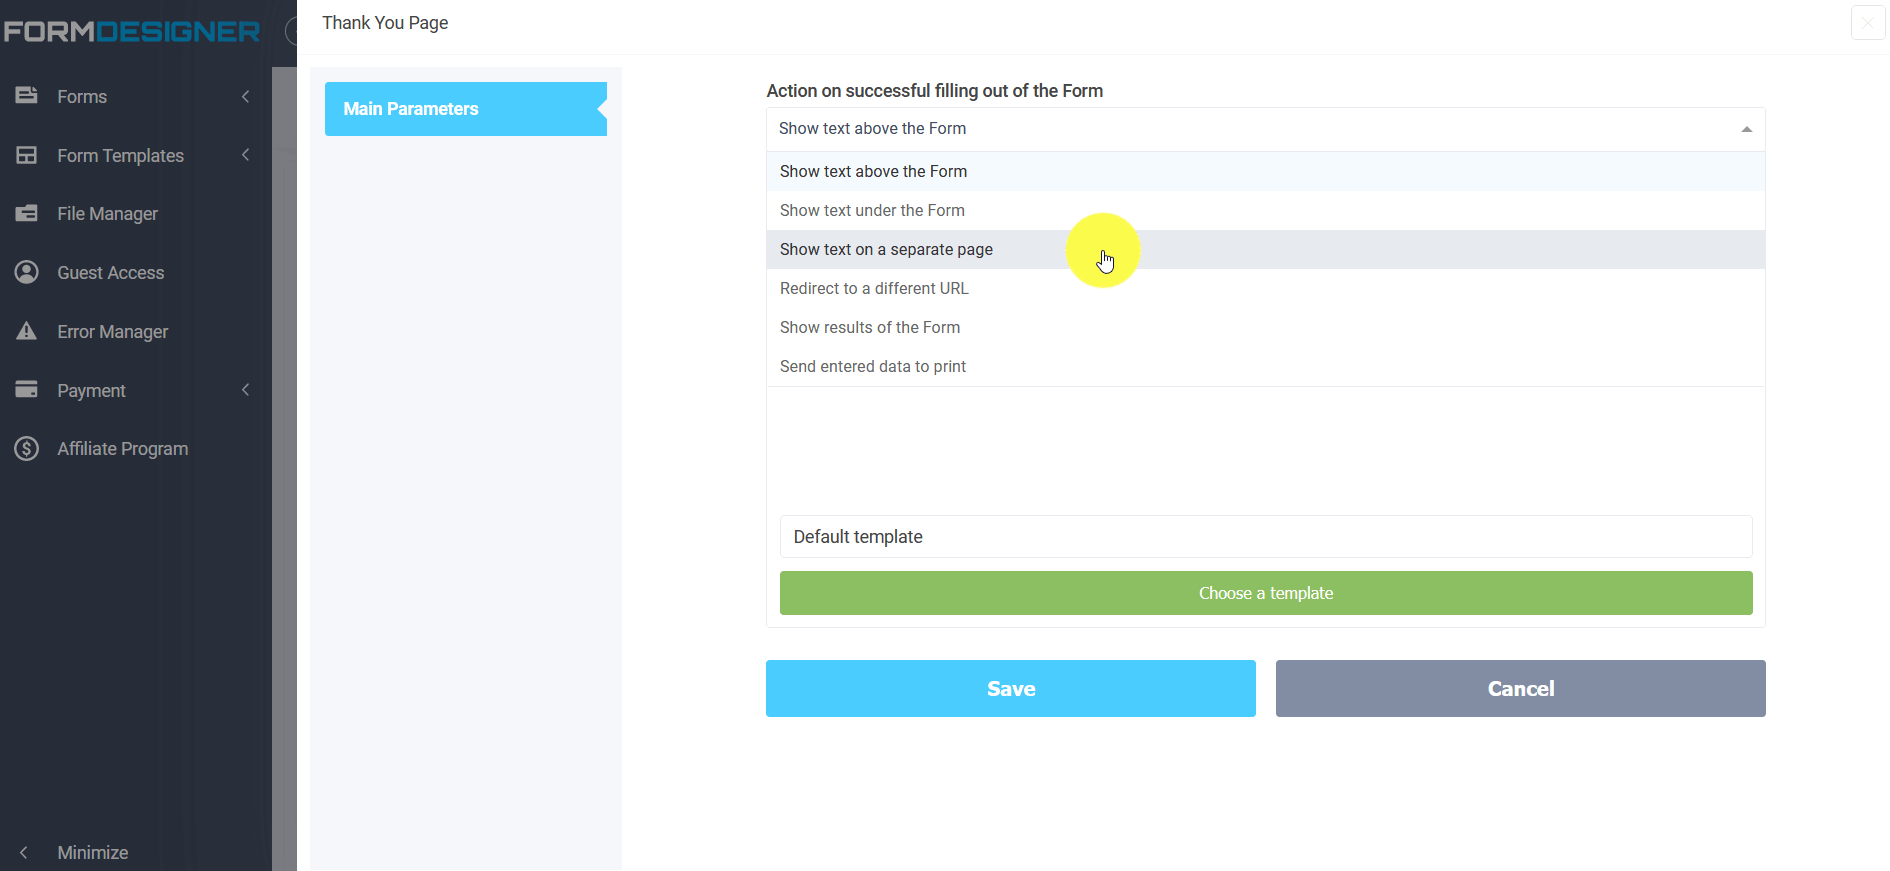
Click save.
Important! The default template in the successful submission action will be displayed only when the rules in the logic for the form results are not met!
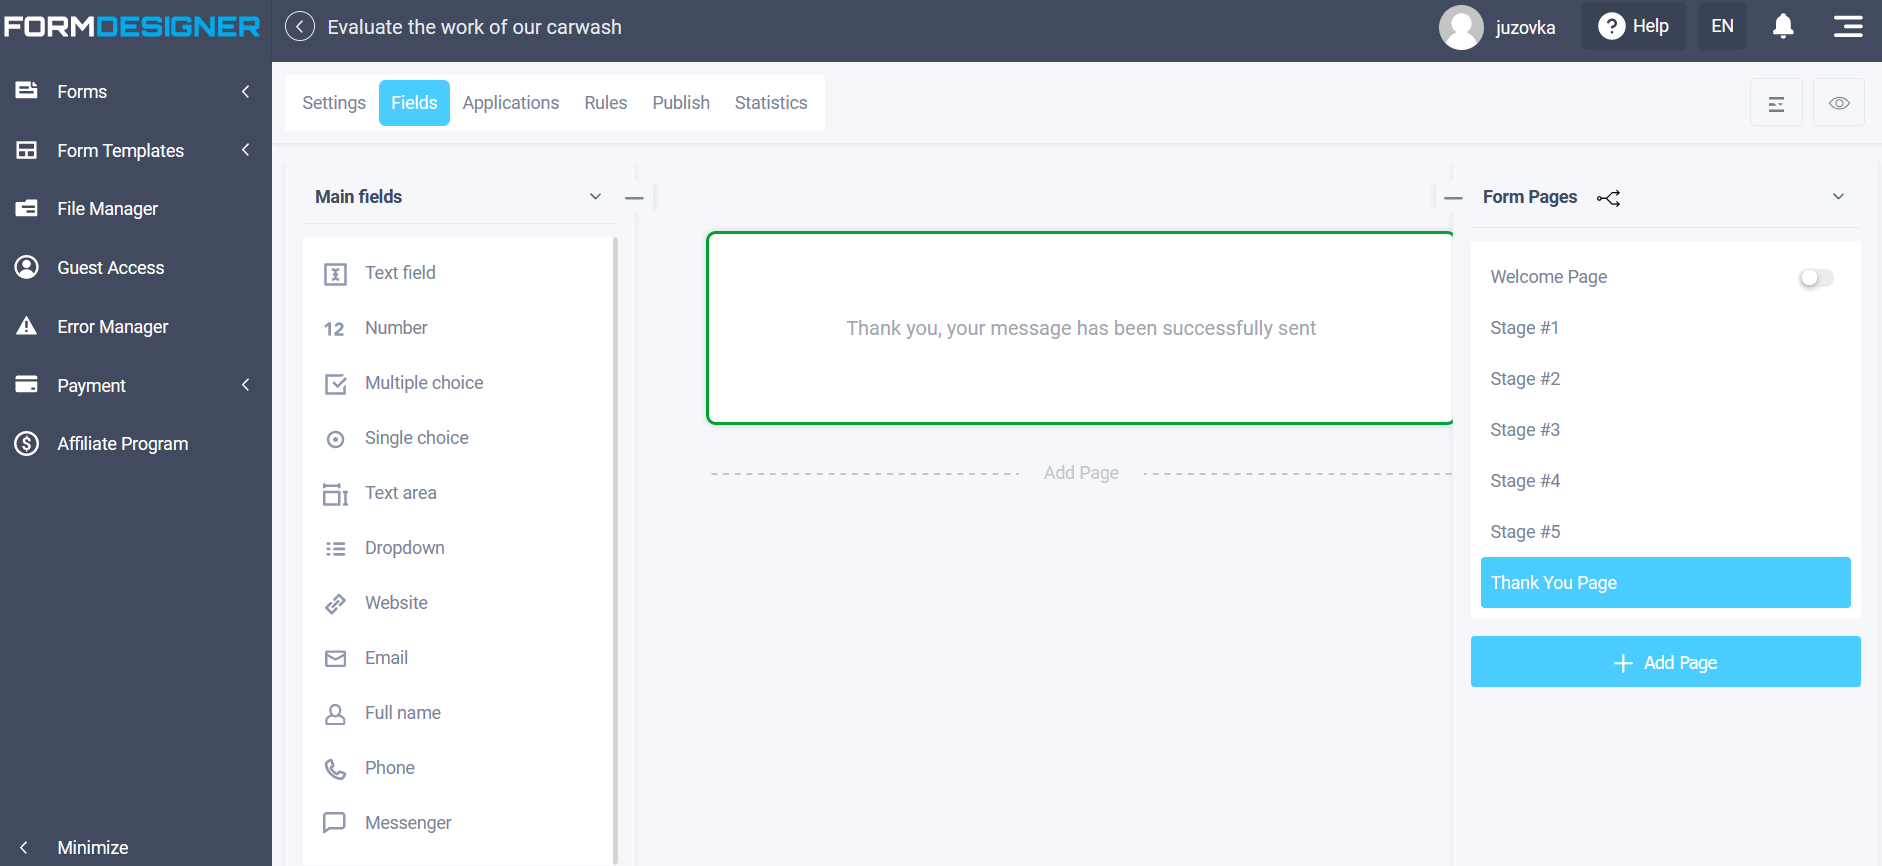
That is, the text on the screen will not be displayed after filling out the form in our case, but the result templates that we specified in the logic for the form results will be shown.
By clicking the form view icon, you can view the customized form:
Where in the text, after submitting the form, the result of the survey/testing will be displayed, in our case - how the customers rated the car wash.

In the section "Design theme" you can choose one of the template design themes that you can edit for yourself.
If necessary, you can also configure sending the test results to the user's email address. To do this, you need to activate "E- mail notifications for the user (answering machine)". In addition, you can configure separate logical rules for email notifications and there set up separate templates with results depending on the amount of points.
We hope this material will be useful for you. Leave your comments in the form below!