
An email form is a web form that sends everything a visitor types in to your email address the moment they press the button. It is the simplest way to collect enquiries, orders and feedback without building a back end or checking an admin panel every hour.
You can build one in FormDesigner and start from the ready contact form. The builder stores every submission and sends a copy to the address you set. Create an account and the form is ready to publish on the site.
This page is about a form that emails you the visitor's message. A form that only collects an address for a newsletter is a subscription form.
Why send form submissions to email
Email is where most small businesses already work. A new lead that lands in the inbox gets read in minutes, can be forwarded to a colleague, and sits next to the rest of the conversation with that customer. The same submission can go to several people, for example to sales and to the person who handles support.
If the team reads messages in Telegram rather than in an inbox, send the same submission there.
What to put in the form
Every extra field lowers the number of people who finish the form, so start with the minimum you need to reply: a name, an email address and a message. Add a phone number only if you really call people back. A drop-down for the topic of the enquiry is worth having, because it lets you route messages and write a clear subject line for the notification. If the visitor needs a price, add a calculator: they see an estimate straight away, and you receive the details they entered together with the result.
How to set up an email form
- Create the form and add the fields you need. Mark the email address and the message as required.
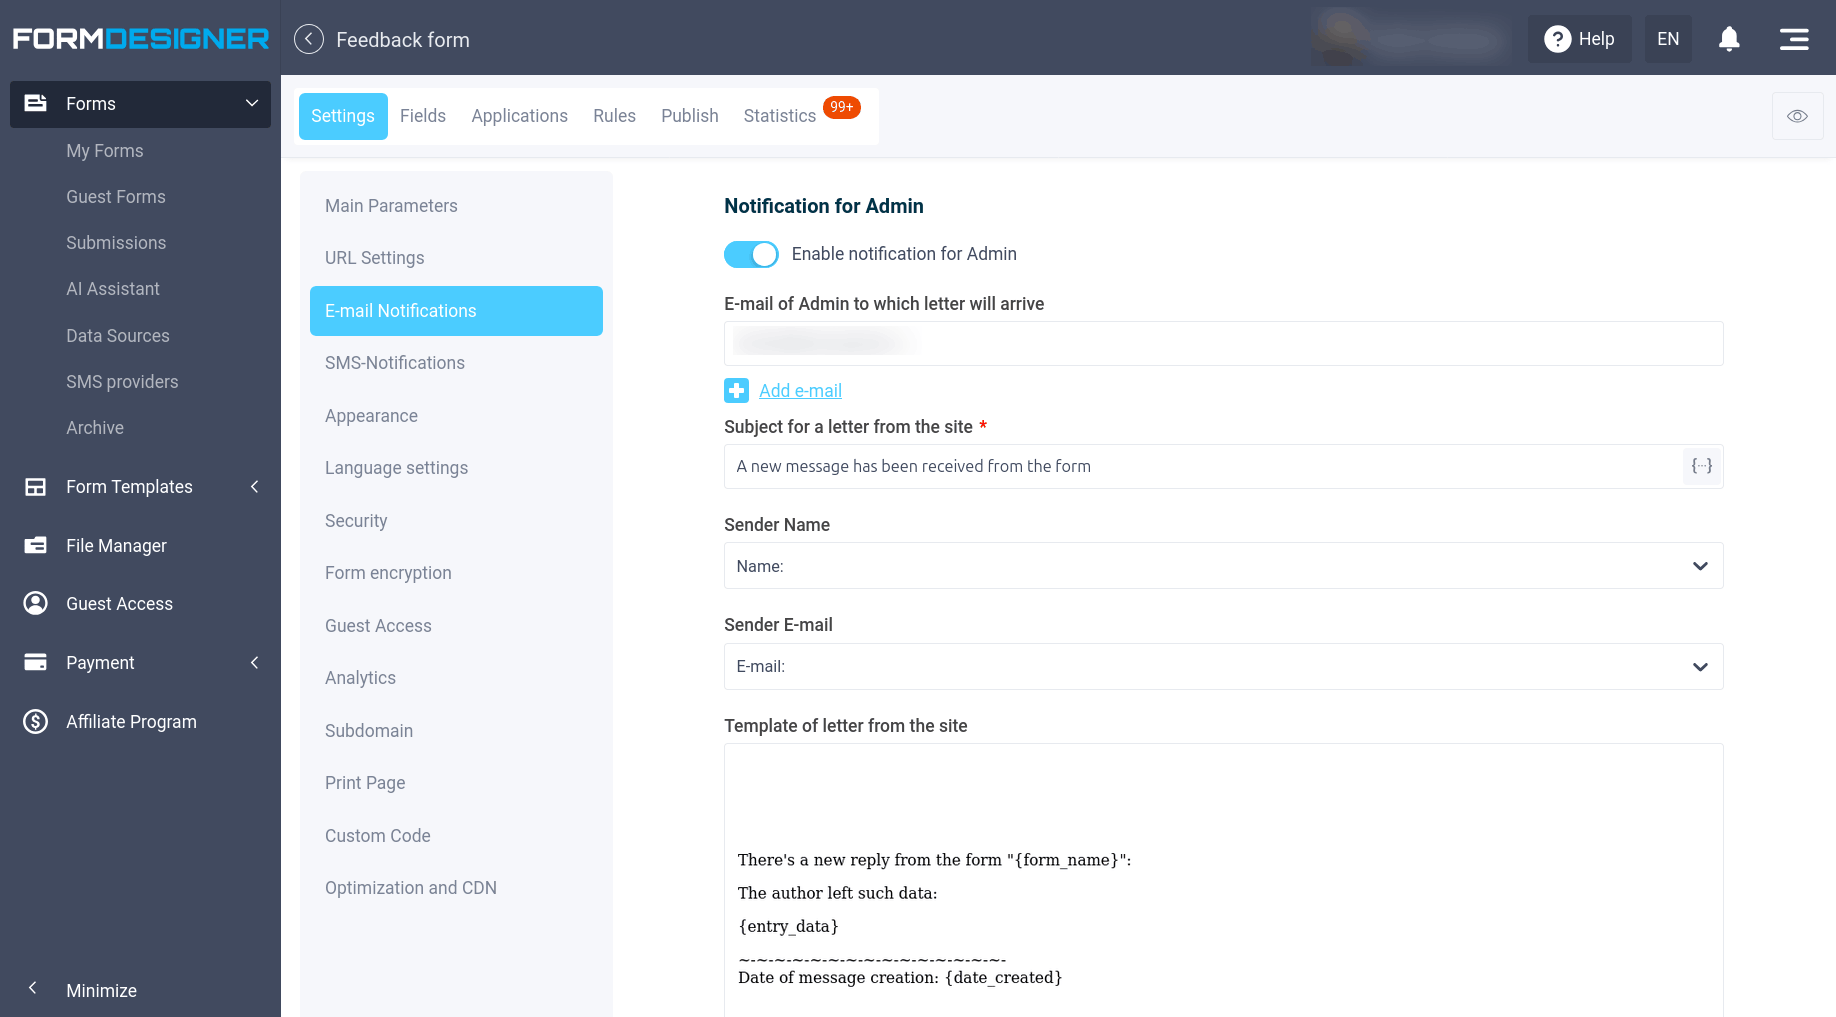
- Open the notification settings and enter the address that should receive submissions. Use a shared mailbox such as sales@ or info@ rather than a personal one, so nothing is lost when someone is away.
![Form settings in FormDesigner, with E-mail Notifications highlighted in the left menu]()
- Write a clear subject line, for example "New enquiry from the website", and include the visitor's answers in the body of the message.
- Set the visitor's address as the reply-to, so you can answer with one click.
- Publish the form on your site, send yourself a test submission and check that it arrives, including in the spam folder.
What the notification email looks like
The letter to your team should say who wrote and what they need, without making you open the account for every enquiry. Put the visitor's name in the subject and their address in Reply-To. Fill the body with the answers from the form:
Subject: New enquiry from the website: Anna
Reply-To: [email protected]

Name: Anna
Email: [email protected]
Topic: Pricing
Message: I need a quote for a contact form on our site.
If the visitor attached a file, leave the file in the account and put a link in the email. A mailbox is a poor place for documents.
Send a confirmation email to the visitor
A second email, this time to the person who filled in the form, is worth setting up. A short confirmation such as "We received your message and will reply within one working day" shows that the form worked and reduces repeat submissions. Keep it brief, repeat what they sent so they can spot a typo, and say when to expect an answer. In FormDesigner this is the autoresponder.
Why a mailto link is not enough
The oldest way to build a form that sends to email is an HTML form whose action is a mailto: address. It still appears in tutorials, but it does not send anything by itself: it only opens the visitor's mail program, and if none is set up, nothing happens. You also cannot validate the fields, protect against spam or confirm delivery. A form builder submits the form to a server and delivers the message, so every submission reaches the inbox whatever device the visitor uses.
The fields are ordinary HTML. The address in action has to be a server, not mailto::
<form action="/send" method="post">
  <label for="name">Name</label>
  <input type="text" id="name" name="name" required>

  <label for="email">Email</label>
  <input type="email" id="email" name="email" required>

  <label for="message">Message</label>
  <textarea id="message" name="message" required></textarea>

  <button type="submit">Send</button>
</form>
Templates
You rarely need to start from a blank page. A feedback form template already has a name, an email and a message. Change the labels and the destination address. Then check three things: submissions arrive at the address you set, spam protection is on, and the form looks right on a phone. A topic drop-down is worth adding only when you really route enquiries to different people. For a newsletter address, start from a subscription form instead.
Avoiding spam and lost messages
Public forms attract bots, and a form without protection will soon fill the inbox with junk. A hidden honeypot field or a CAPTCHA stops most of it without annoying real visitors. The opposite problem is just as common: genuine submissions that never arrive because the receiving mail server flags them. Sending notifications from a domain with correct SPF and DKIM records, and asking the team to whitelist the sender address, solves most of these cases. Test the form again after every change to the address or the domain.
Keep the data safe
Messages from a contact form often include names, phone numbers and sometimes much more, and plain email is not a secure channel. If the form collects anything sensitive, read how to encrypt form data and look at secure forms. Collect only what you need. A link to the stored submission is safer than putting the full details into the notification email.
A good email form is short, sends to a mailbox several people can read, and has basic spam protection. Set it up once, send a test, and it will collect enquiries for as long as the site is online.






 Frightfully low prices! 40% off annual plans + 3 months of QuizLead.io