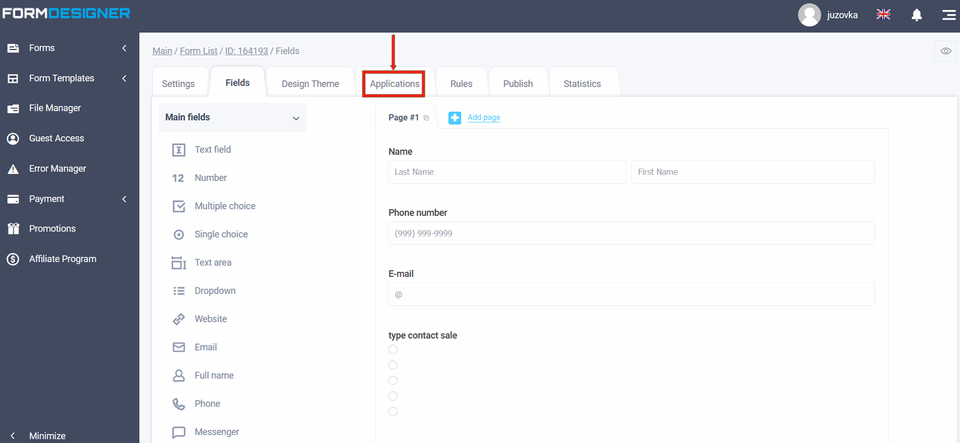
To connect the integration module, you need to go to your personal cabinet and select the "Applications" section in the required form:
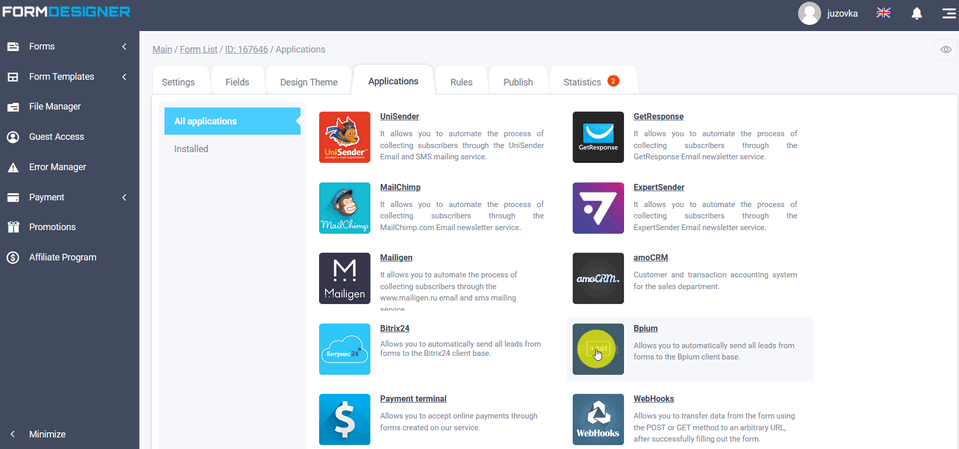
A list of all available applications will appear in front of you. Click the "+Add" icon under Bpium:
Application settings
You will see a popup with the Bpium application settings:
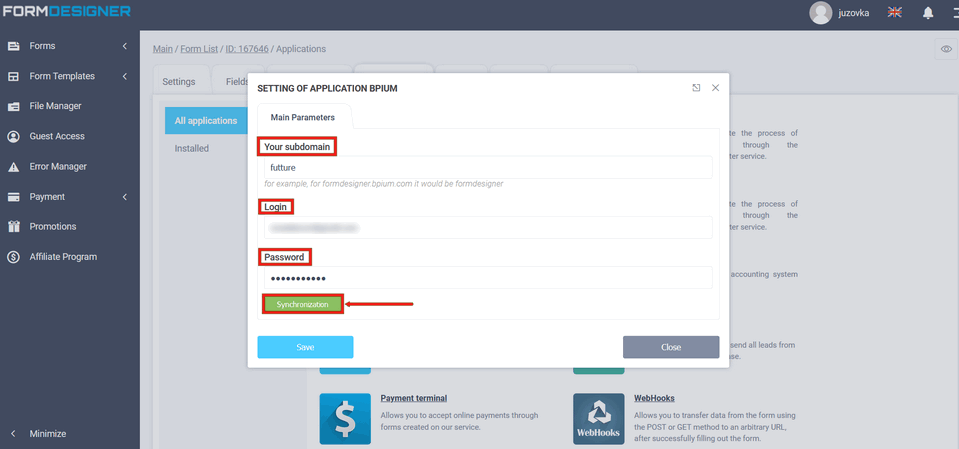
Data from the Bpium service
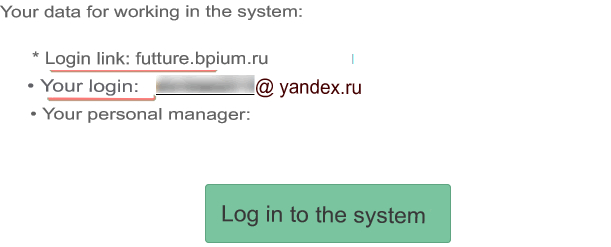
You need to enter the data you received when registering in the Bpium service. In the "Your subdomain" field enter the first part of the link up to ".bpium.ru", in our case "futture":

Or the first part of the link you received when you signed up for the Bpium service:
Enter the corresponding data in the "Login" and "Password" fields and click the "Synchronize" button in the application settings. If you have entered all data correctly, you will see the main settings of the Bpium application:
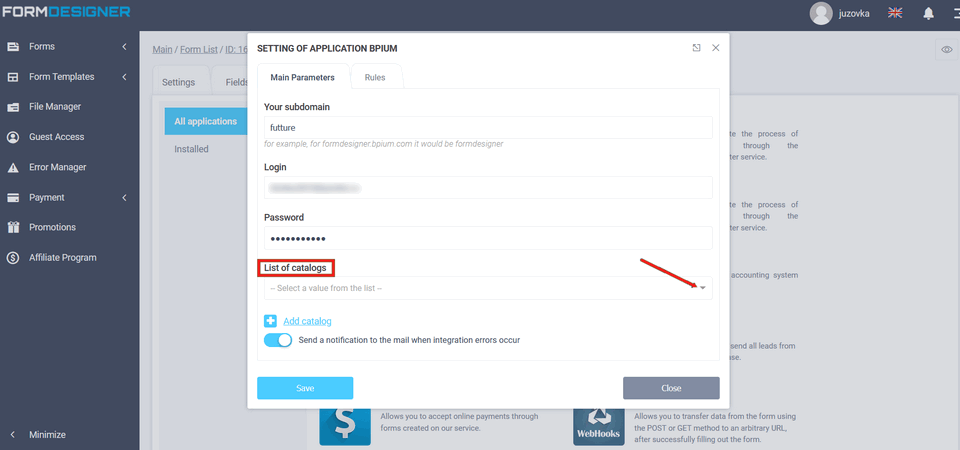
Catalog Selection
The list of directories created on Bpium will be automatically pulled up. Select from the list the directory to which you wish to transfer data from the form, after which you should press the "Add directory" button.
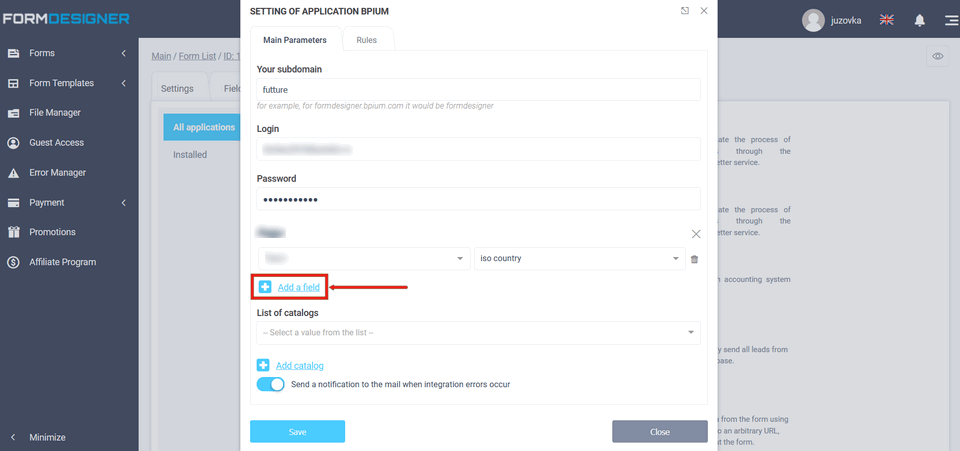
You need to add the required fields from the form to the selected catalog, which will be submitted to Bpium. Check all mandatory fields in the given catalog and add them in the application, otherwise data will not be saved.
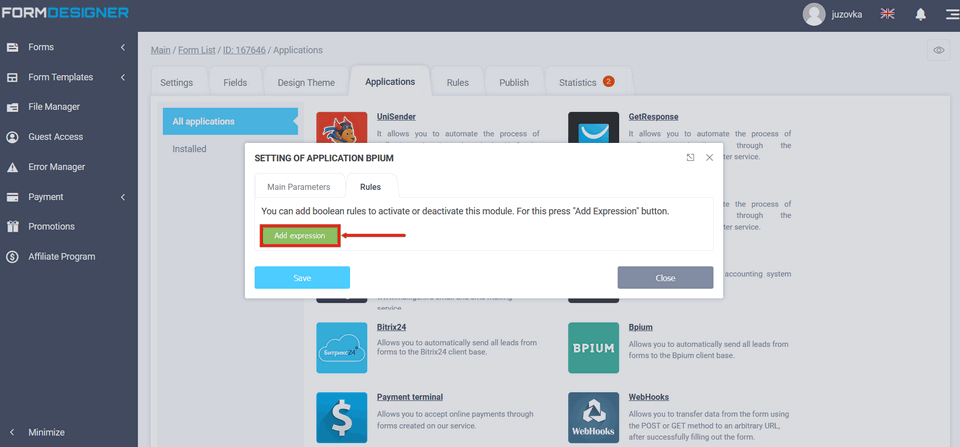
Rules
In the settings of the Bpium application on the "Rules" tab, you can add logical rules to activate or deactivate this application. To do this, click the "Add expression" icon: