In order to add the Bitrix24 integration module you need to install the "FormDesigner online web form builder" application on the bitrix portal. To install the application your account in Bitrix24 should have the status of "Administrator". If not, contact your portal administrator to perform the integration. Next you need to click on the link:
- For All countries - https://www.bitrix24.com/apps/app/formdesigner.global
- For Russia - https://www.bitrix24.ru/apps/?app=formdesigner.forms
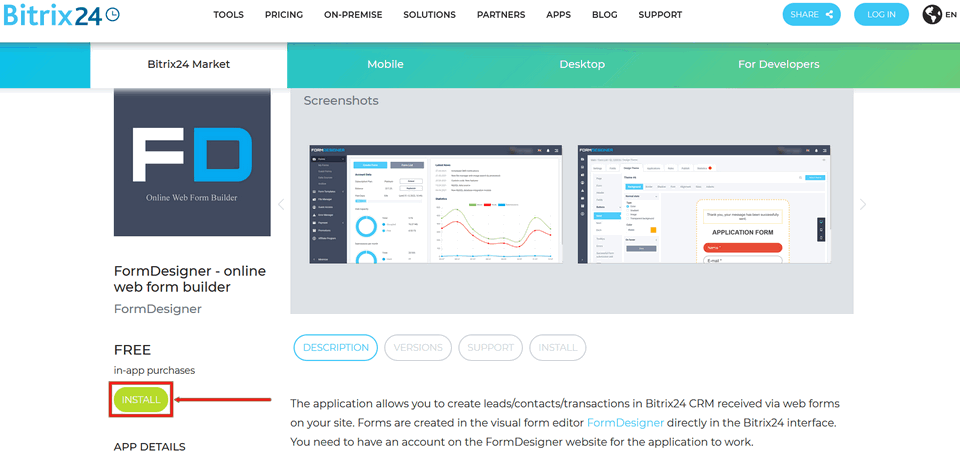
Clicking on the above link will open a window with the Bitrix24 application. Click Install on the bottom left, under the Formdesigner logo and description:
After that you will be prompted to enter your portal data into Bitrix24:

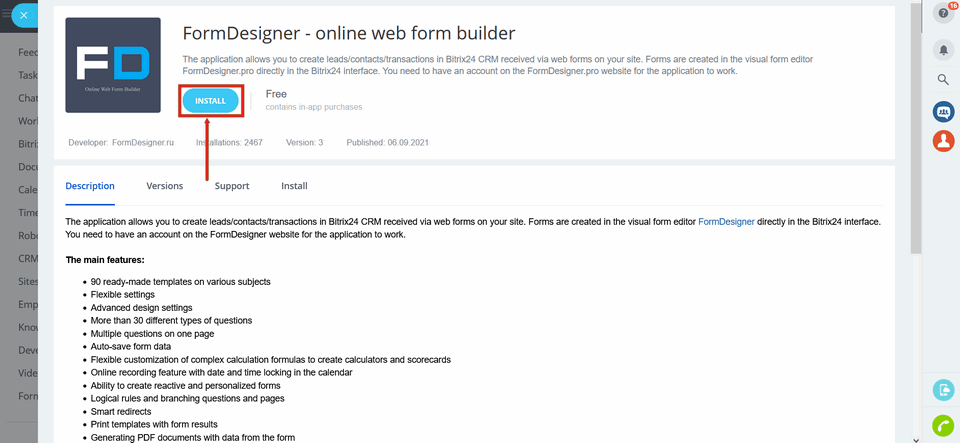
In the "Enter your portal address" (Login) field enter the first part of the address up to the point you were sent an email to authorize in Bitrix24 or copy it from the browser line where you have Bitrix24 open and click continue and next you will be redirected to your portal in Bitrix24 and in it click "Install" button:
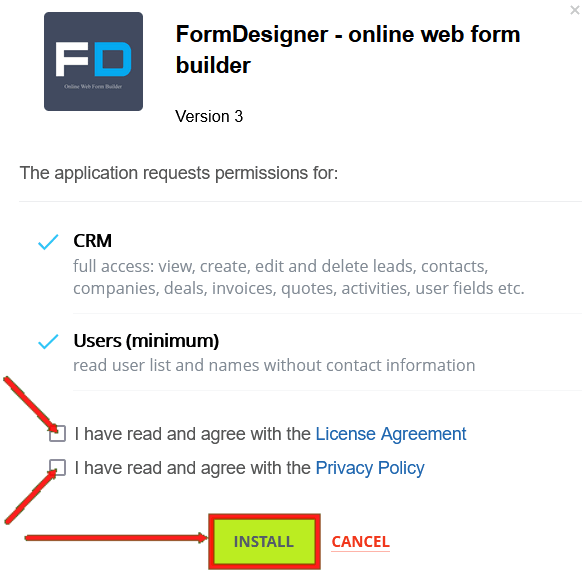
To install the app, check the boxes that you have read and agree to the license agreement and privacy policy, click install:
Application settings
Install the application in the Bitrix24 portal, you can now configure the module of integration of Bitrix24 with FormDesigner, for this you need to go to your personal cabinet and select the "Applications" section in the required form:
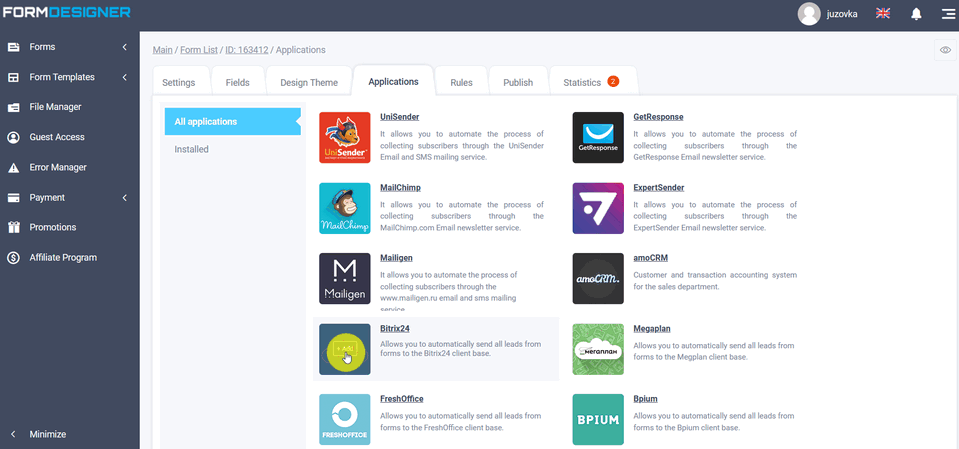
A list of all available modules will appear in front of you. Click the "+Add" icon in Bitrix24:
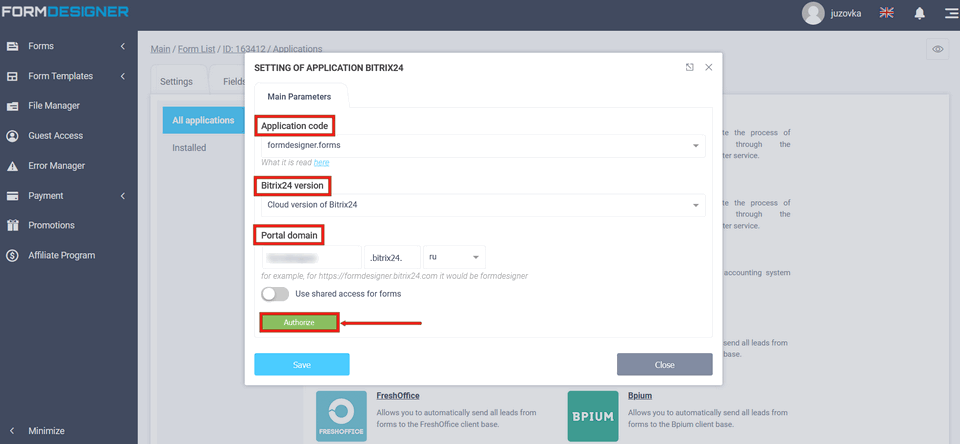
Here you need to select the application code, Bitrix24 version and enter the address of your portal. The application code depends on the application you have installed:
- formdesigner.global - for all countries
- formdesigner.forms - new application for Russia
- infoservice.formdesigner - an old application for the Russian marketplace (not used now)
If you are using the box version of Bitrix24 installed on your server, then in the module settings you should select the box version of Bitrix24 and specify the domain of the box version. You need to enter only one domain, without prefix "https://". Otherwise there is no difference between the cloud and box version.
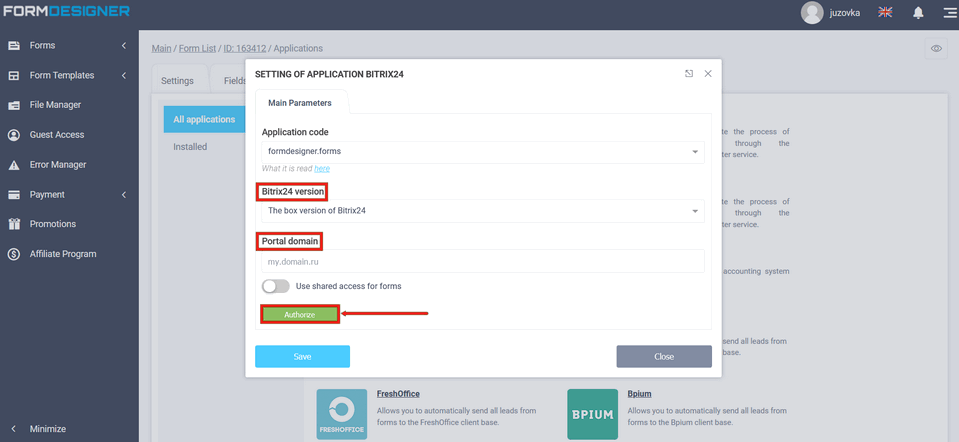
Once you have entered all the data, you must click the "Authorize" button. If you are not currently logged in to Bitrix24, you will be taken to the sign-in form where you need to enter your email and password from your Bitrix24 account. Enter your details and click the "Sign in" button:
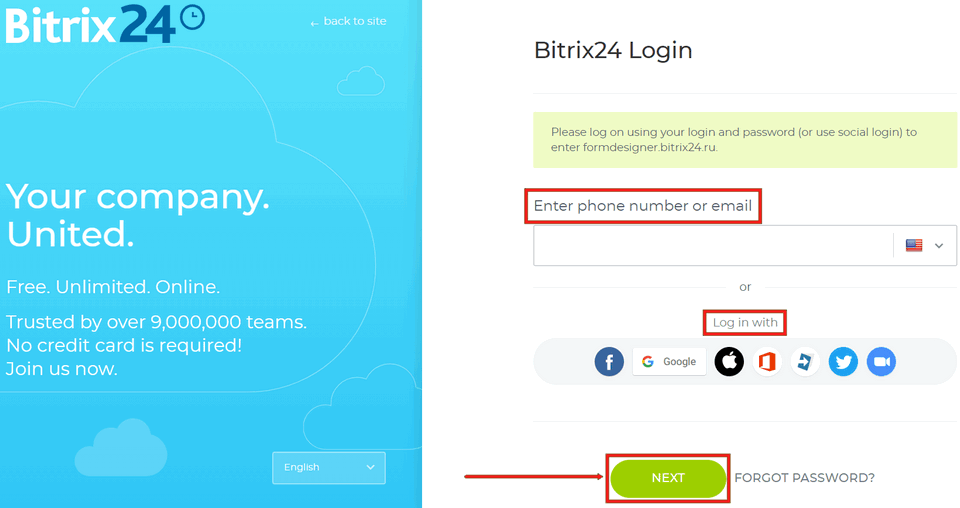
It should be noted here that some browsers may block the opening of the popup (Mozilla Firefox, Google Chrome), so you should allow it to appear.
If the data is entered correctly, the module will load data for configuring form elements, which will be sent to Bitrix24 CRM:
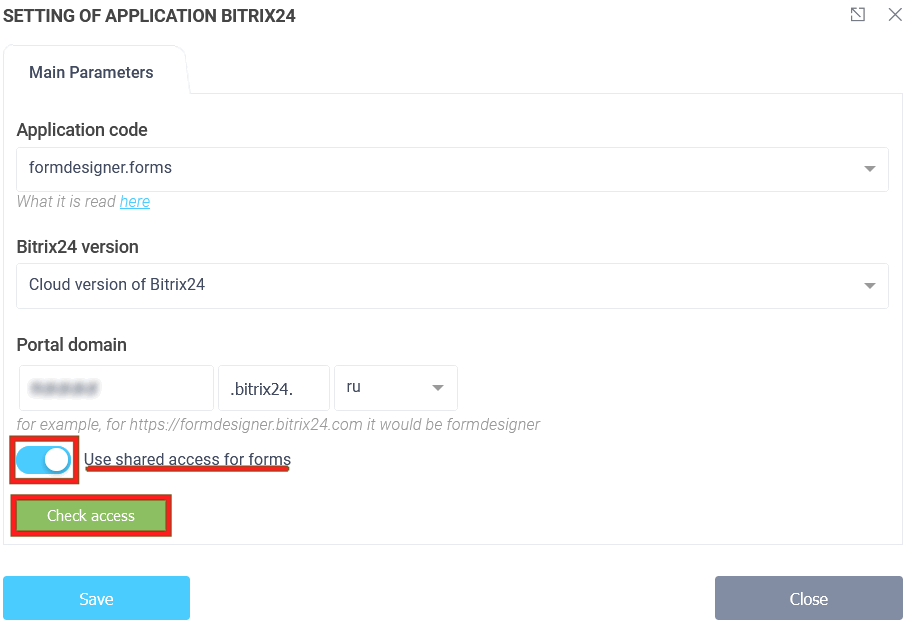
Common access for forms
Worth noting that if you have the integration module connected to one of the forms, using the "Use shared access for forms" switch, and selecting the appropriate application code, version, portal domain, you can click "Check access" and then access is automatically authorized:
In the module settings you configure the parameters which will be transmitted to Bitrix24. The data is separated into separate tabs:
- Main Parameters
- Contact
- Lead
- Deal
- Company
- Rules
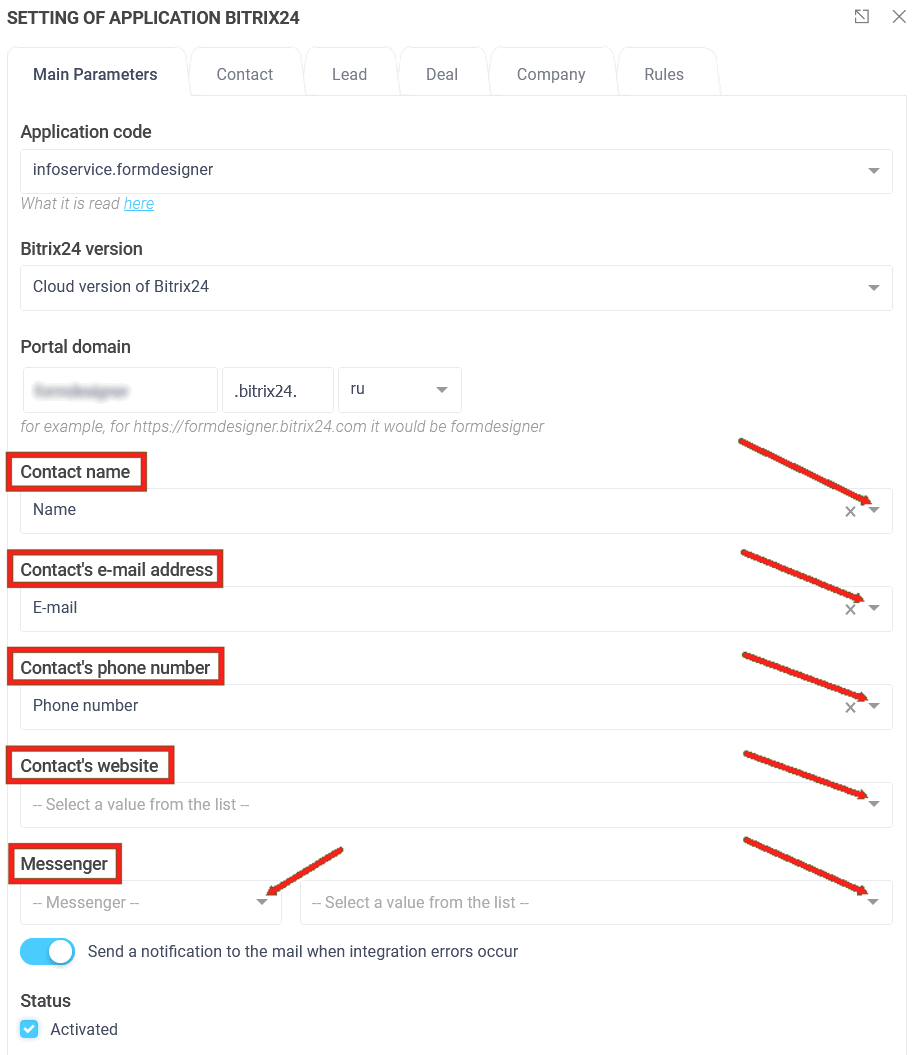
In the Basic Settings tab, you can select basic settings for Bitrix fields that will match the fields from the form:
- Contact name
- Contact's e-mail address
- Contact's phone number
- Contact's website
- Messenger
Contact
To configure individual contact settings, go to the "Contact" tab:

By activating the "Create a separate contact" radio button, you can configure additional contact options. If you click the "Add field" icon, you will be able to add an additional contact field, and then a new line will be added, where your contact fields from Bitrix24 will be displayed on the left, and web form fields that are available for transfer will be displayed on the right. There is also an option at the bottom to "Update contact data when duplicates occur". Before a contact is created, there is a check for duplicates. The search is performed by the e-mail address and phone number fields. If a contact with these data already exists then no new contact is created, and if the "Update contact data when duplicates occur" option is enabled then the contact data will be overwritten. If this option is left unchecked, only missing data will be added to a contact.
Lead
In the "Lead" tab, you can configure the settings for a lead. To configure how to create a lead, activate the "Create a lead" switch by clicking on the slider. Next, you will have access to the settings for the lead:
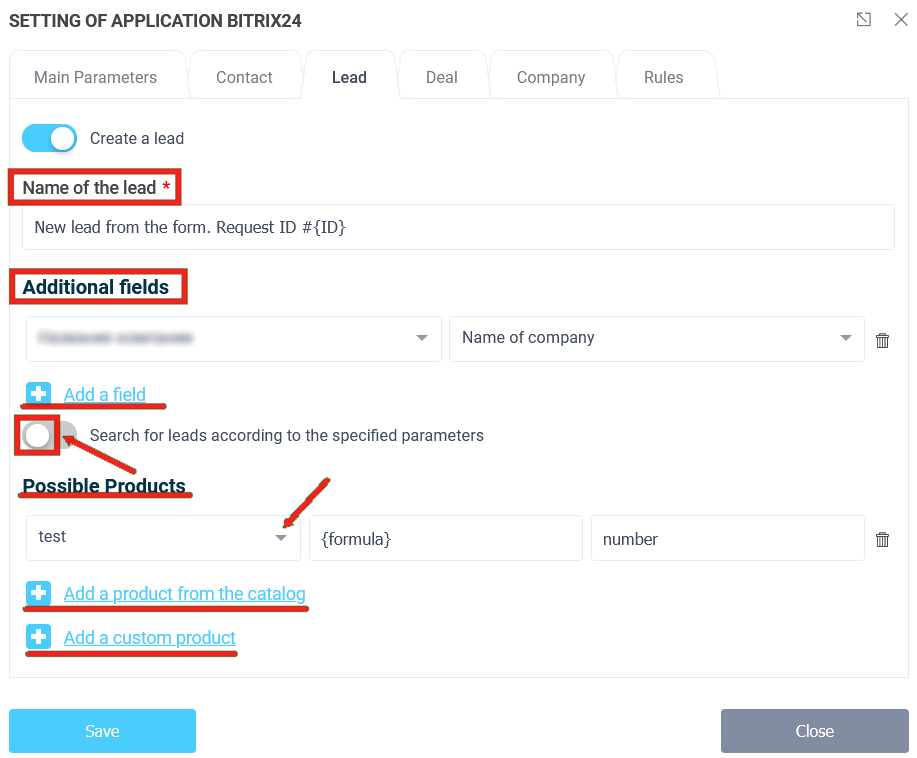
In the "Name of lead" field, you can specify the lead data and also insert some value from the form, using special macros. To set up the transfer of any other lead field from Bitrix24, you need to click on the "Add a field" icon. A new line will be added to the module settings, where all available fields from your Bitrix24 portal will be displayed on the left, and form fields will be displayed on the right. You can configure additional filters that will be applied when searching for a lead. The search for leads is performed by phone number and e-mail address of a contact or company. In order to enable this option, you need to activate the "Search for leads by specified parameters" switch and specify parameters of additional filters for search.
Deal
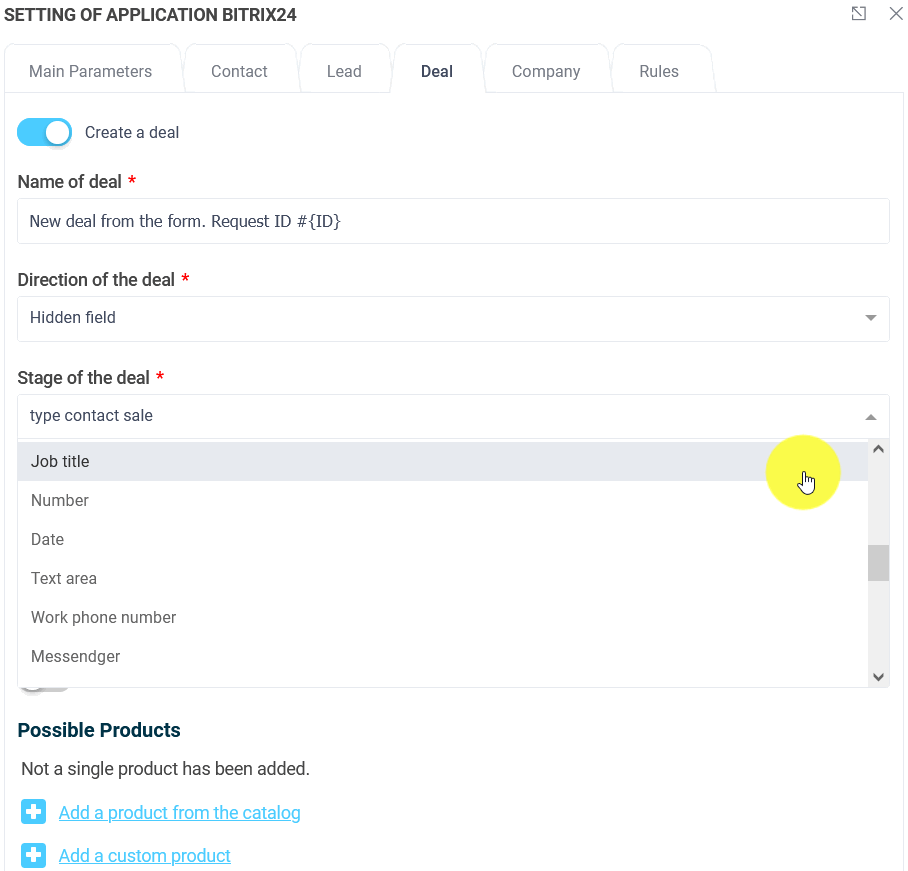
In the settings of the Bitrix24 module if you need to create a deal right away when sending a form, you need to activate the "Create a deal" switch on the "Deal" tab:

Here you can customize the name of the deal with any macro from the form in the "Name of dael" field and select the sales funnel in the "Stage of the deal" list:
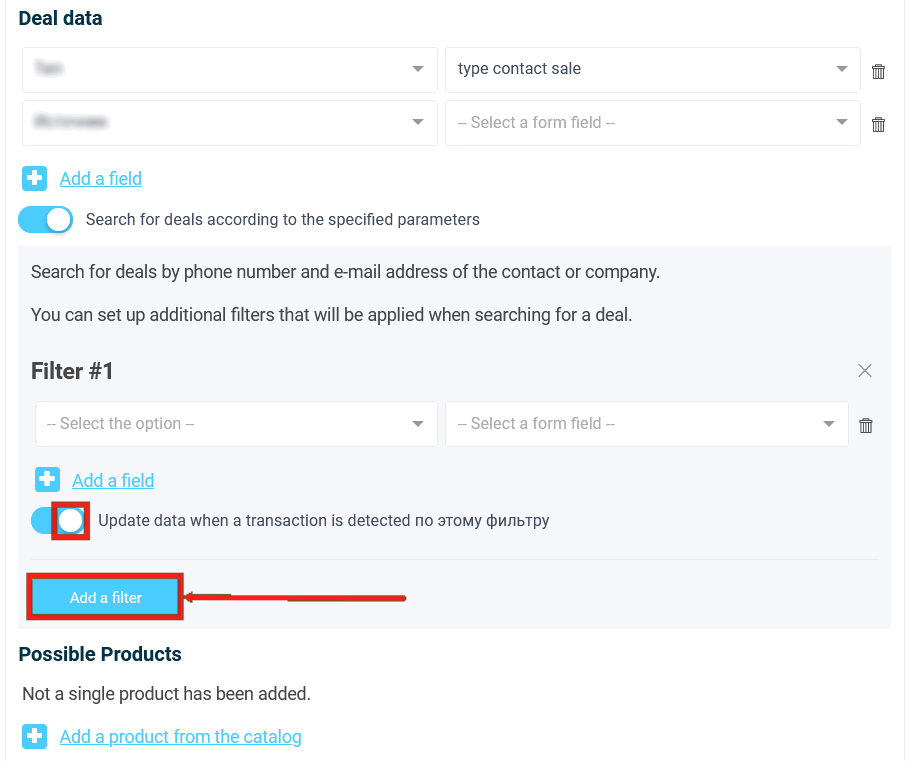
And also choose which fields will be transmitted when creating a deal and you can add the required field by clicking on the "Add a field" icon. A new line will be added to the module settings, where all the available fields from your Bitrix24 portal will be displayed on the left and the form fields will be displayed on the right. In the "Possible Products" field, you can select from the catalog the products that you have created in Bitrix24 by clicking the "Add a product from the catalog" icon. You can also add an arbitrary product and its price by clicking corresponding icon.
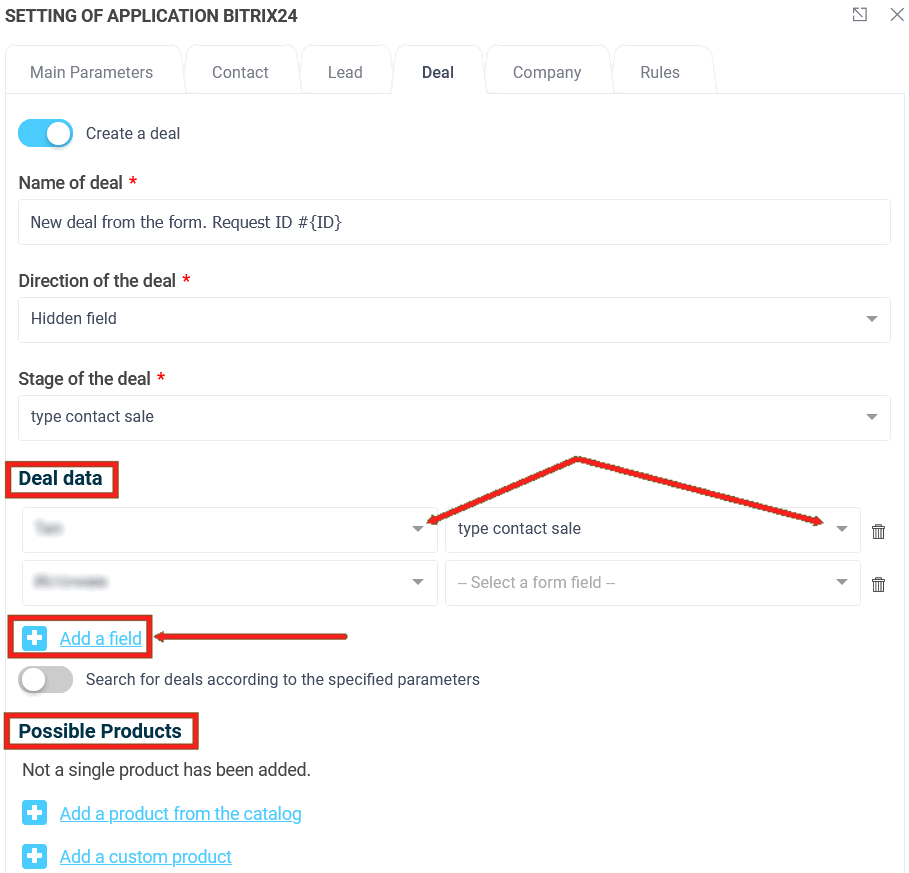
You can configure additional filters to be applied
when searching for deal. The search of deals is performed by phone number and e-mail
contact or company address. To enable this option you
it is necessary to activate the switch "Search deals by
specified parameters", and set the parameters of additional filters for search. If you enable the switch "Update data when detecting deals by this filter", then when the specified conditions in the used filter are met, the deal data are updated.
Company
In order to set up company data, you must activate the "Create Company" switch. Click on the slider so that it will become active. You will then be presented with the option to customize your company data:
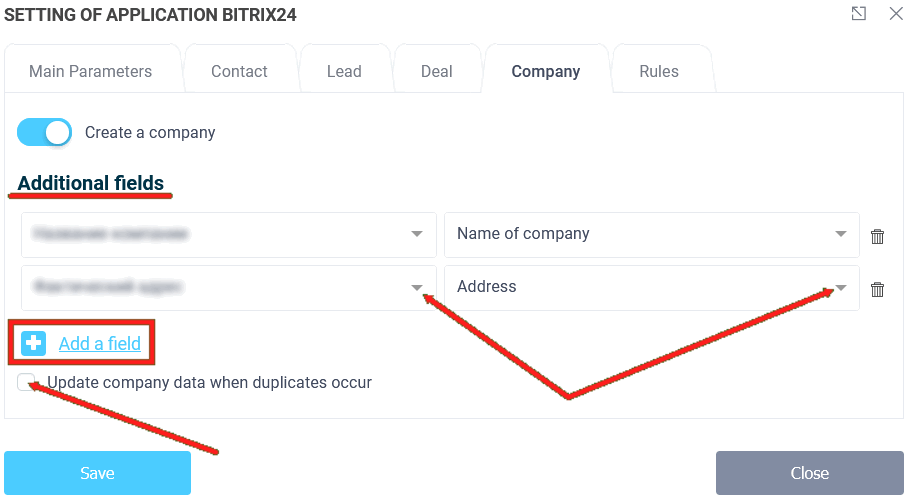
To add a new row of data, you need to click on the "Add Field" icon, after which a new row will appear, where you can select the desired company field on the left and select the value from the form to be passed into it on the right. In addition, at the bottom there is an option "Update company data when duplicates occur". Before creating a company there is a check for duplicates. The search is performed by the e-mail address and phone number fields. If a company with such data already exists then no new company is created, and if the "Update company data when duplicates appear" option is enabled then the company data are updated. If this option is not enabled, only missing data will be added to the company.
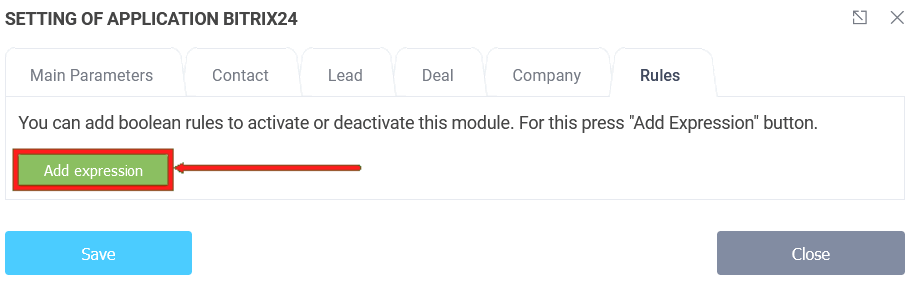
Logic
In the "Logic" tab you can add logical rules to activate
or deactivate integration module of Bitrix24. To do this, click on the button
"Add expression" and select a rule, at which the module will be
will be activated or deactivated:
If you activate the creation of all entities, you will have a separate lead and a separate transaction with a company and a contact assigned to it. The contact is also assigned to the company itself. When adding parameters do not forget to add mandatory fields in Bitrix24. Once all the data have been configured, it is necessary to click on the "Save" button.