In order to enable this module, you need to go to the "Modules" section in the desired form. That's where you will find our new IP Firewall module:
Hover your mouse over it and click the "Add" button and you will see a window showing you the basic settings for the module:
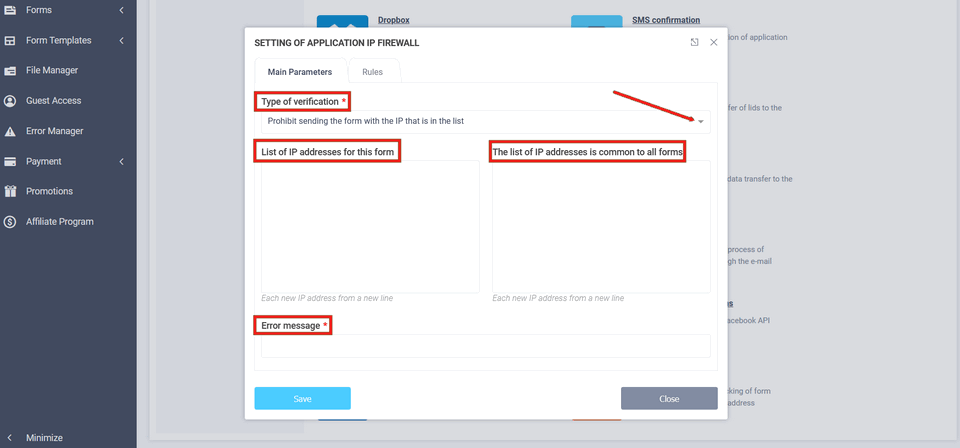
This is where you select the IP validation type:
- Prohibit sending a form with a listed IP
- Disallow only IPs on the list (Whitelist)
- Clear form submissions
If you want to block some users from submitting a form and you know their IP, you can select the Deny form submission from IPs in the list checkbox. You will need to check "only allow a form from a listed IP" if you need to do an internal survey, for example. Then you can specify the external IP of your company that all your employees use to access the internet and only that IP will be allowed to submit the form.
The next thing you need to do is enter the IP list itself. You can enter two lists:
- List of IP addresses for this form
- List of IP addresses common to all forms
I think the first list is clear. You should enter here the IPs that will be tested only in this form. The second universally used list is for all forms with the IP Firewall module enabled.
And at the end, you need to enter an "Error Report" that you want to tell the user if the IP protection triggers.
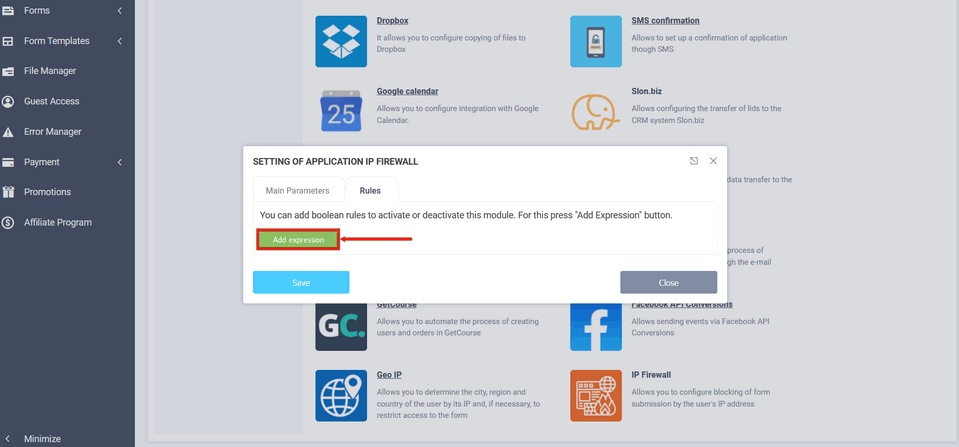
In the "Logic" section, you can add rules to activate or deactivate the module: