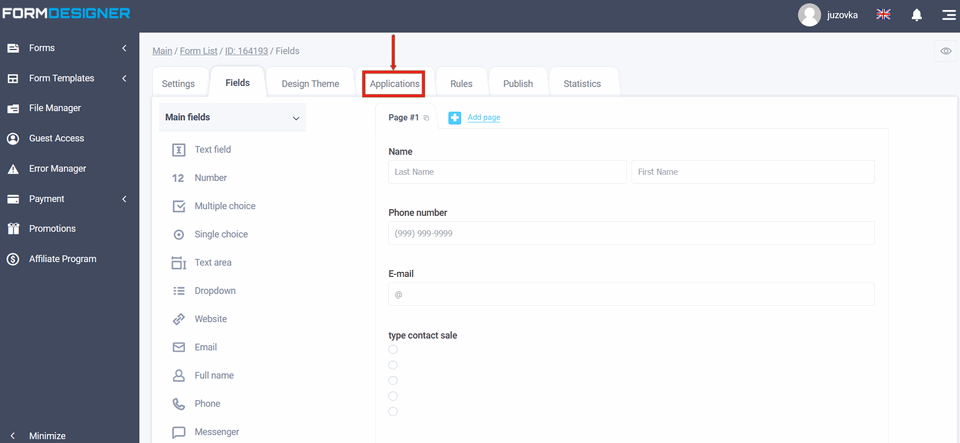
To connect the integration module, you need to go to your personal cabinet and select the "Applications" section in the required form:
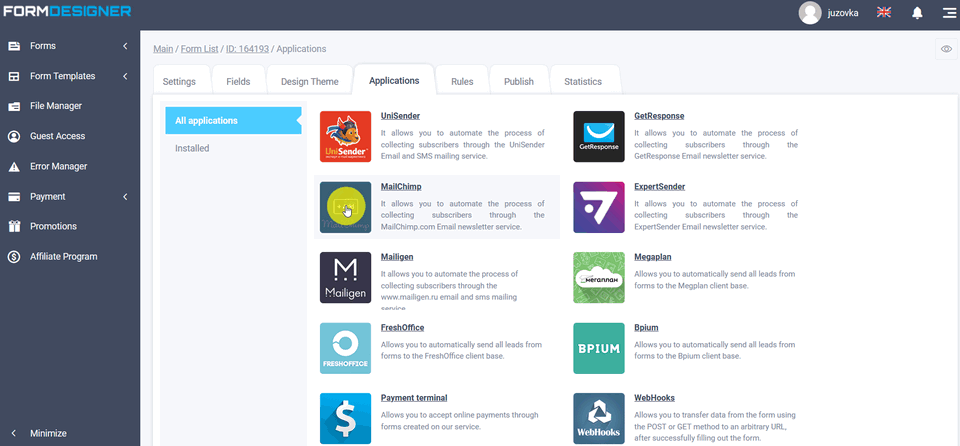
A list of all available applications will appear in front of you. Click the "+Add" icon under MailChimp:
Settings of application Mailchimp
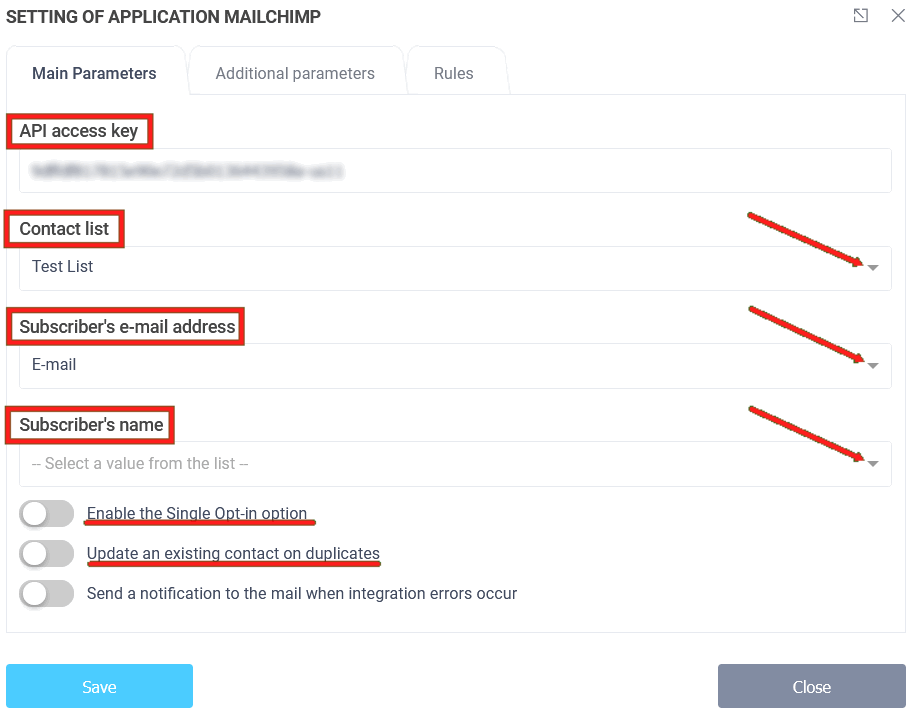
A popup window will open with module settings, where you need to enter the key from your MailChimp email service account in the "API access key" field. Then click sync and save:
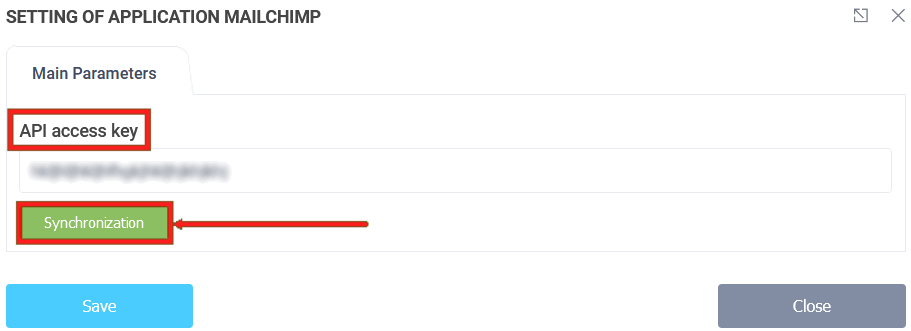
API access key
In order to find out where the API access key is located, you need to go into your MailChimp email service account settings. To do it, click on your profile and open the "Profile" tab.

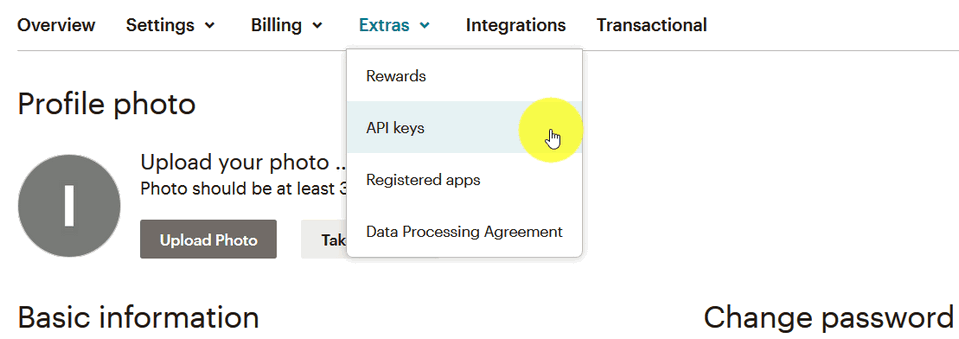
Under "Extras" select the "API keys" tab:
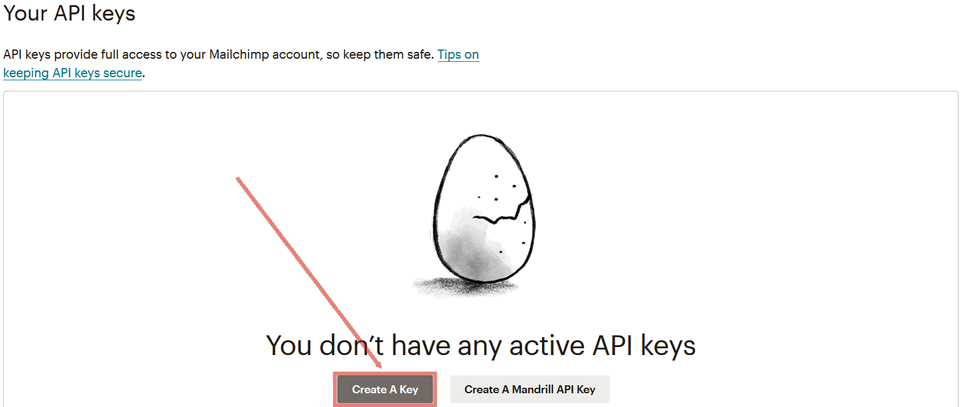
Scroll down to "Your API keys" and create an API key by clicking on the "Create A Key" icon:
Next, copy the key from the "API key" field and paste it into the module settings on FormDesigner in the "API access key" field (in the third screenshot):

In the MailChimp module settings, select the newsletter created on the MailChimp email service. You can also enable the "Update existing contact on doubles" option, then when you add a subscriber to your mailing list, his/her data will be overwritten with the new one you set up in the module:
Advanced MailChimp module settings
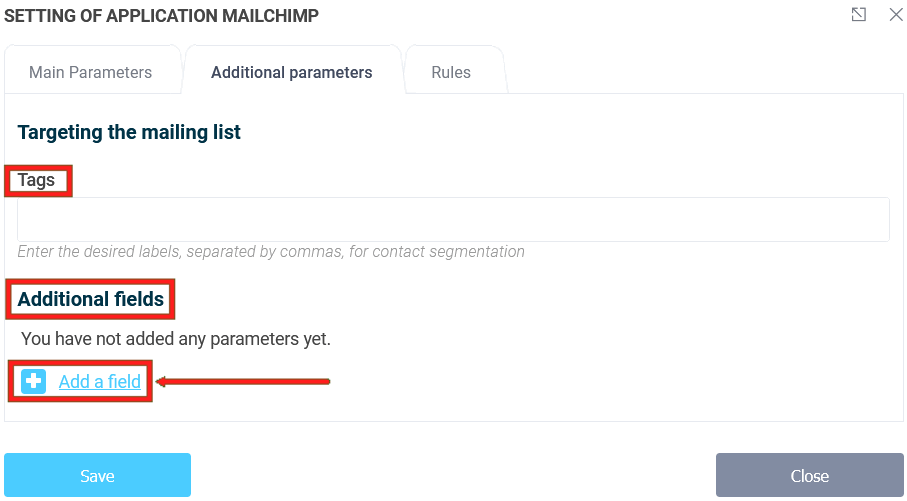
In additional parameters you can add parameters from the form. Here you can choose which parameters to pass to MailChimp. To add a parameter, click the "Add parameter from form" link. After that, you will have a line added where additional fields of the selected mailing list in MailChimp will be displayed on the left and fields from the form will be displayed on the right. In this way you can set up the transfer of all necessary fields from the form to your mailing list. After that, you need to click on the "Save" button:
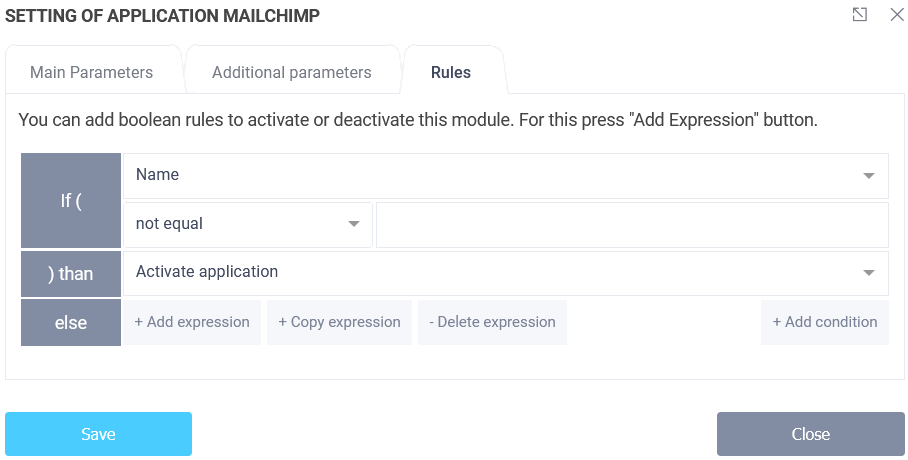
In the "Logic" section, you can add logic rules to activate or deactivate this module:

