As requested by so many of our users, we've added integration with the Facebook Conversions API.
It's sort of an alternative to the familiar Facebook pixel, which sends events from the browser. But because of recent changes in Apple's approach to collecting user data from devices with iOS 14.5 and above, it has some limitations.
According to Apple's update, apps must show users a dialog box asking for permission to track, and if the user doesn't approve that permission, Apple will block those requests, which in turn will affect the accuracy of user data.
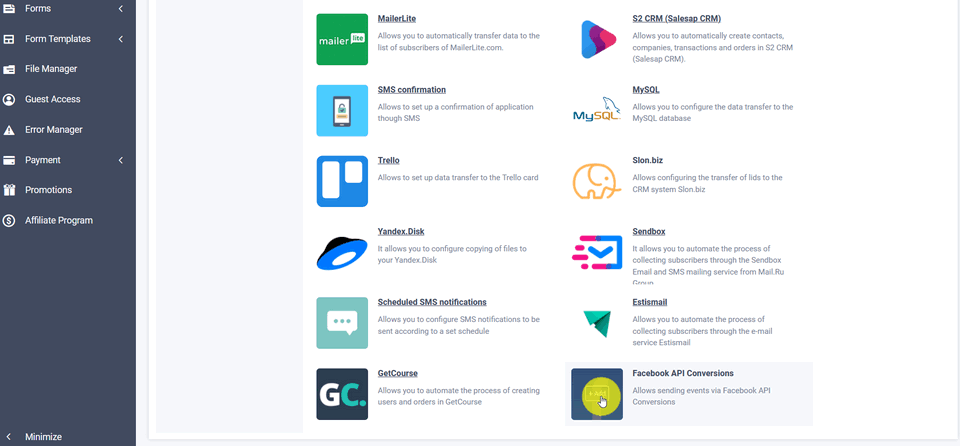
For the purpose of avoiding this, Facebook encourages everyone to use the Conversions API. To use API Conversions on your web forms, you can go to Plugins to find the Facebook API Conversions plugin:
Hover your mouse over it and click the "Add" button and you'll see a window with the module's settings:
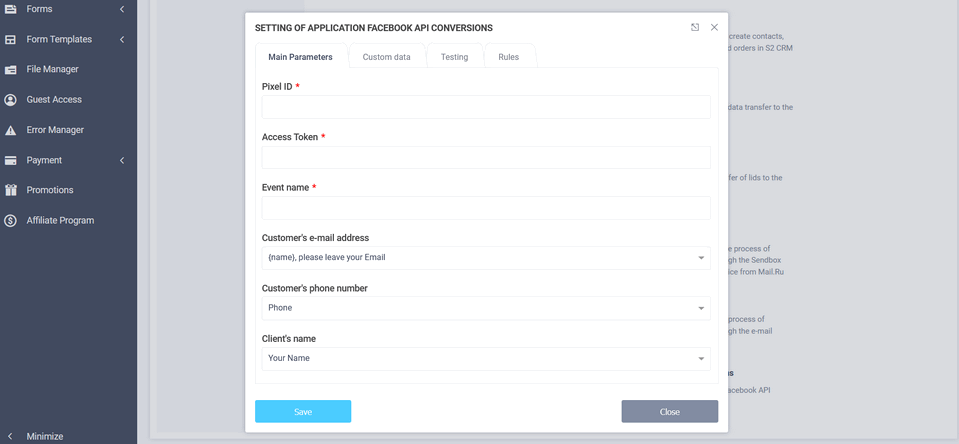
Here you need to enter the pixel ID for which events will be sent, the name of the event itself, the access token, as well as customer details like email address, phone number and name (if you have those fields in the form).
Pixel ID and Access Token
Facebook Business Manager under Events Manager to get these details:
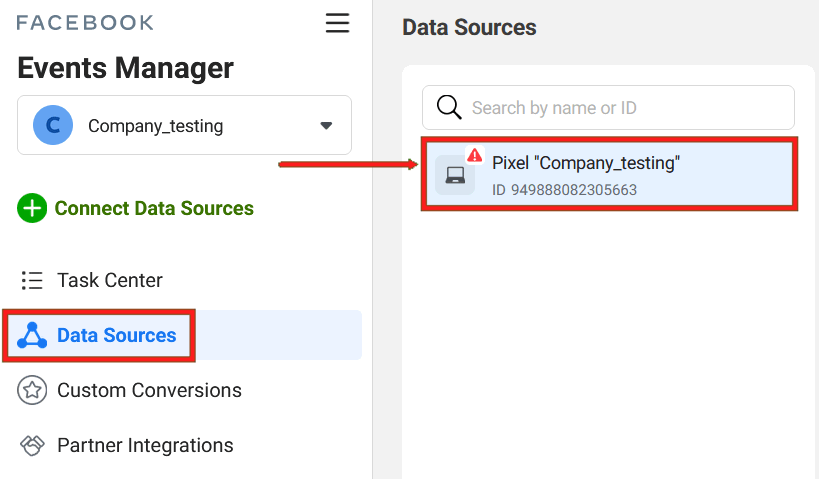
In the "Data Sources" section, you need to select the pixel you want. In the screenshot above, the pixel ID is highlighted and you need to copy it to the module settings.
The next step is to generate an access token. To do this, you need to go to the "Settings" section and find the "API Conversions" section there:
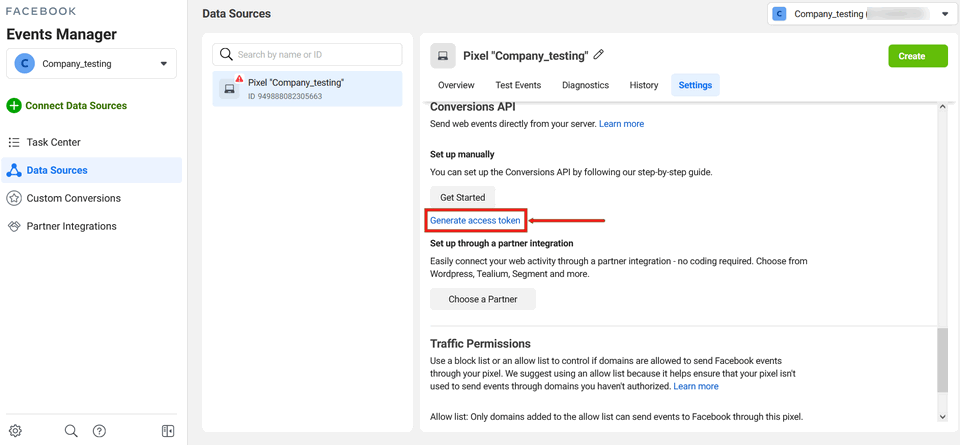
Here you need to click the "Generate access token" link, after which a special code appears which you need to copy and paste into the "Access token" field in the module settings.
Standard Facebook events
You must fill in the "Event name" field in the module settings. Facebook offers a list of standard events for this, which you can find at this link. But you can also use your own custom event.
Testing events
Next, you need to test how events are sent after you submit a web form. To do this, you will need to go to the "Test Events" section in the desired pixel:
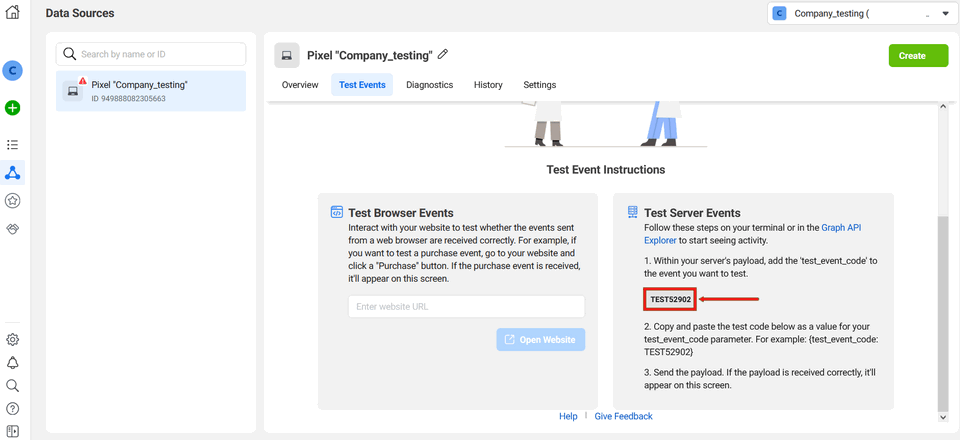
There you will find the test code that you need to copy and paste into the module settings in the "Testing" section:
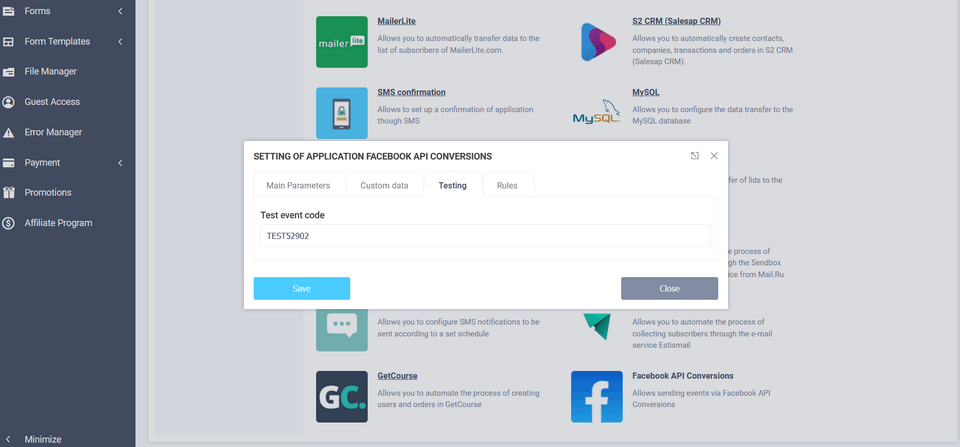
After that you need to click on the "Save" button and you can test sending events. To do this, without closing the "Test Events" section in Events Manager, try sending the form. A few minutes after submitting the form, the test event should appear in Events Manager:
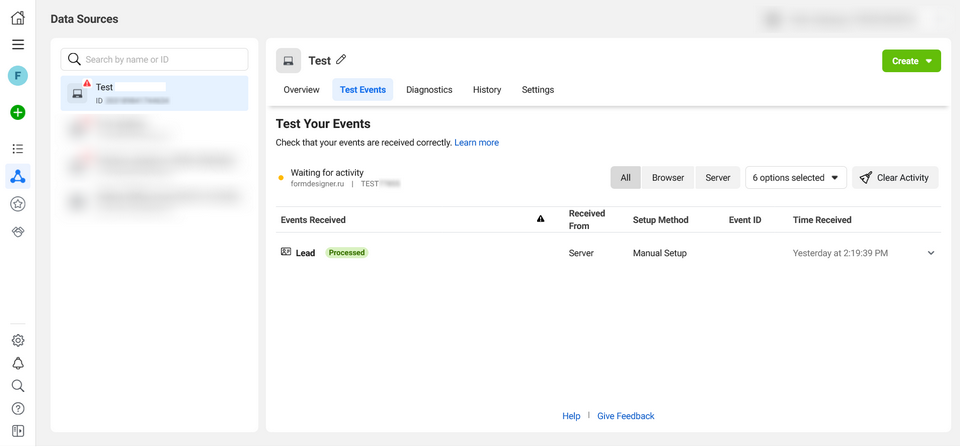
After testing the form, the test code must be removed from the module settings. This completes the configuration of integration with Facebook API Conversions. All the sent events will not appear in Events Manager right away, but in about 30 minutes.