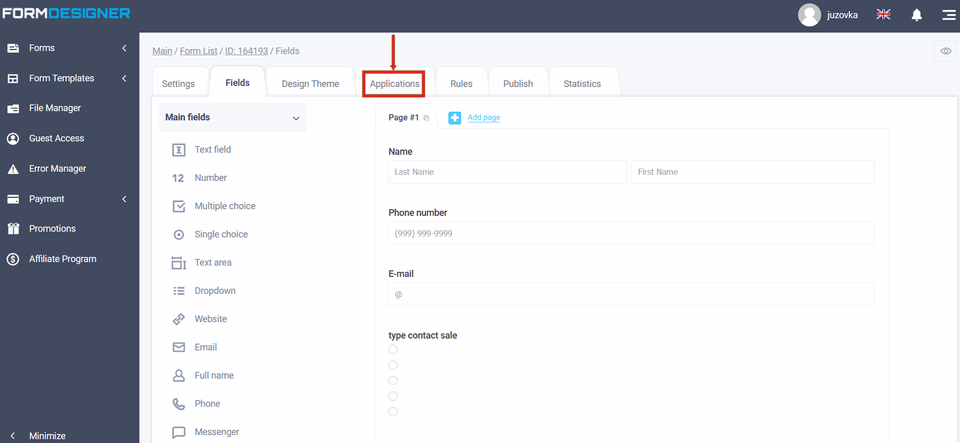
To connect the integration application, you need to go to your personal cabinet and select the "Applications" section in the required form:
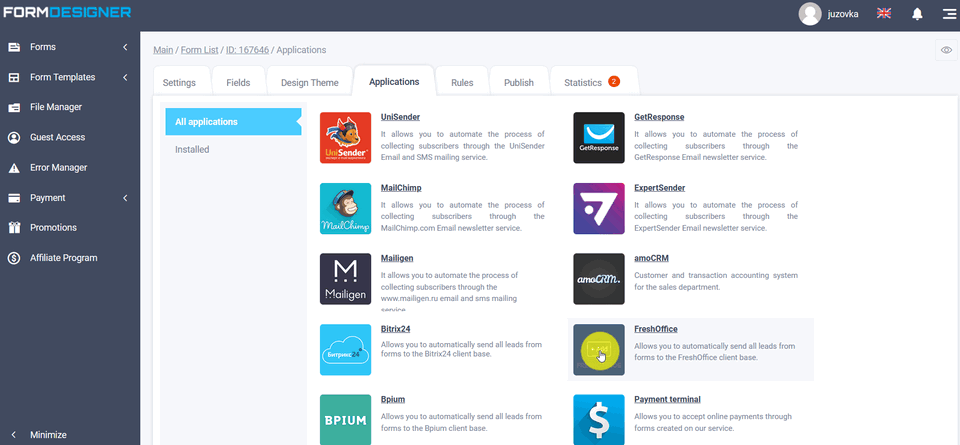
A list of all available applications will appear in front of you. Click the "+Add" icon under FreshOffice:
Application settings
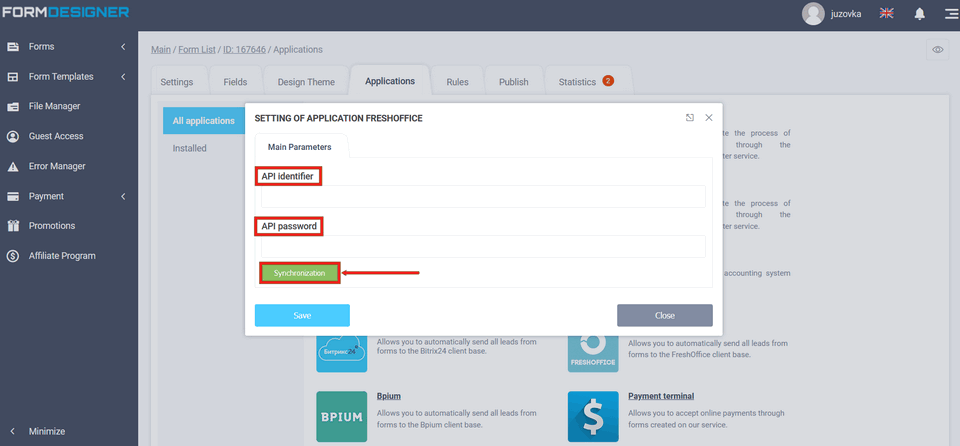
You will see a popup with the FreshOffice application settings:
Where to get the API ID and API password
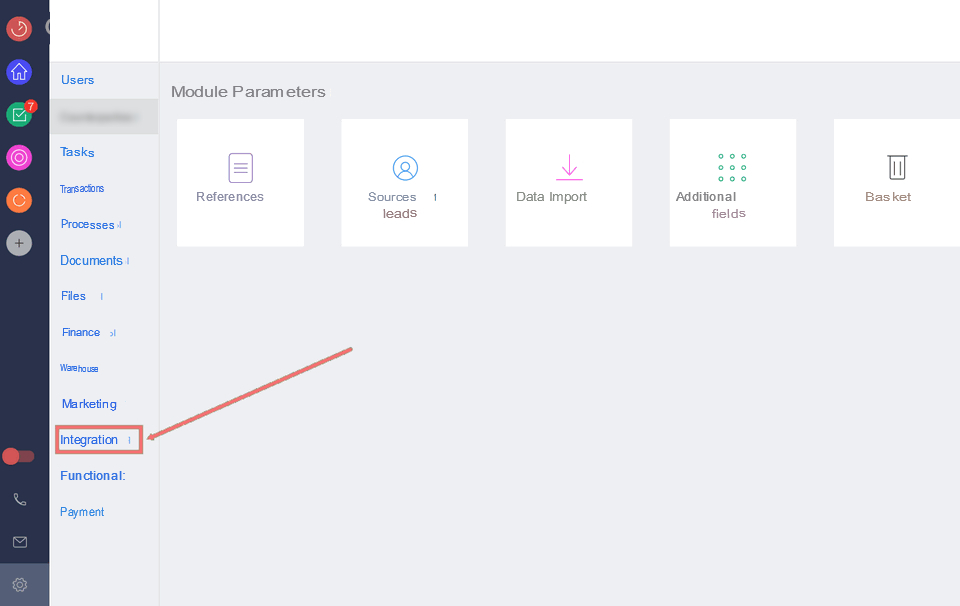
Enter your API ID and API password in the appropriate fields, and click sync. You can take field values from your FreshOffice settings. To do it, go to your FreshOffice personal cabinet, open settings in the panel on the left and select integration:
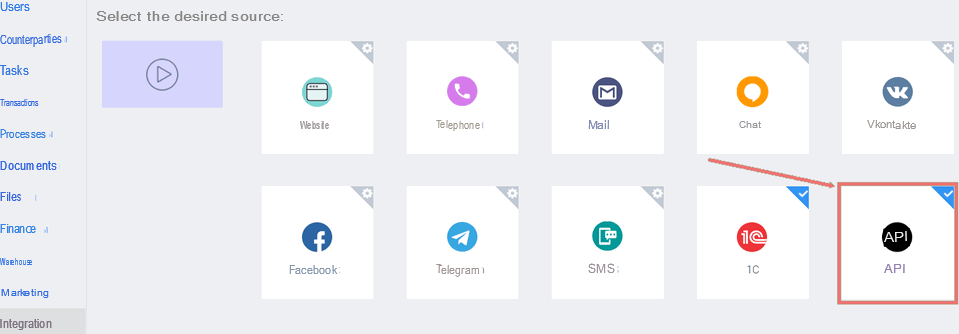
Next, click the API icon:
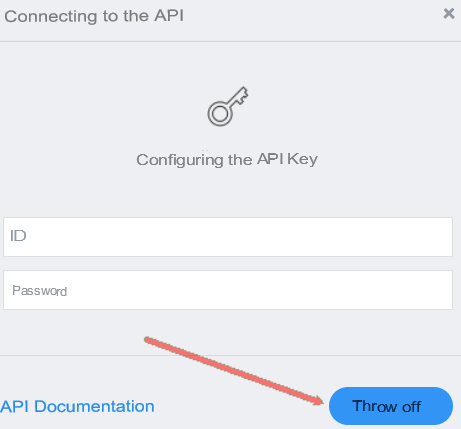
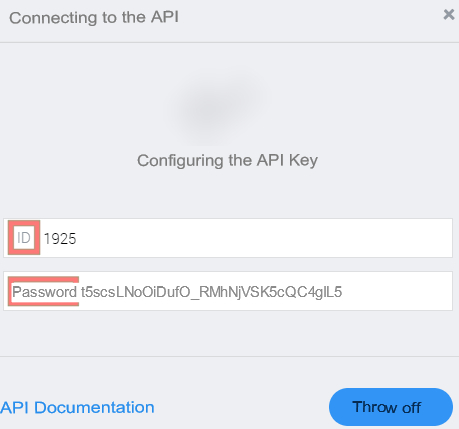
You will see the "Connect API" pop-up window. If you haven't used the API before, that ID and password will be empty, then you need to click the reset button to get the ID and password:
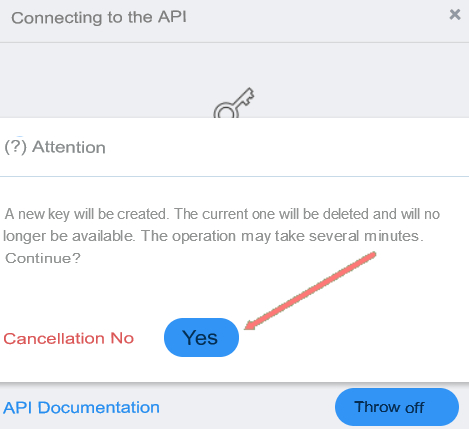
Confirm action:
Copy the ID, password and in the integration module settings, paste it into the "API ID" and "API Password" fields:
After you have synchronized the data you entered, you will see the FreshOffice application settings window:
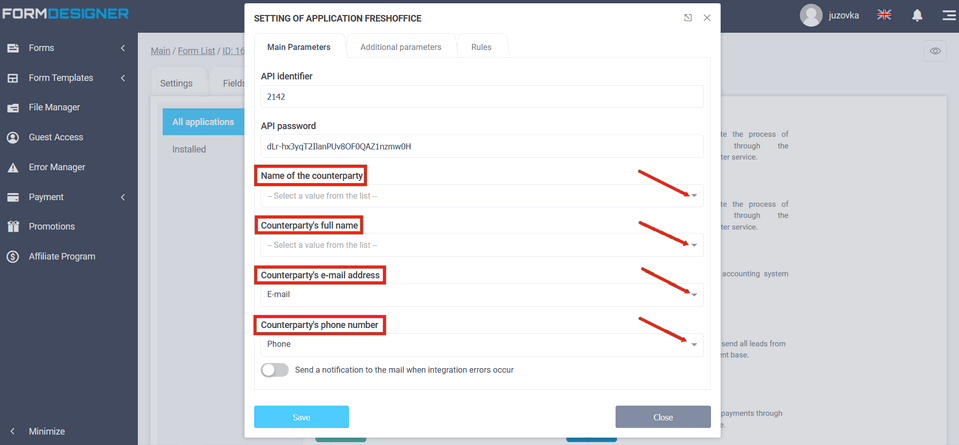
Here you should select the form fields that will contain the name of the counterparty, full name of the counterparty, e-mail address and phone number of the counterparty. At the same time, the name of the counterparty is mandatory to fill in. You can also pass additional fields if you go to the "Additional parameters" tab:
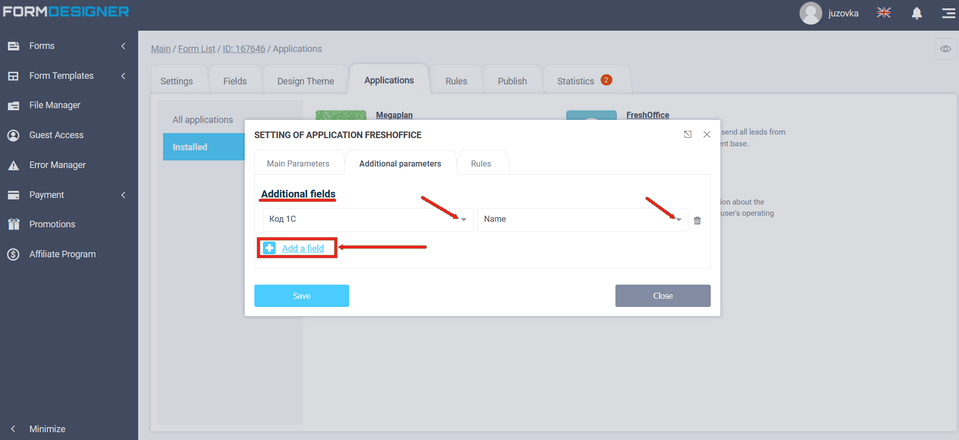
To add a field and select its corresponding parameter from the form, you need to click the "Add parameter from form" icon.
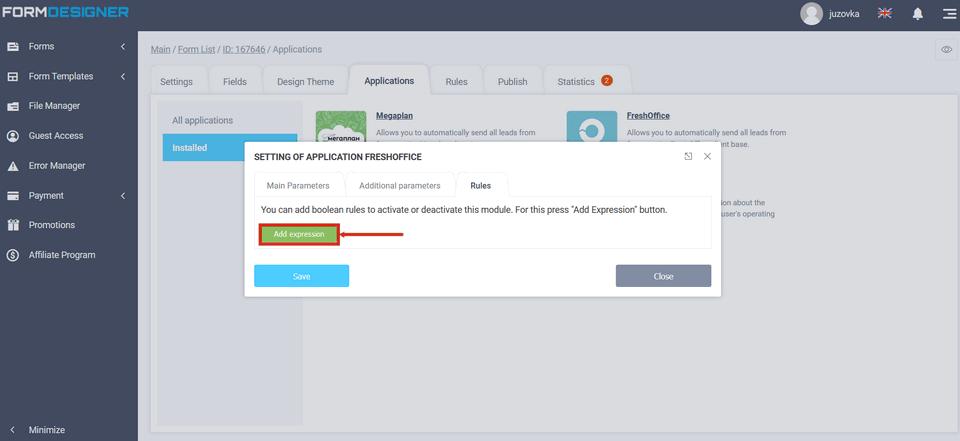
Application activation rules
In the FreshOffice module settings in the "Rules" tab, you can add logical rules to activate or deactivate this module. To do this, click the "Add Expression" icon:
