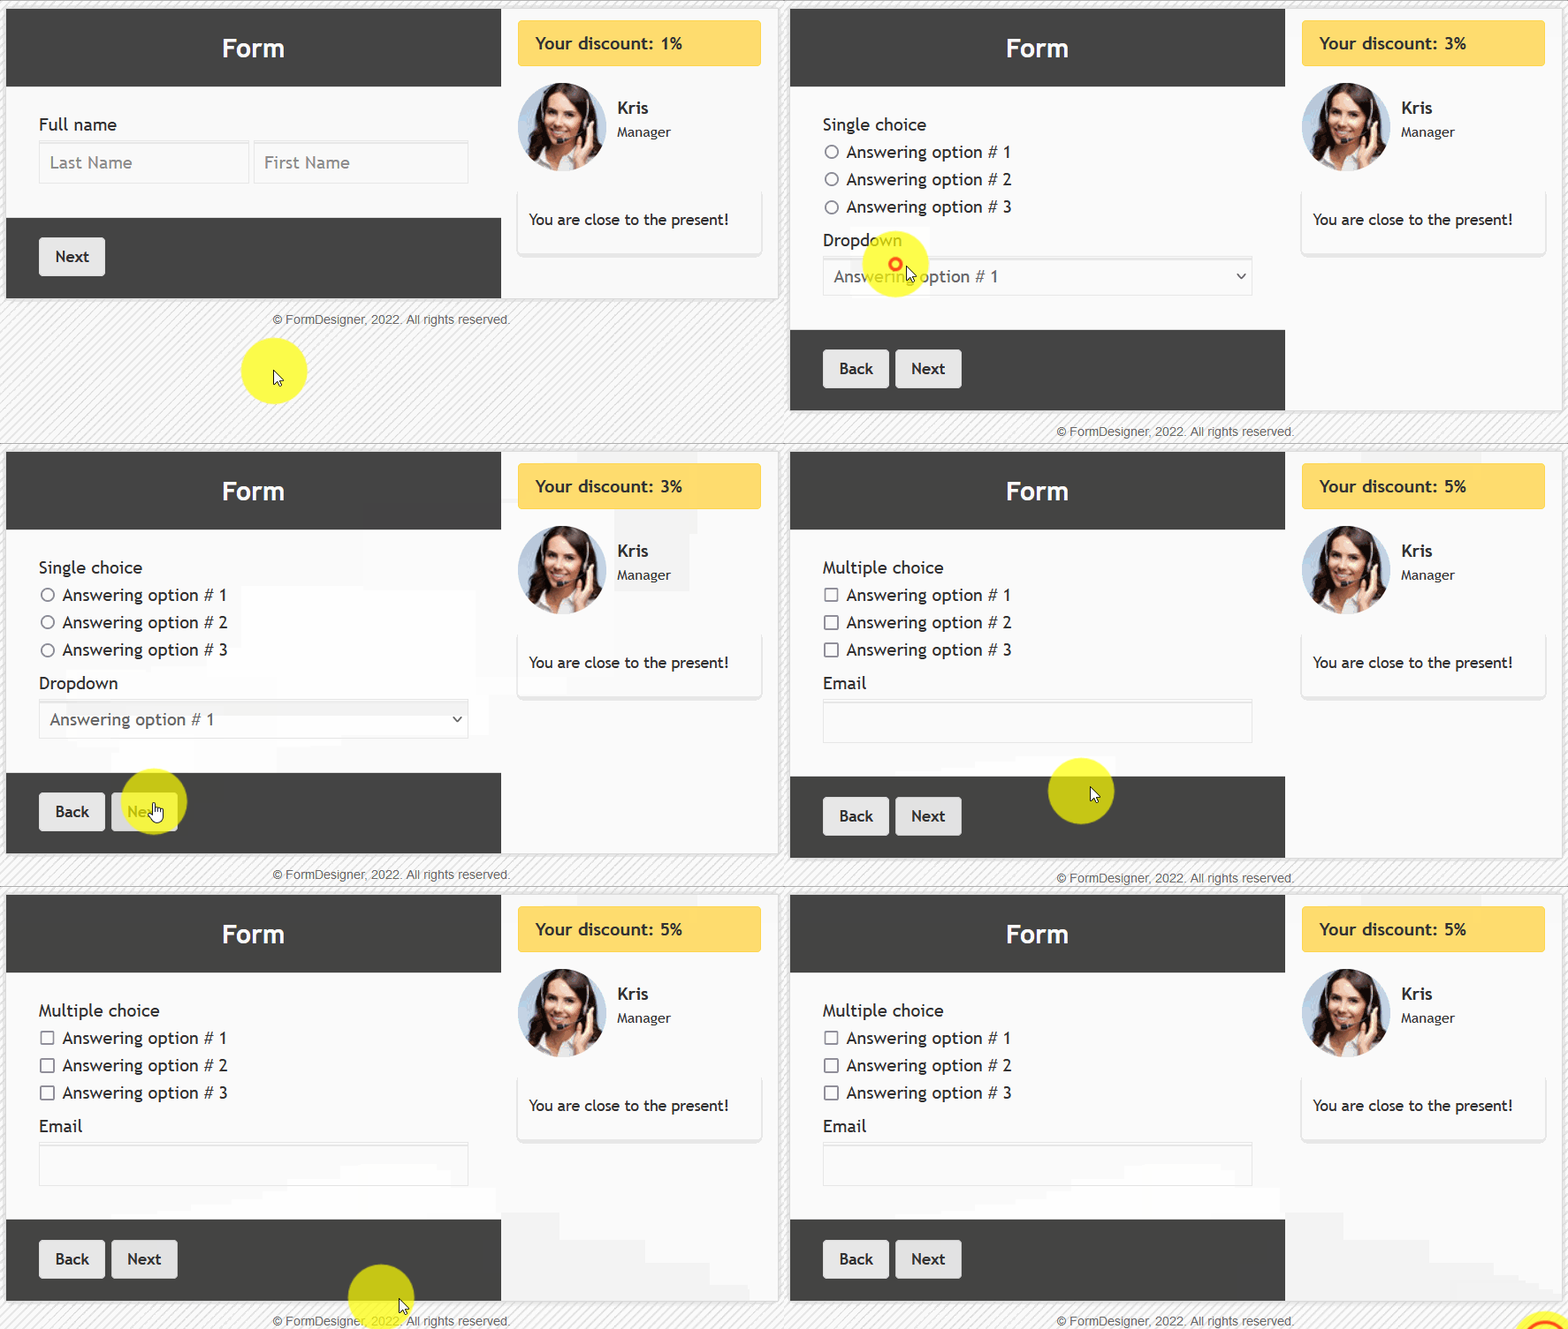
The form can be made more interesting, for example, to improve your a quiz, if you add a consultant and discount information to it.
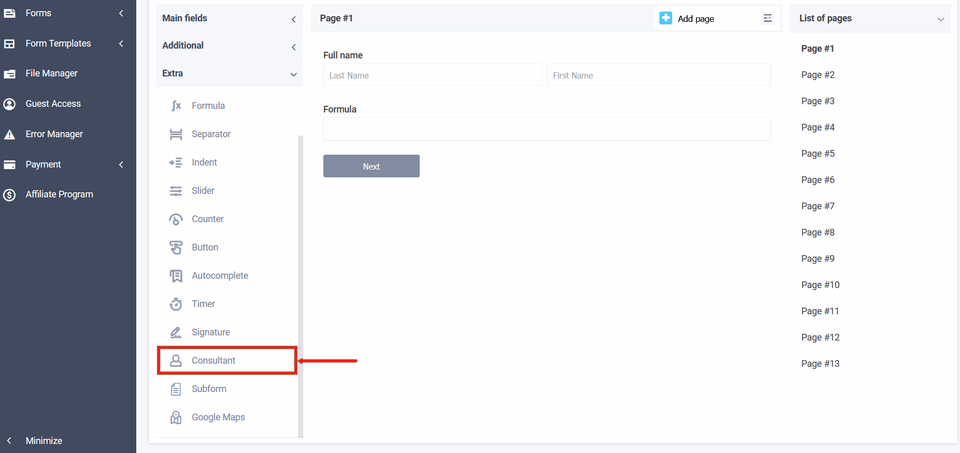
To add the "Consultant" element to the form, you need to click on the selected item in the extra fields in the "Fields" tab
or drag it to the right, then you will see
the added element on the right in the editor:
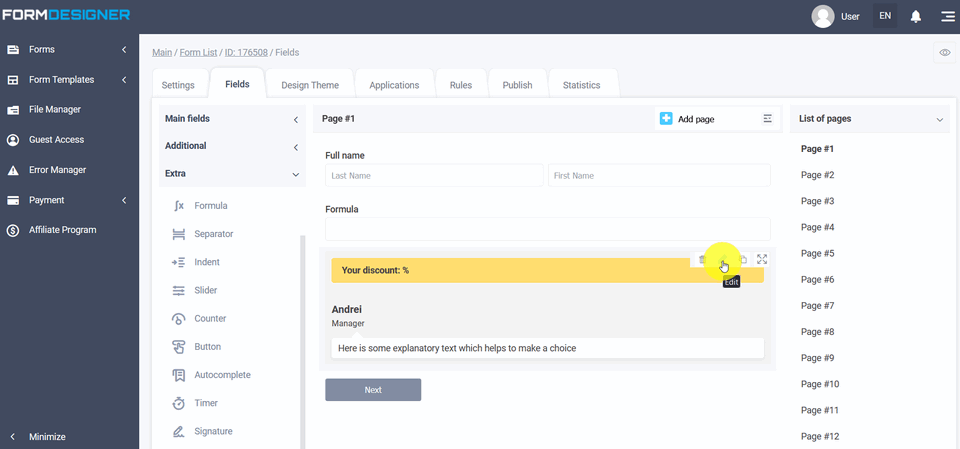
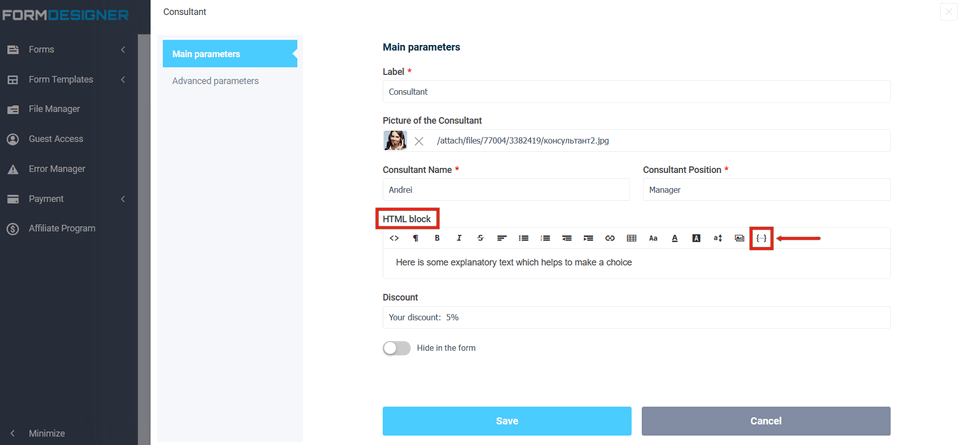
If you click on the "Edit" icon, a pop-up window for editing this element will open in front of you:
In the settings of this element there is a "Label" field where you can change the description of the consultant so that you do not get confused in the logical rules on which page which consultant is located. In the "Consultant name" and "Consultant position" fields, you can specify the name and position, respectively, which will be displayed in the form. In the "HTML block" field, you can specify an explanatory text that will be displayed below the consultant's avatar, and also specify the discount amount in the "Discount" field, which will be displayed in the element header.
The meaning and description of other
fields, you can see here
"Basic parameters of the elements".
If you click on the icon on the right in the "Consultant Image" field, as shown in the screenshot, a file manager will open in front of you, where you can choose an avatar for the consultant from previously uploaded images or upload a new image:
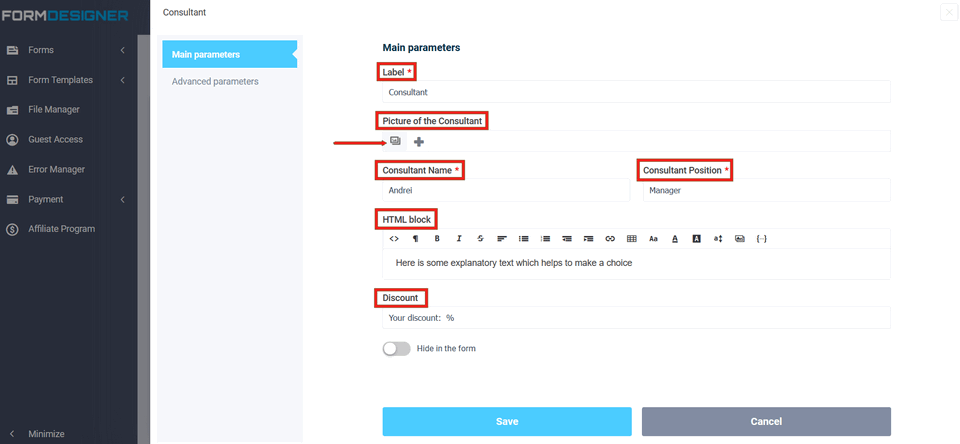
You can also use macros of the form in the description of the explanatory text, thereby substituting previously entered information into these blocks, to do this, click the icon in the form of {...} and add the necessary macro:
The "Consultant" field must be added separately to all pages where
necessary. Thus, it allows you to display different
consultants on different pages.Let's add, for example, switches and consultants on three pages and open the form in viewing mode:
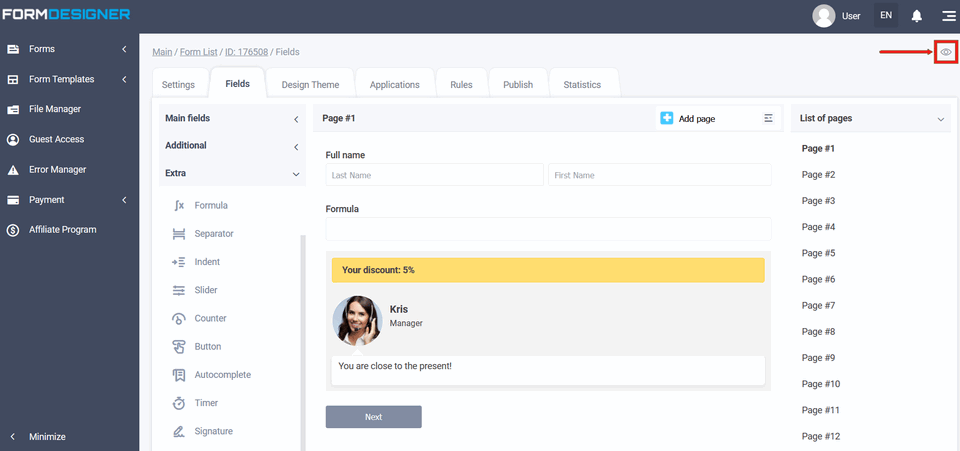
The form will look like this, where there are different discounts on three pages, its size will increase with each page:
